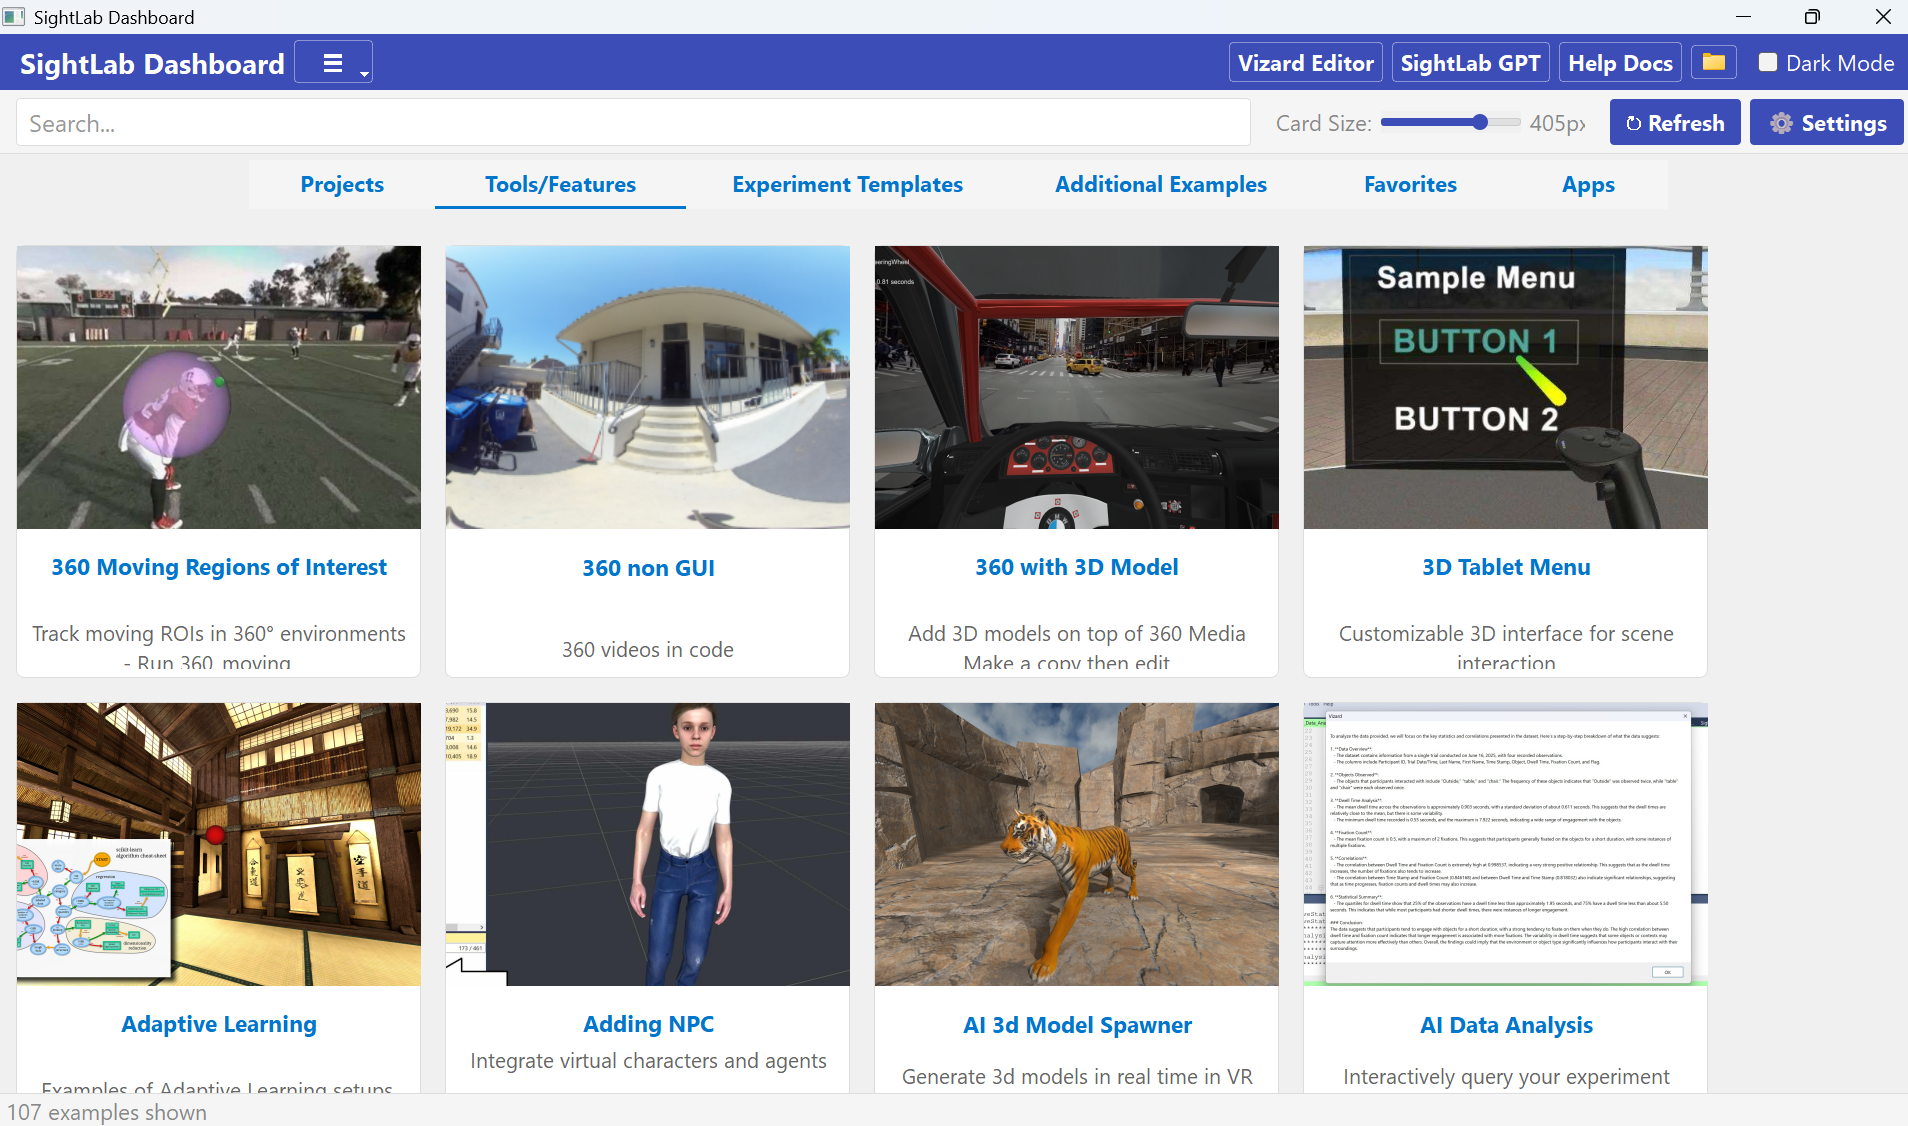
SightLab Dashboard
A browsable, searchable interface for creating, discovering, launching, and managing SightLab projects, example scripts, apps, and more. Note: you can always click on the folder icon in the top right of the dashboard to access the SightLab2 folder.
Getting Started
Launching the Dashboard
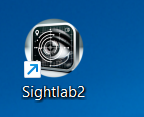 |
Double-click either Desktop shortcut for "Sigthlab2" or the SightLab Dashboard.py file or executable at the workspace root (executable can't run Vizard embedded). |
User Interface Overview
Header Bar
- Vizard Editor — Opens the Vizard python editor
- SightLab GPT — Opens the SightLab VR Assistant chatbot
- Help Docs — Opens the SightLab documentation site
- Dark Mode — Toggle between light and dark themes (preference is saved)
Toolbar
- Search Bar — Filters cards across all tabs by title, description, tags, and category. When text is entered, tabs are replaced with a unified results grid. Clear the search to return to tabs.
- Card Size Slider — Adjusts card thumbnail size from 140px to 360px. Saved automatically.
- Refresh — Rescans the filesystem for new or modified examples and projects.
- Settings — Opens the Settings dialog.
Tabs
The main content is organized into category tabs:

| Tab | Contents |
|---|---|
| Projects | User projects scanned from the Projects folder (Can change directory) |
| Tools/Features | Tool and feature examples |
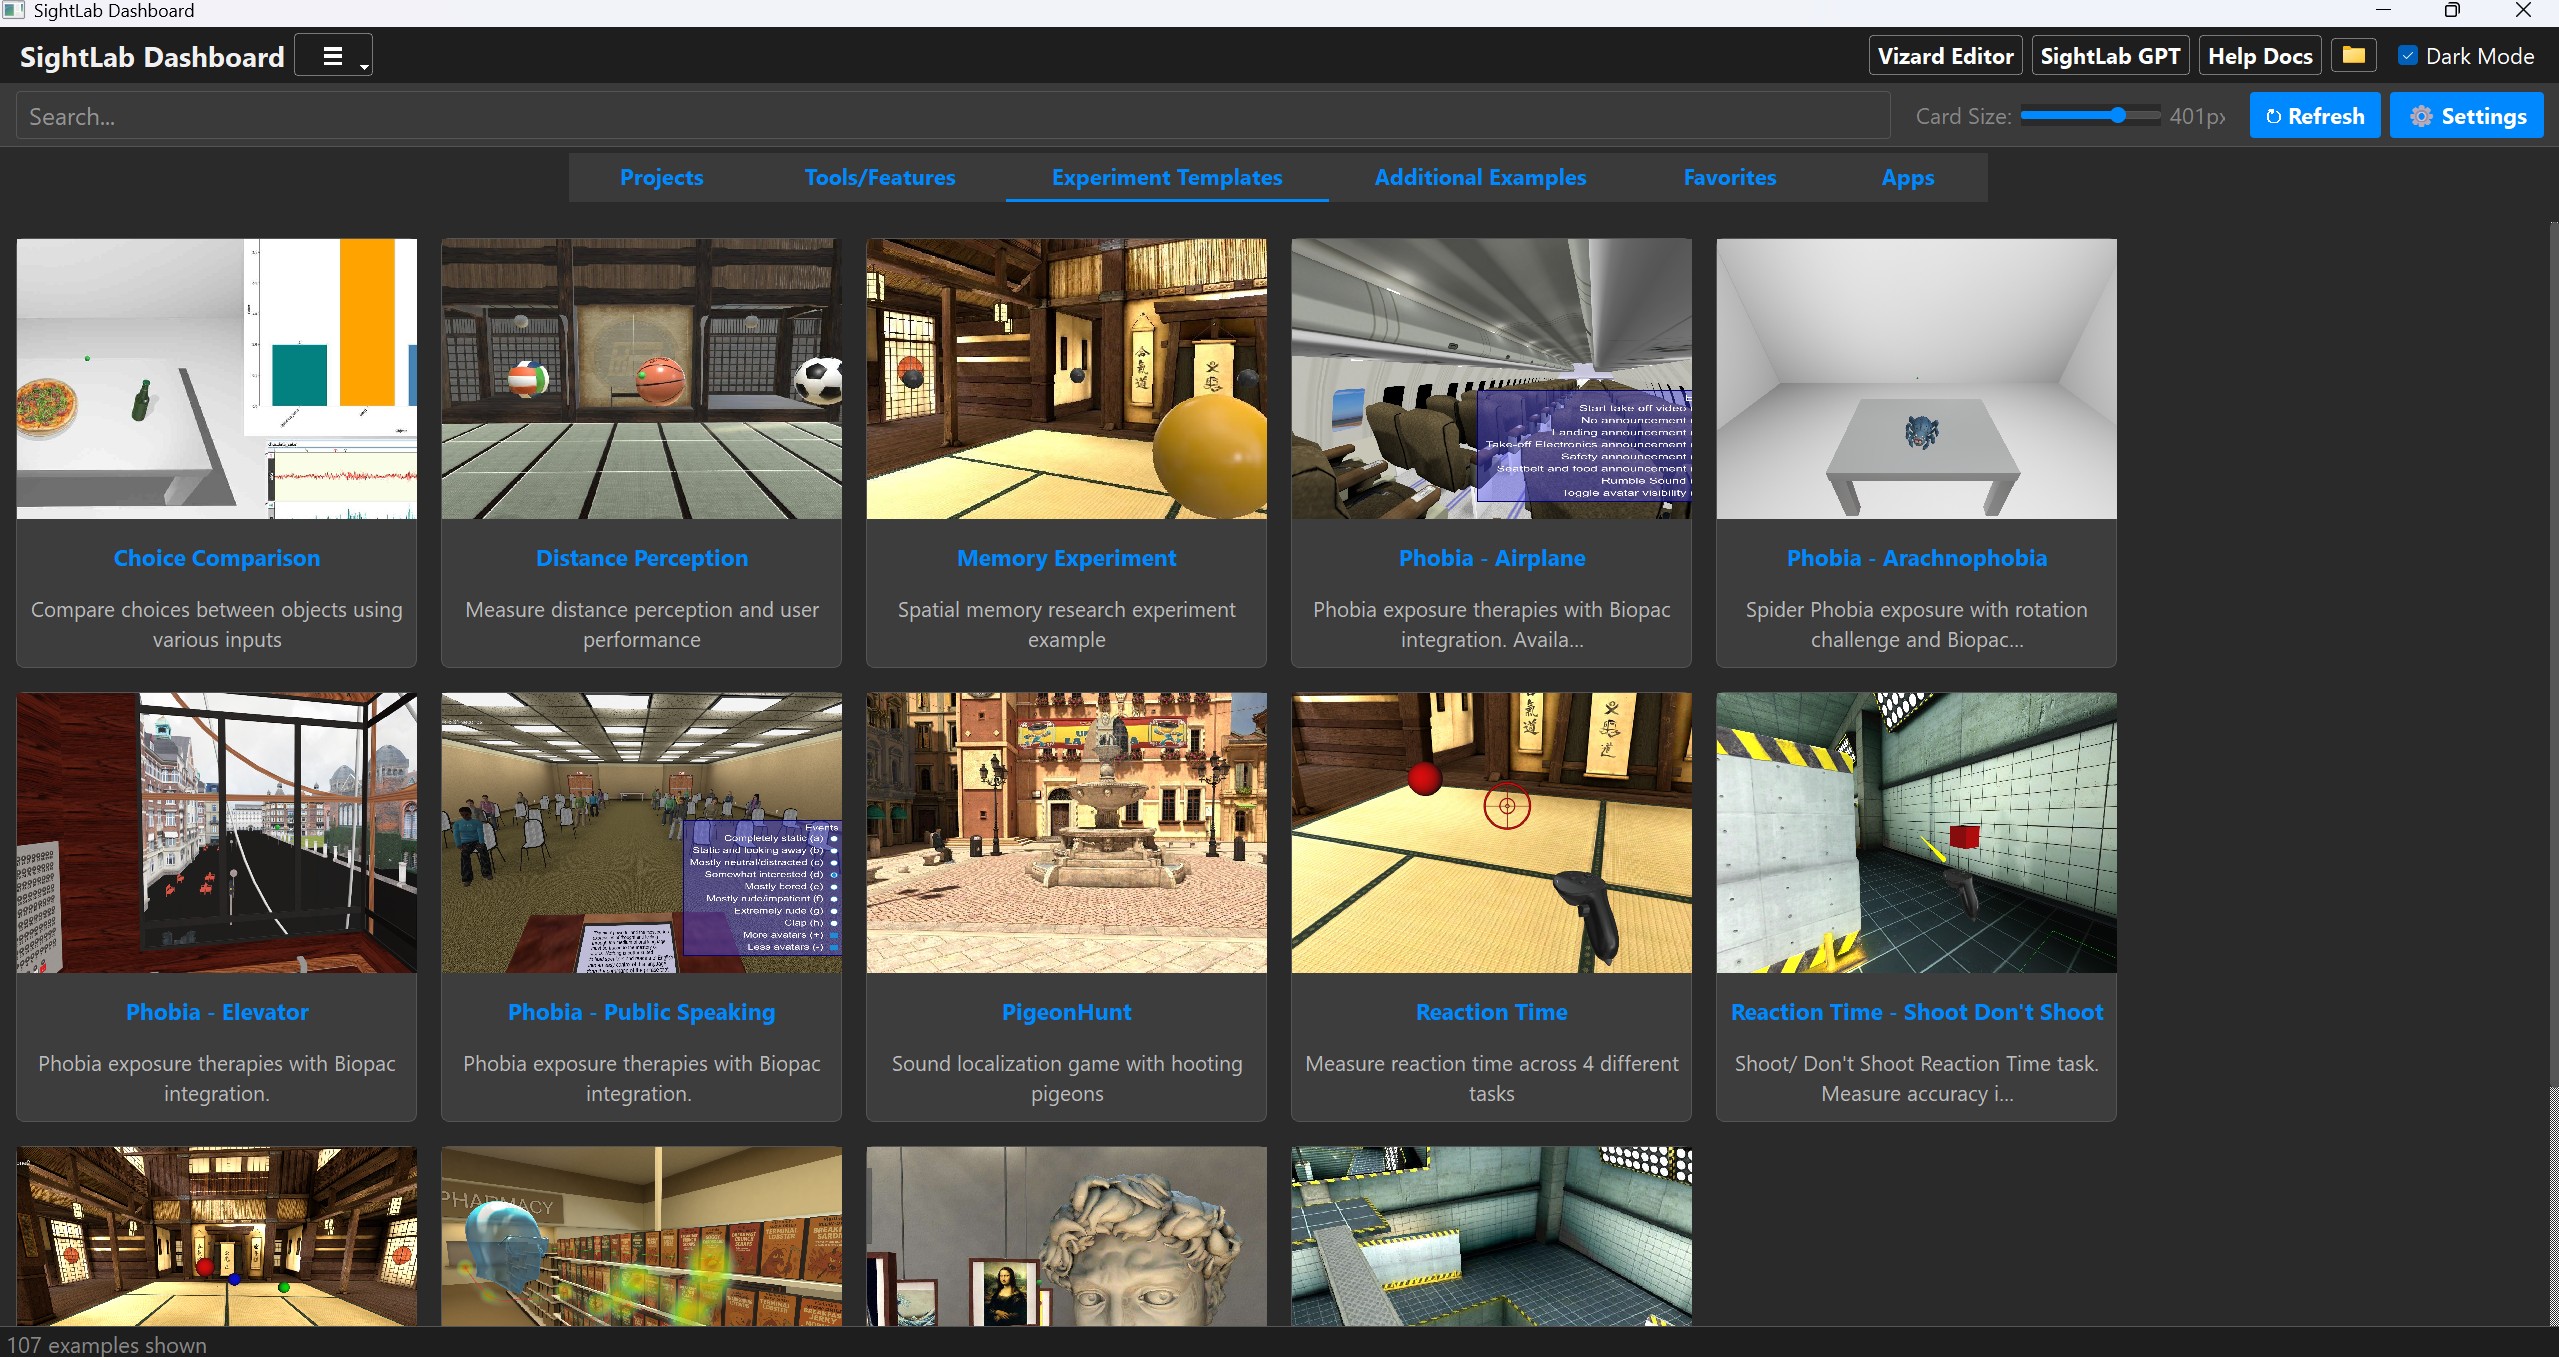
| Experiment Templates | Ready-made experiment scripts |
| Additional Examples | Extra example scripts |
| Uncategorized | Items without an assigned category |
| Favorites | All items you've marked as favorites |
| Apps | Shortcuts to external applications (Vizard, Inspector, etc.) |
| Assets | Standalone asset browser — browse, import, and generate assets without opening a project |
- Custom categories can be created by editing an item's category (see Editing Metadata).
Cards & Navigation
Card Grid
Cards display a thumbnail, title, and brief description in a responsive grid that reflows as the window resizes. You can also click and drag or ctrl click to select multiple cards.
- Left-click an example card to open its Detail Page.
- Left-click a group card to navigate into it. A breadcrumb trail appears (e.g.,
ExampleScripts > How-To's > Video Processing) with clickable links to jump back to any level.
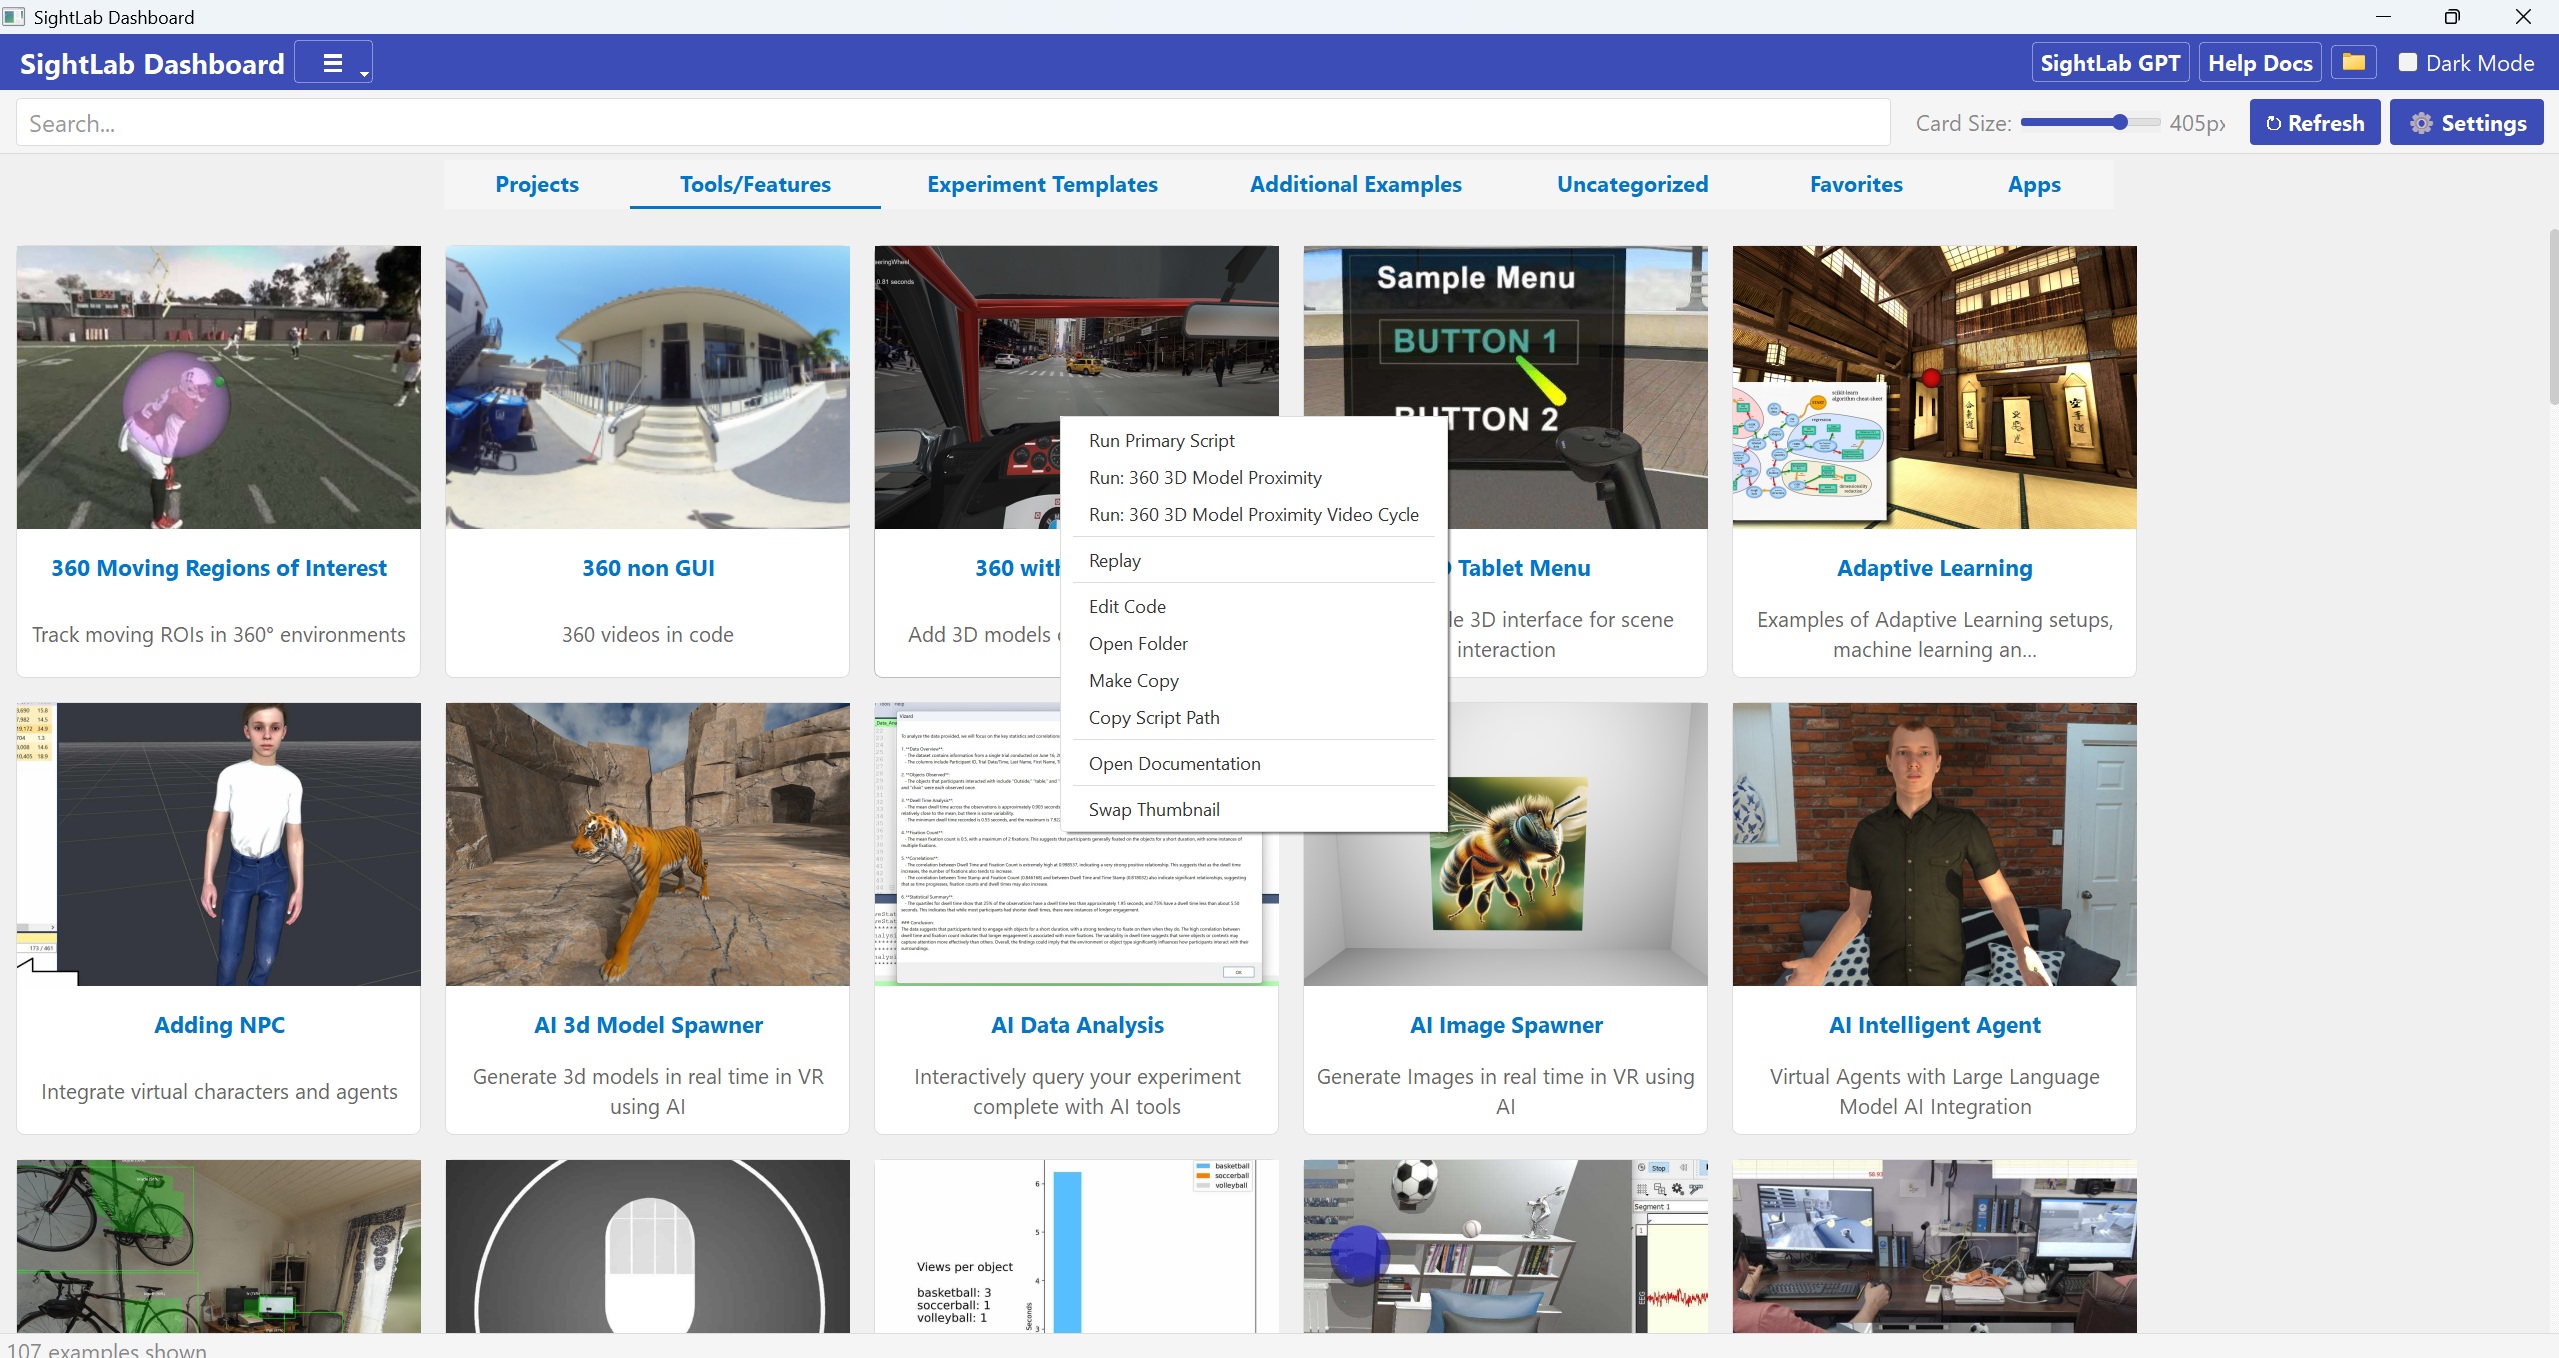
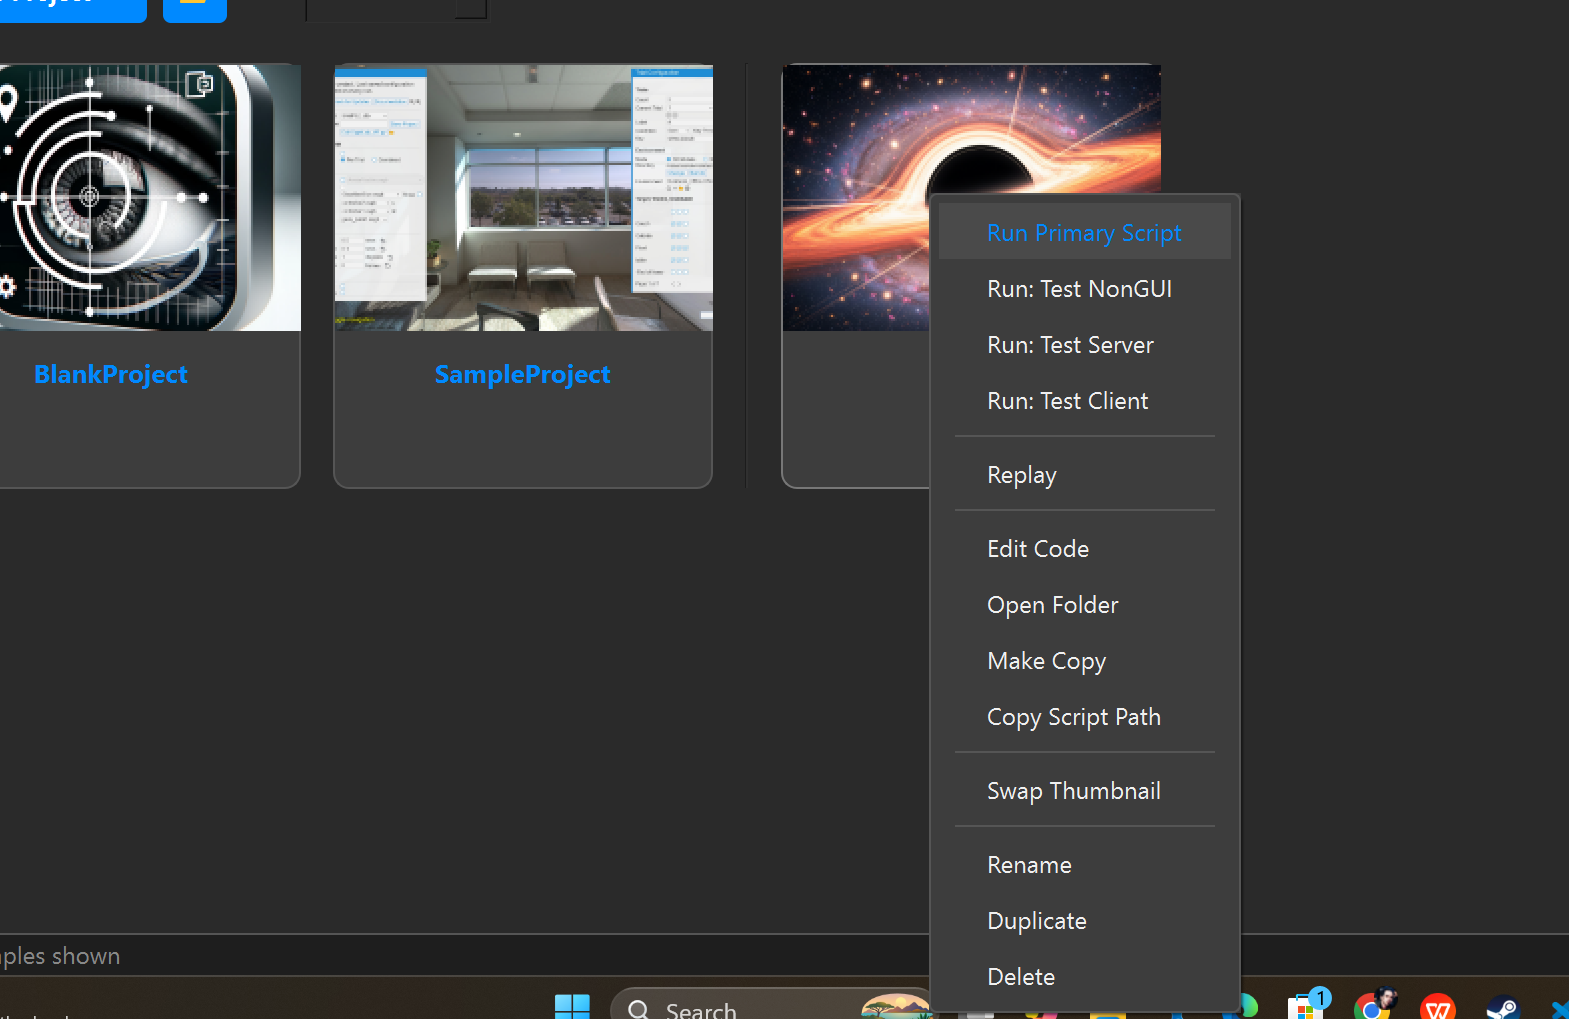
Card Context Menu (Right-Click)
Right-click any card for quick actions:
| Action | Description |
|---|---|
| Run Primary Script | Launch the primary script in Vizard |
| Run: [name] | Launch an alternate or multi-user script |
| Replay | Run the session replay script |
| Edit Code | Open the primary script in the Vizard IDE |
| Open Folder | Open the folder in Windows Explorer |
| Make Copy | Copy the example folder to a destination |
| Copy Script Path | Copy the primary script's full path to the clipboard |
| Open Documentation | Open the example's documentation URL in a browser |
| Swap Thumbnail | Choose a new thumbnail image for this card |
Project cards have additional actions:
| Action | Description |
|---|---|
| Rename | Rename the project folder |
| Duplicate | Create a copy of the project |
| Delete | Permanently delete the project |
Rename and Delete is not available for the built-in SampleProject template.
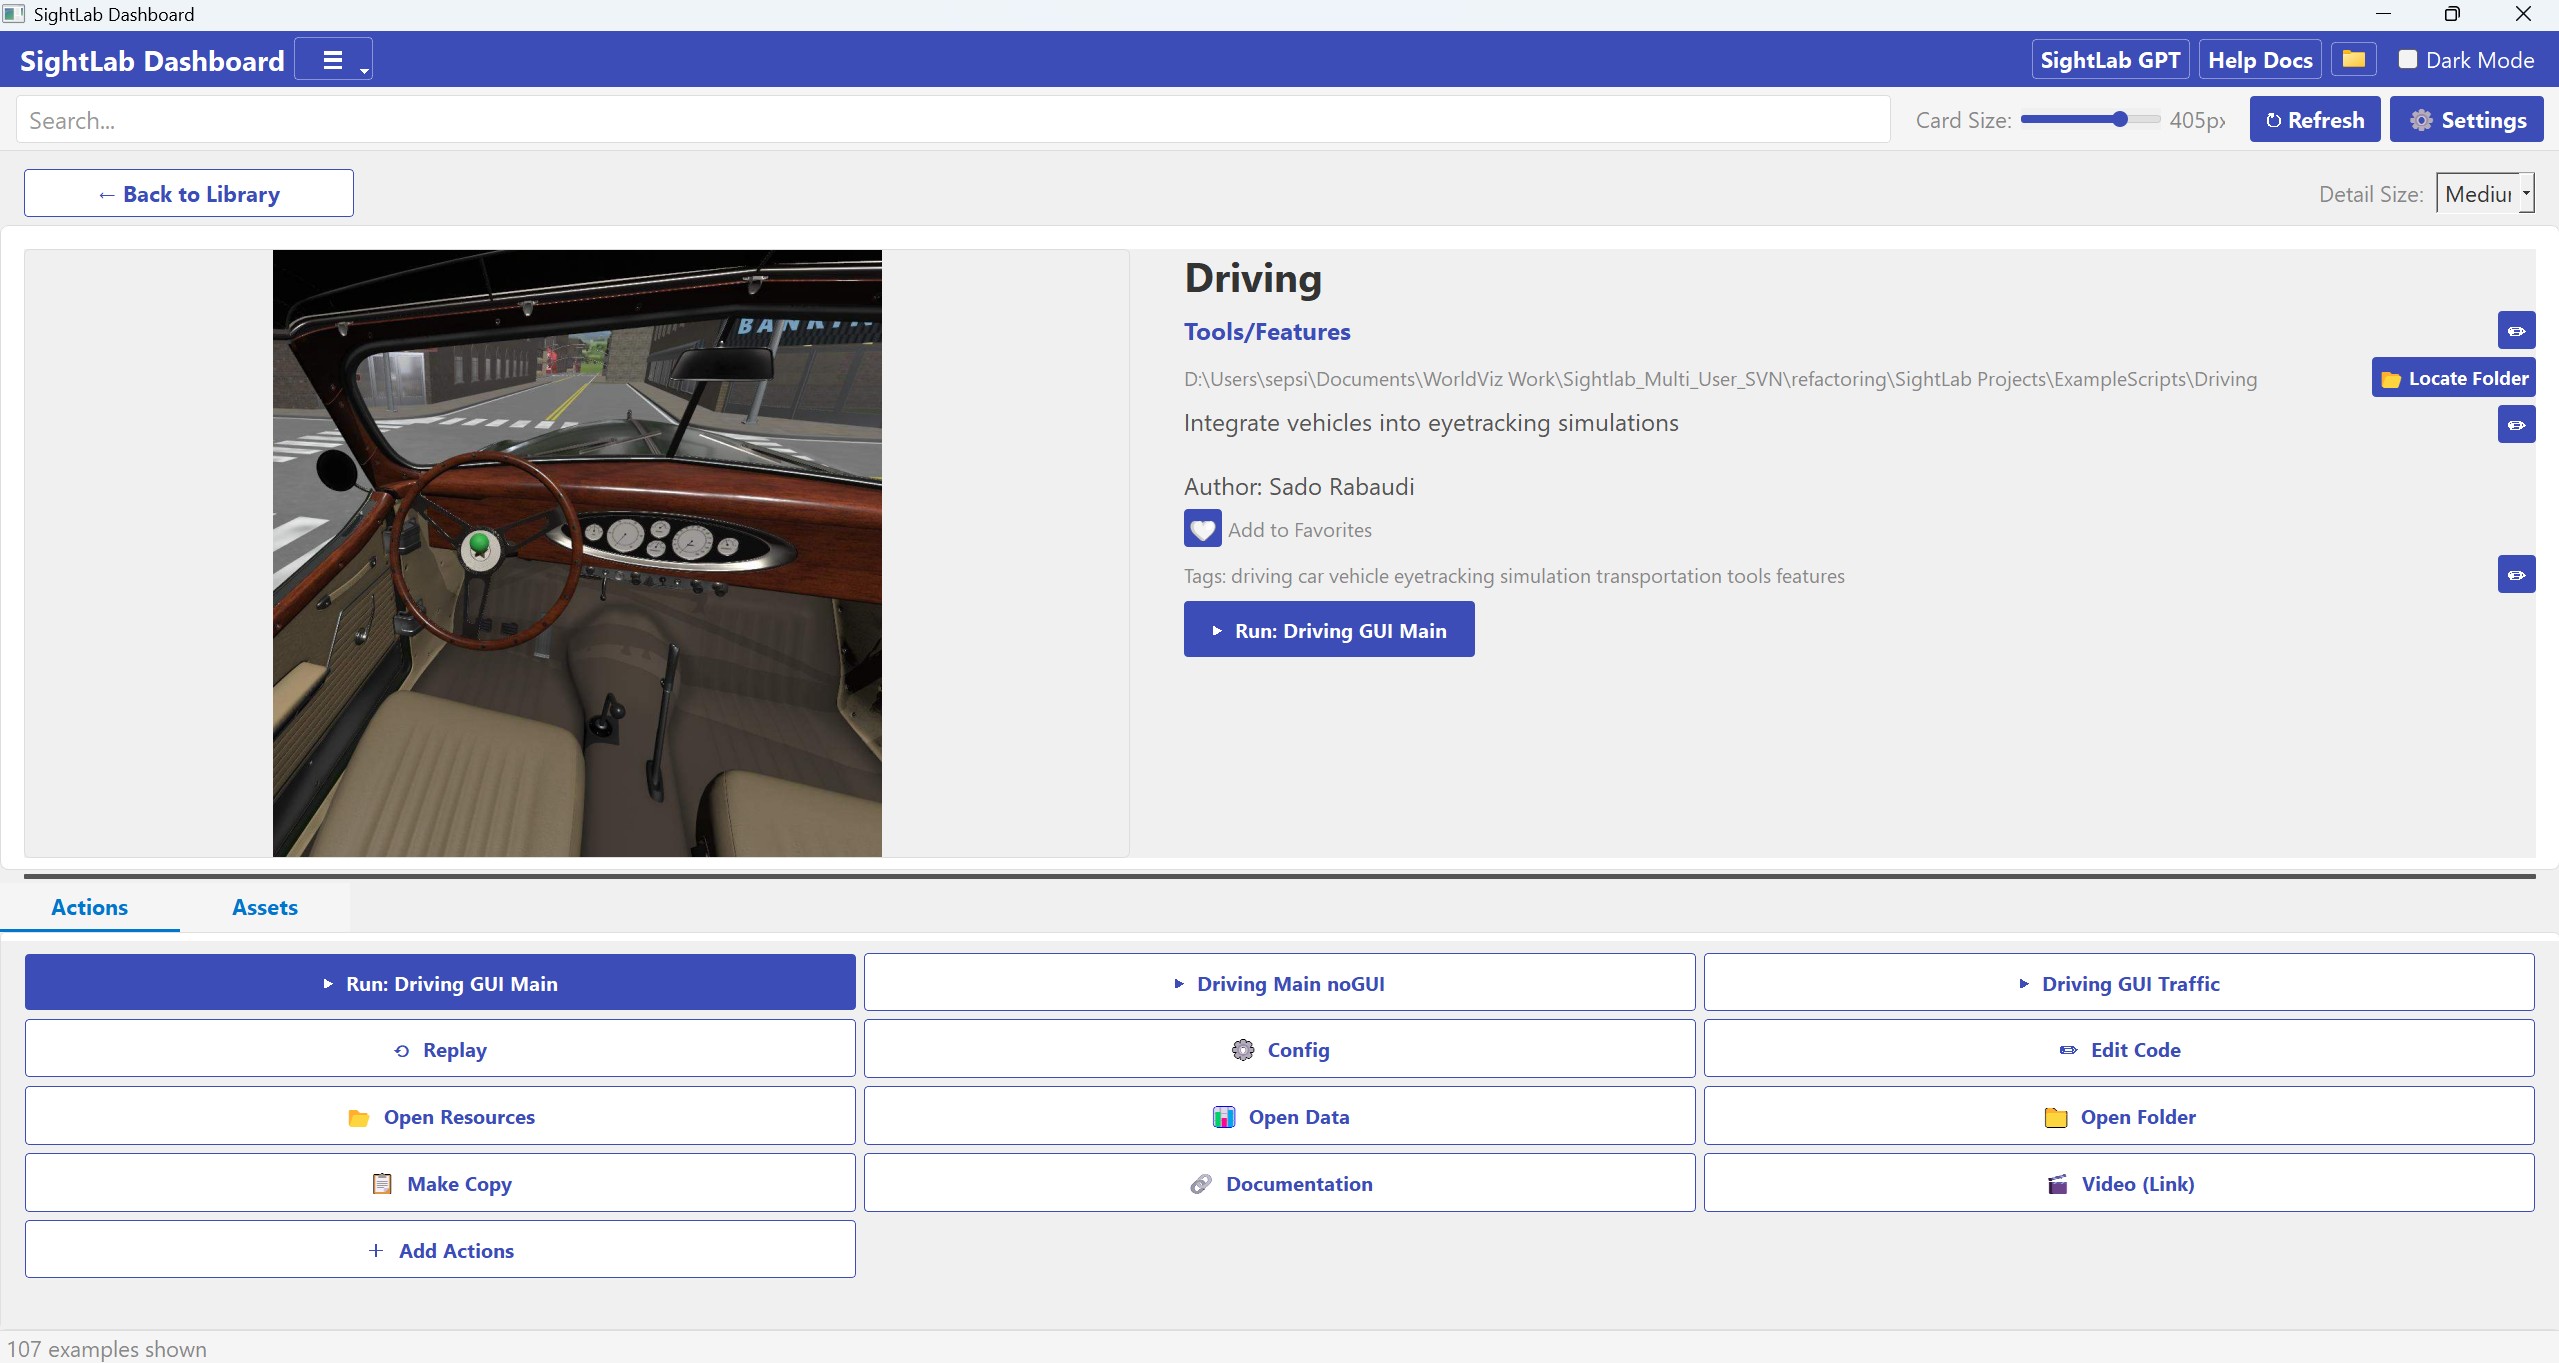
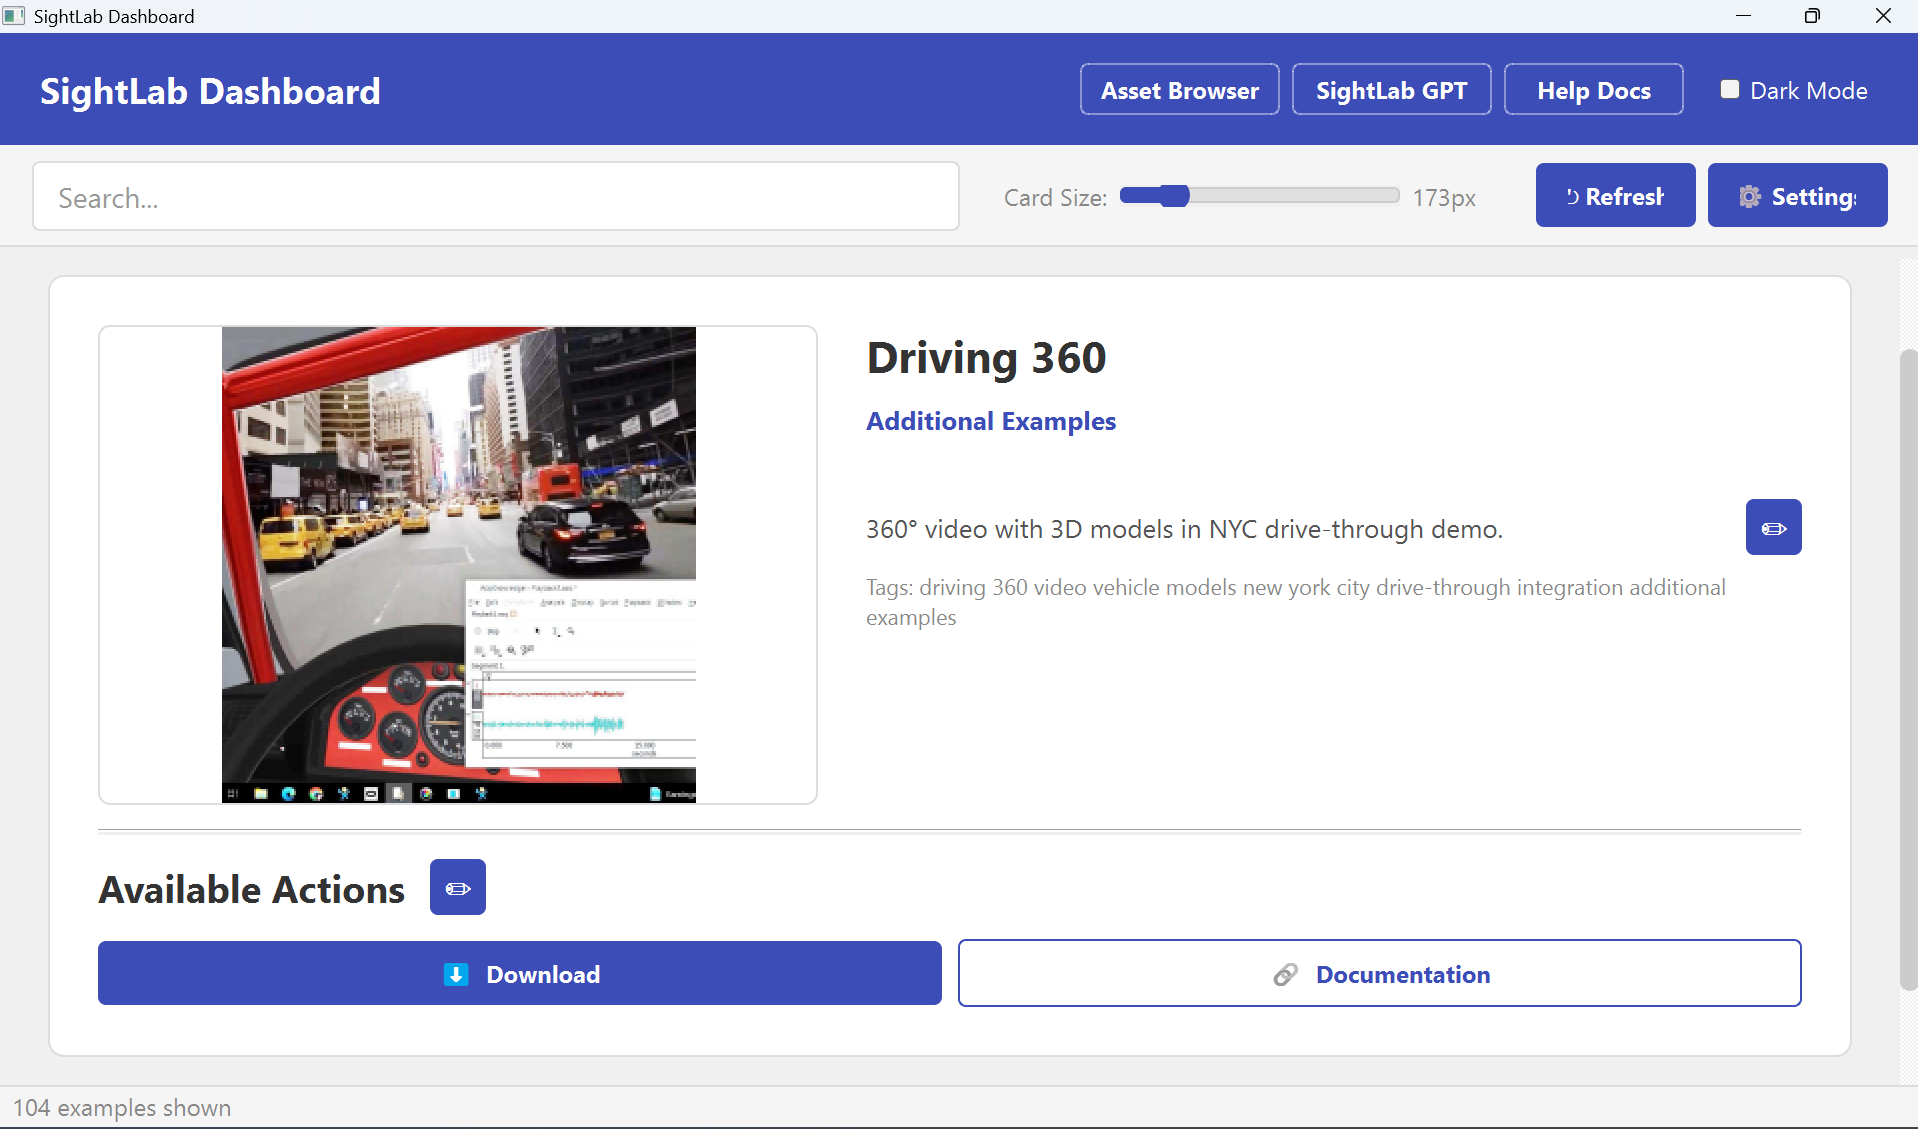
Detail Page
Click a card to view its full detail page with a large thumbnail, metadata, and all available actions. This is also where to run scripts (either embedded or in a separate window).
Metadata Fields
| Field | Editable | How to Edit |
|---|---|---|
| Title | No | Gets this value from what you initially name your project, or the folder name |
| Category | Yes | Click the ✏ button; select from dropdown or type a custom category |
| Folder Path | Yes | Click 📂 Locate Folder to point to a different directory |
| Description | Yes | Click the ✏ button; enter text in the dialog |
| Tags | Yes | Click the ✏ button; enter comma-separated tags |
| Favorite | Yes | Click the ❤/🤍 heart icon to toggle |
Available Actions
The action grid shows buttons for every operation available on the selected example:
| Button | Description |
|---|---|
| ▶ Run: [name] | Launch the primary script in Vizard (in a new window or embedded) |
| ▶ [Alternate] | Run an alternate script variant |
| ⟲ Replay | Run the session replay script |
| ⚙ Config | Open the configuration file in the editor |
| ⬇ Download | Download a remote example archive |
| ✏ Edit Code | Open the primary script in the Vizard IDE |
| 📁 Open Folder | Open the folder in Windows Explorer |
| 📋 Make Copy | Copy the folder to a chosen destination |
| 🔗 Documentation | Open the online documentation page |
| 🎬 Video (Link) | Open an external video URL |
| 🎬 Video (Local) | Play a local video file |
| 📖 ReadMe | Open a readme/documentation file |
| 📊 Analysis | Run an analysis script (graphs, charts) from a linked Analysis folder |
| 📖 Add Actions | Add new actions such as videos and Readme files |
Managing Scripts
Right-click any script button in the action grid to:
- Set as Primary — Make this script the main "Run" action (the previous primary becomes an alternate).
- Hide — Remove this script from the action list. If the primary script is hidden, the next alternate is automatically promoted.
- Run Embedded - Run in an embedded window in the Dashboard
- Run in Vizard Window - Runs in a pop-up Vizard window
Hidden scripts and primary script selections persist across sessions.
Analysis Scripts
The 📊 Analysis button provides built-in data generation tools as well as any custom analysis scripts found in the project. Extra analysis scripts can also be declared in overrides.json.
Clicking the button opens a dropdown with the following options:
| Option | Description |
|---|---|
| ✨ Generate Visualizations… | Uses an AI model to inspect your experiment's CSV data and automatically generate a set of charts (scatter plots, heatmaps, bar charts, etc.) as PNG files in a Charts/ subfolder. Requires an API key for the selected provider (see Settings). When this starts it will open the data folder. You can change in the settings whether it will use one session or all sessions in the data folder. For a single session, the best file to select is the _experiment_summary.csv file (using "All sessions" will find and use all experiment_summary files) |
| 📊 Generate Barchart… | Deterministically reads a SightLab experiment CSV and produces grouped bar charts (Total Dwell Time vs. Avg Dwell Time per ROI/Object) in a Charts/ subfolder. No AI or API key required. |
| (custom scripts) | Any .py script found inside an Analysis-named subfolder of the project. Scripts from multiple analysis folders are grouped by folder name. Selecting one runs it in a separate Vizard window. |
A progress dialog is shown while Generate Visualizations or Generate Barchart runs. When complete, the Charts/ folder is opened automatically.
Note for Generate Visualizations: A file picker lets you select which CSV to analyse or which folder if using all sessions. The AI provider (Gemma, OpenAI, or Claude) and which data source to use is set in Settings. If you choose OpenAI or Claude you will also need to save the corresponding API key there first.
To add your own analysis scripts to a project, create a subfolder ending with Analysis inside the project folder and place your .py scripts there. The button will appear automatically on the next refresh.
Adding Videos, Documentation & ReadMe
Click the Add Actions button to open the Edit Actions dialog:
| Field | Description |
|---|---|
| Video URL | Paste an external video link (YouTube, etc.) |
| Video (Local) | Browse for a local video file (.mp4, .avi, .mkv, .mov, .wmv, .webm) |
| ReadMe | Browse for a readme file (.md, .txt, .html, .pdf, .rst) |
Enable each field with its checkbox, then click OK. Corresponding buttons will appear in the action grid.
Locate Folder
Click the 📂 button next to the folder path to assign or reassign the example's working directory. This is useful when an example's scripts live in a different location than expected. The path is saved as a relative path when possible.
Swap Thumbnail
Either drag and drop from the assets (will use a thumbnail of the asset) or right-click the thumbnail on the detail page (or use "Swap Thumbnail" from the card context menu) to choose a new image. Supported formats: PNG, JPG, JPEG, BMP, GIF, WEBP.
- For Projects: The image is copied into the project folder as
_thumbnail.[ext]. - For other examples: The image is copied to the dashboard assets folder and the path is saved in overrides.
- Note that when running a new project it will run embedded and automatically capture the first 3d model or media file and make that the thumbnail.
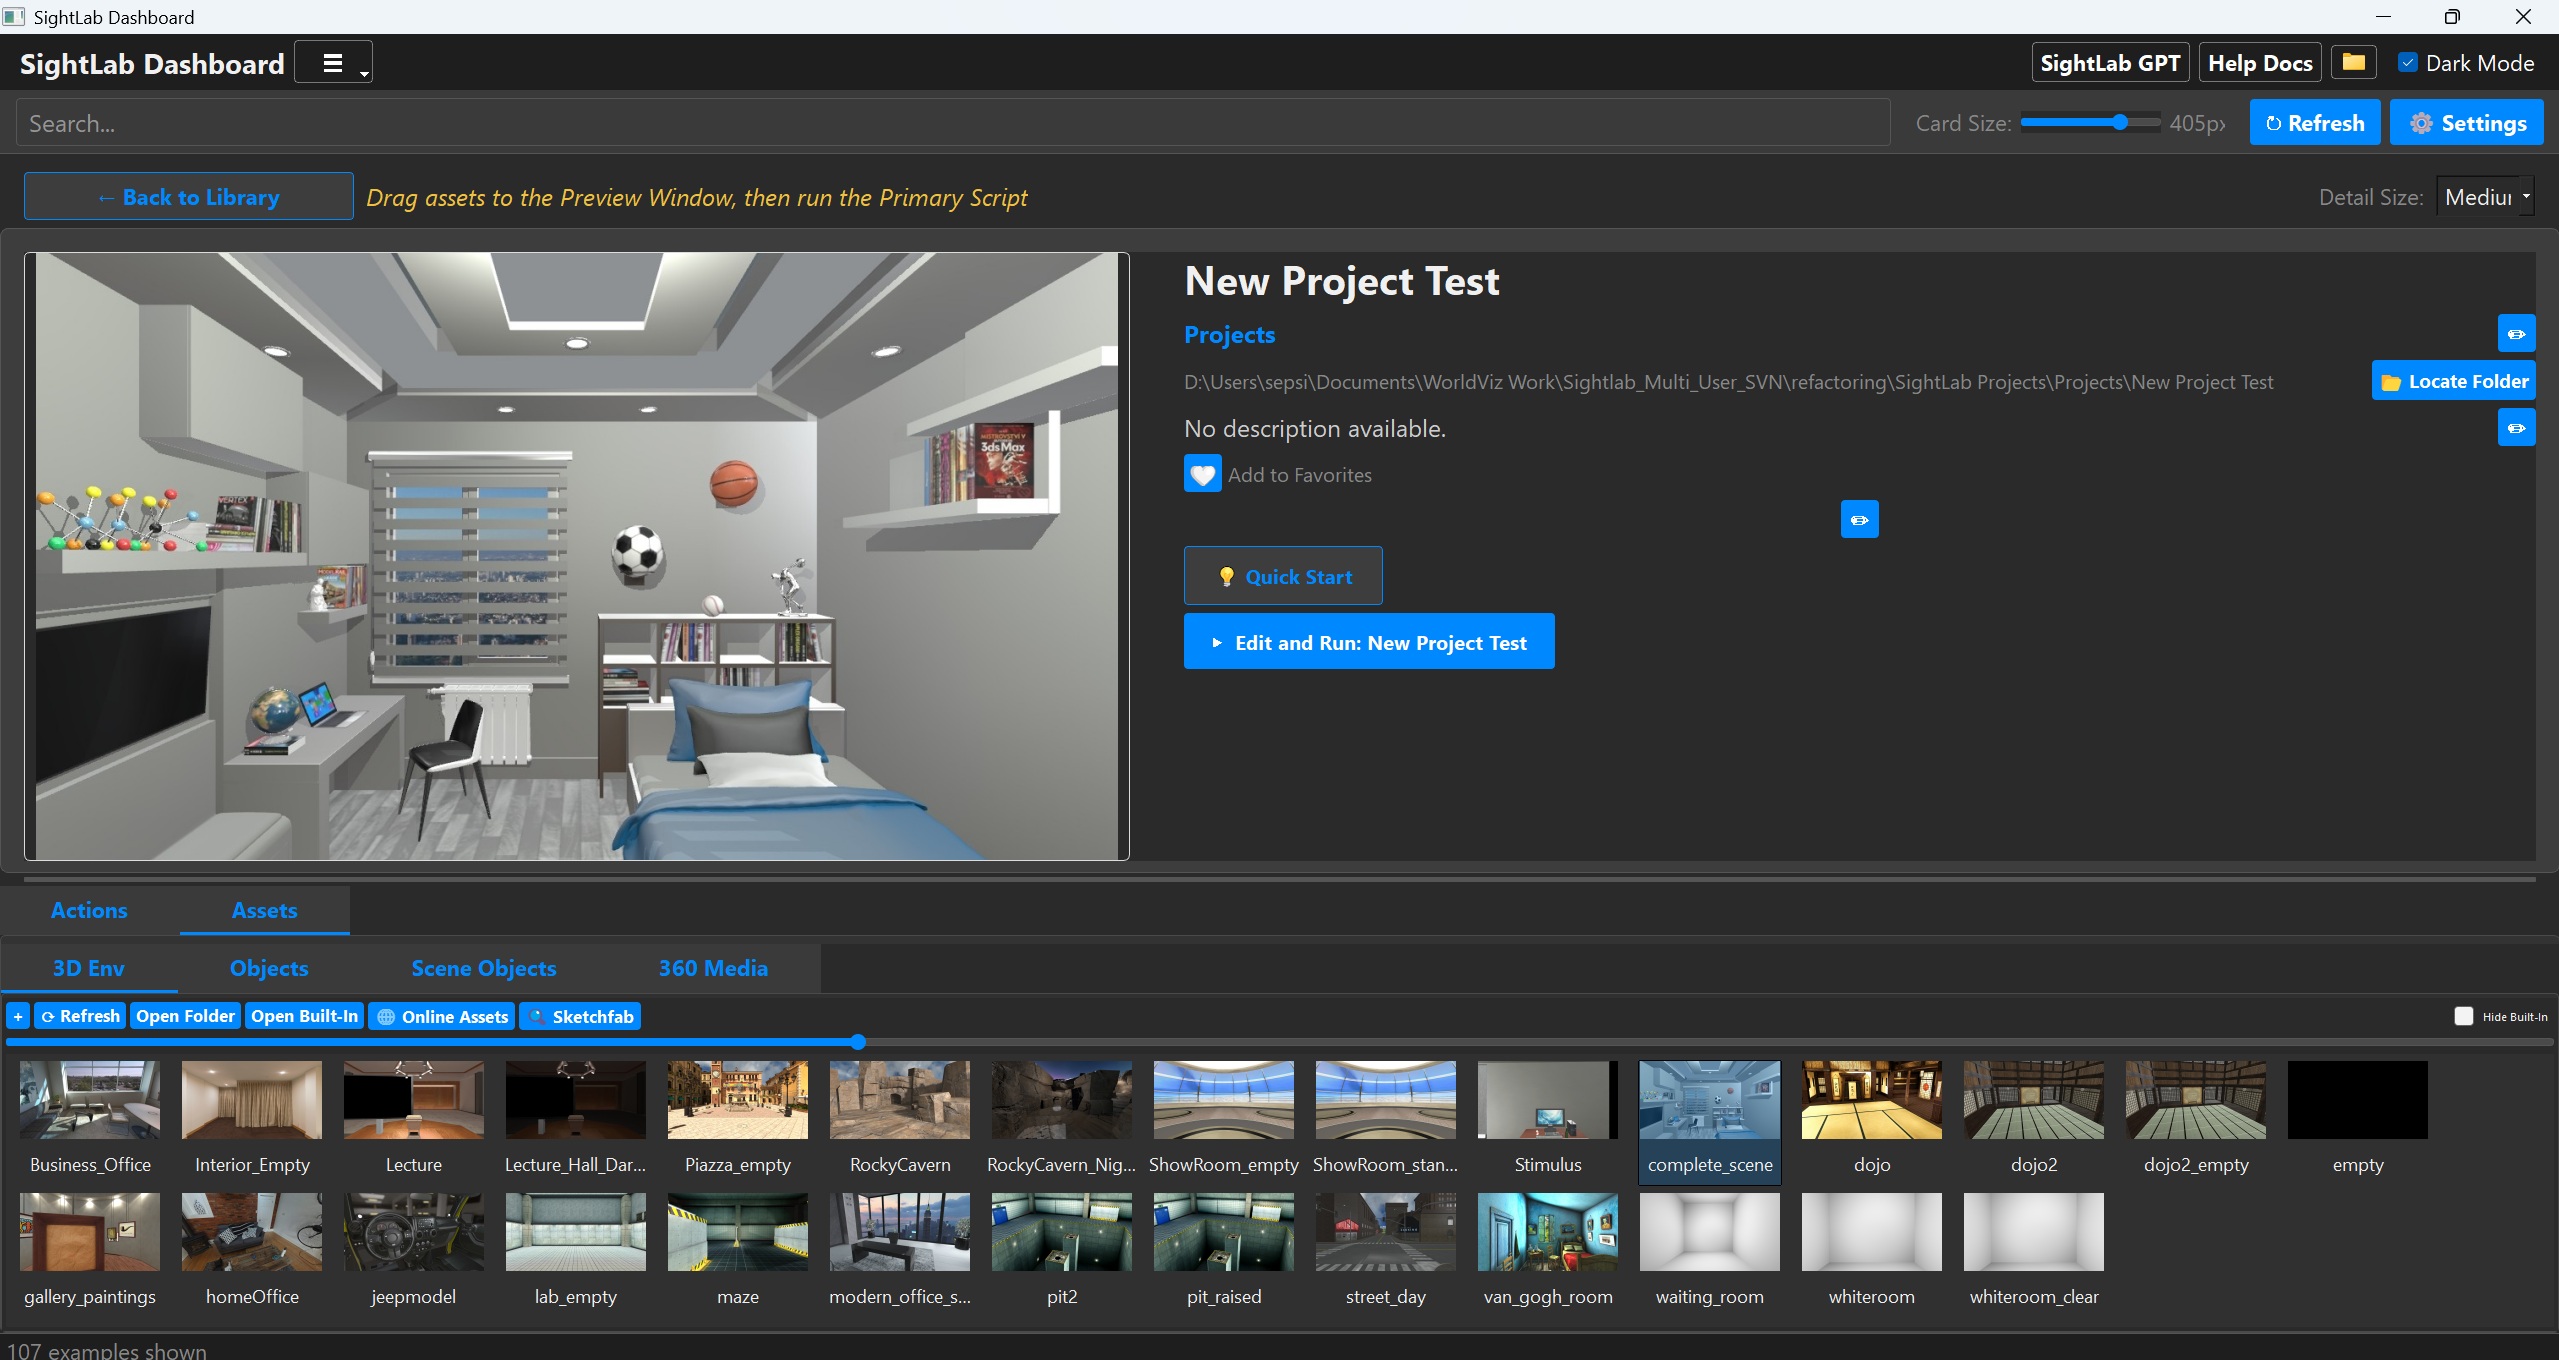
Projects Tab
Creating a New Project
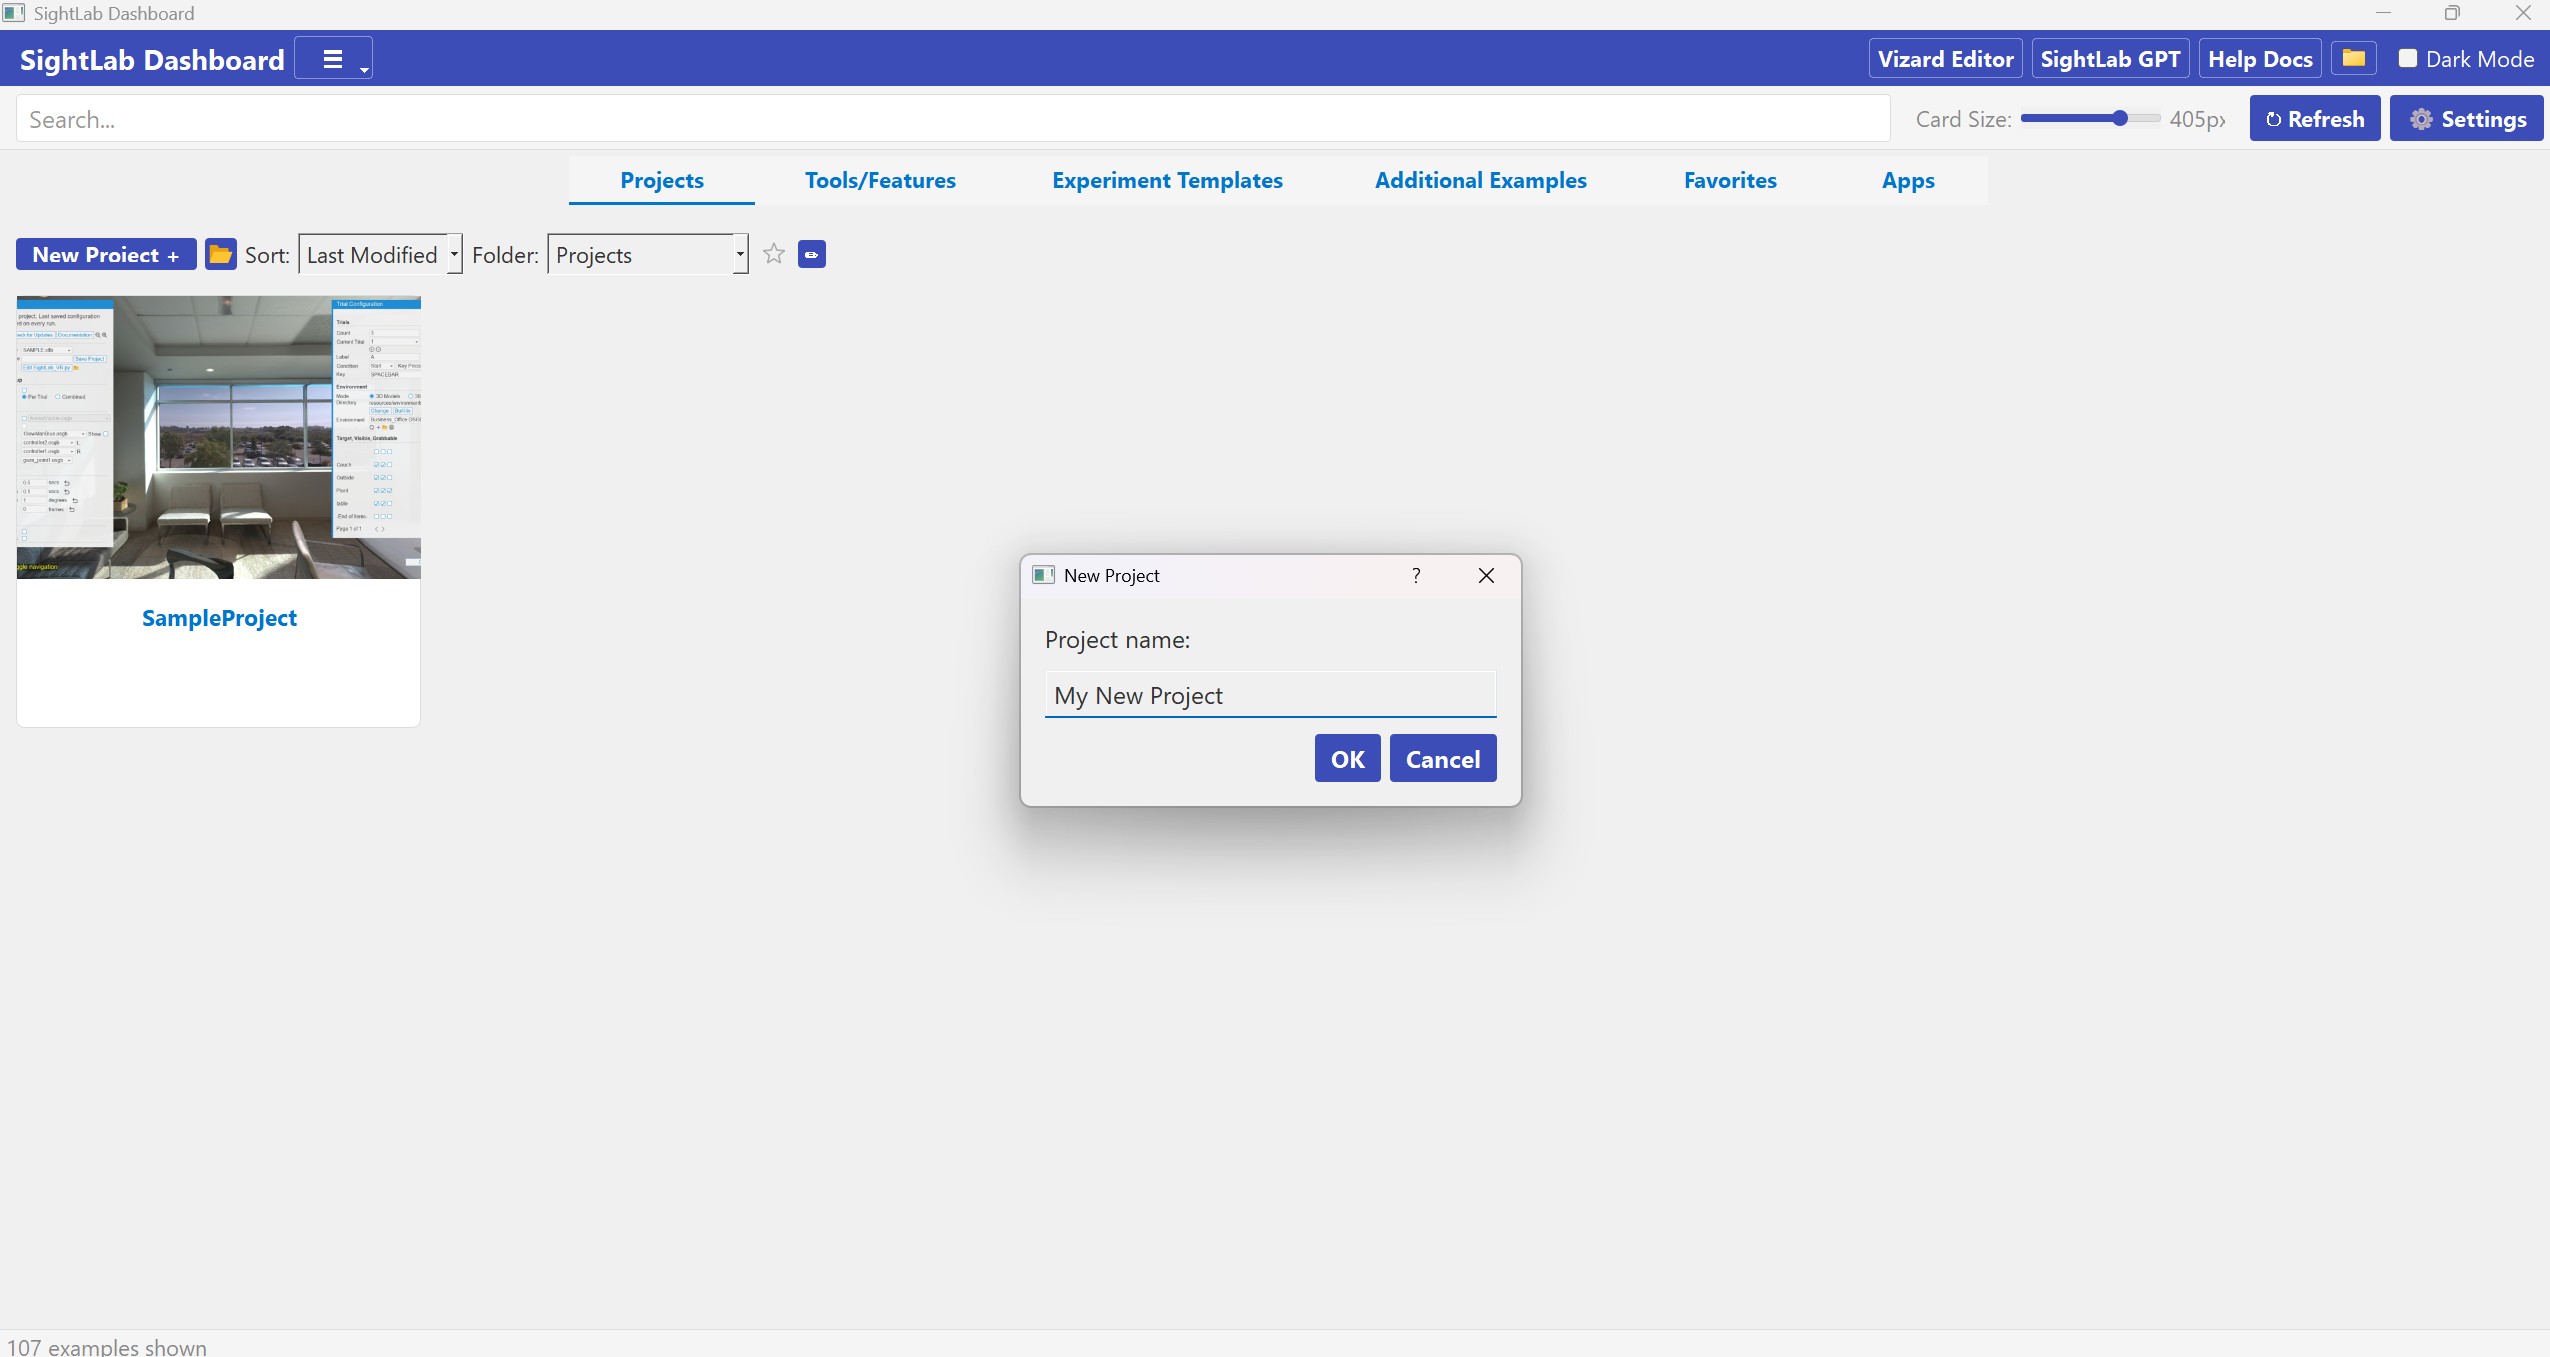
Click "New Project +" to create a new project:
- Enter a project name in the dialog.
- A copy of the SightLab Project template is created in your projects folder.
- Python files are automatically renamed to match the project name.
In the details page drag an asset into the preview window (or embedded Vizard/SightLab window) and click the pencil icon to edit the description. Click the + sign to add more trials and assets, adjust more options in the GUI and click "Continue" when you are done. See the documentation for more details on the GUI options.
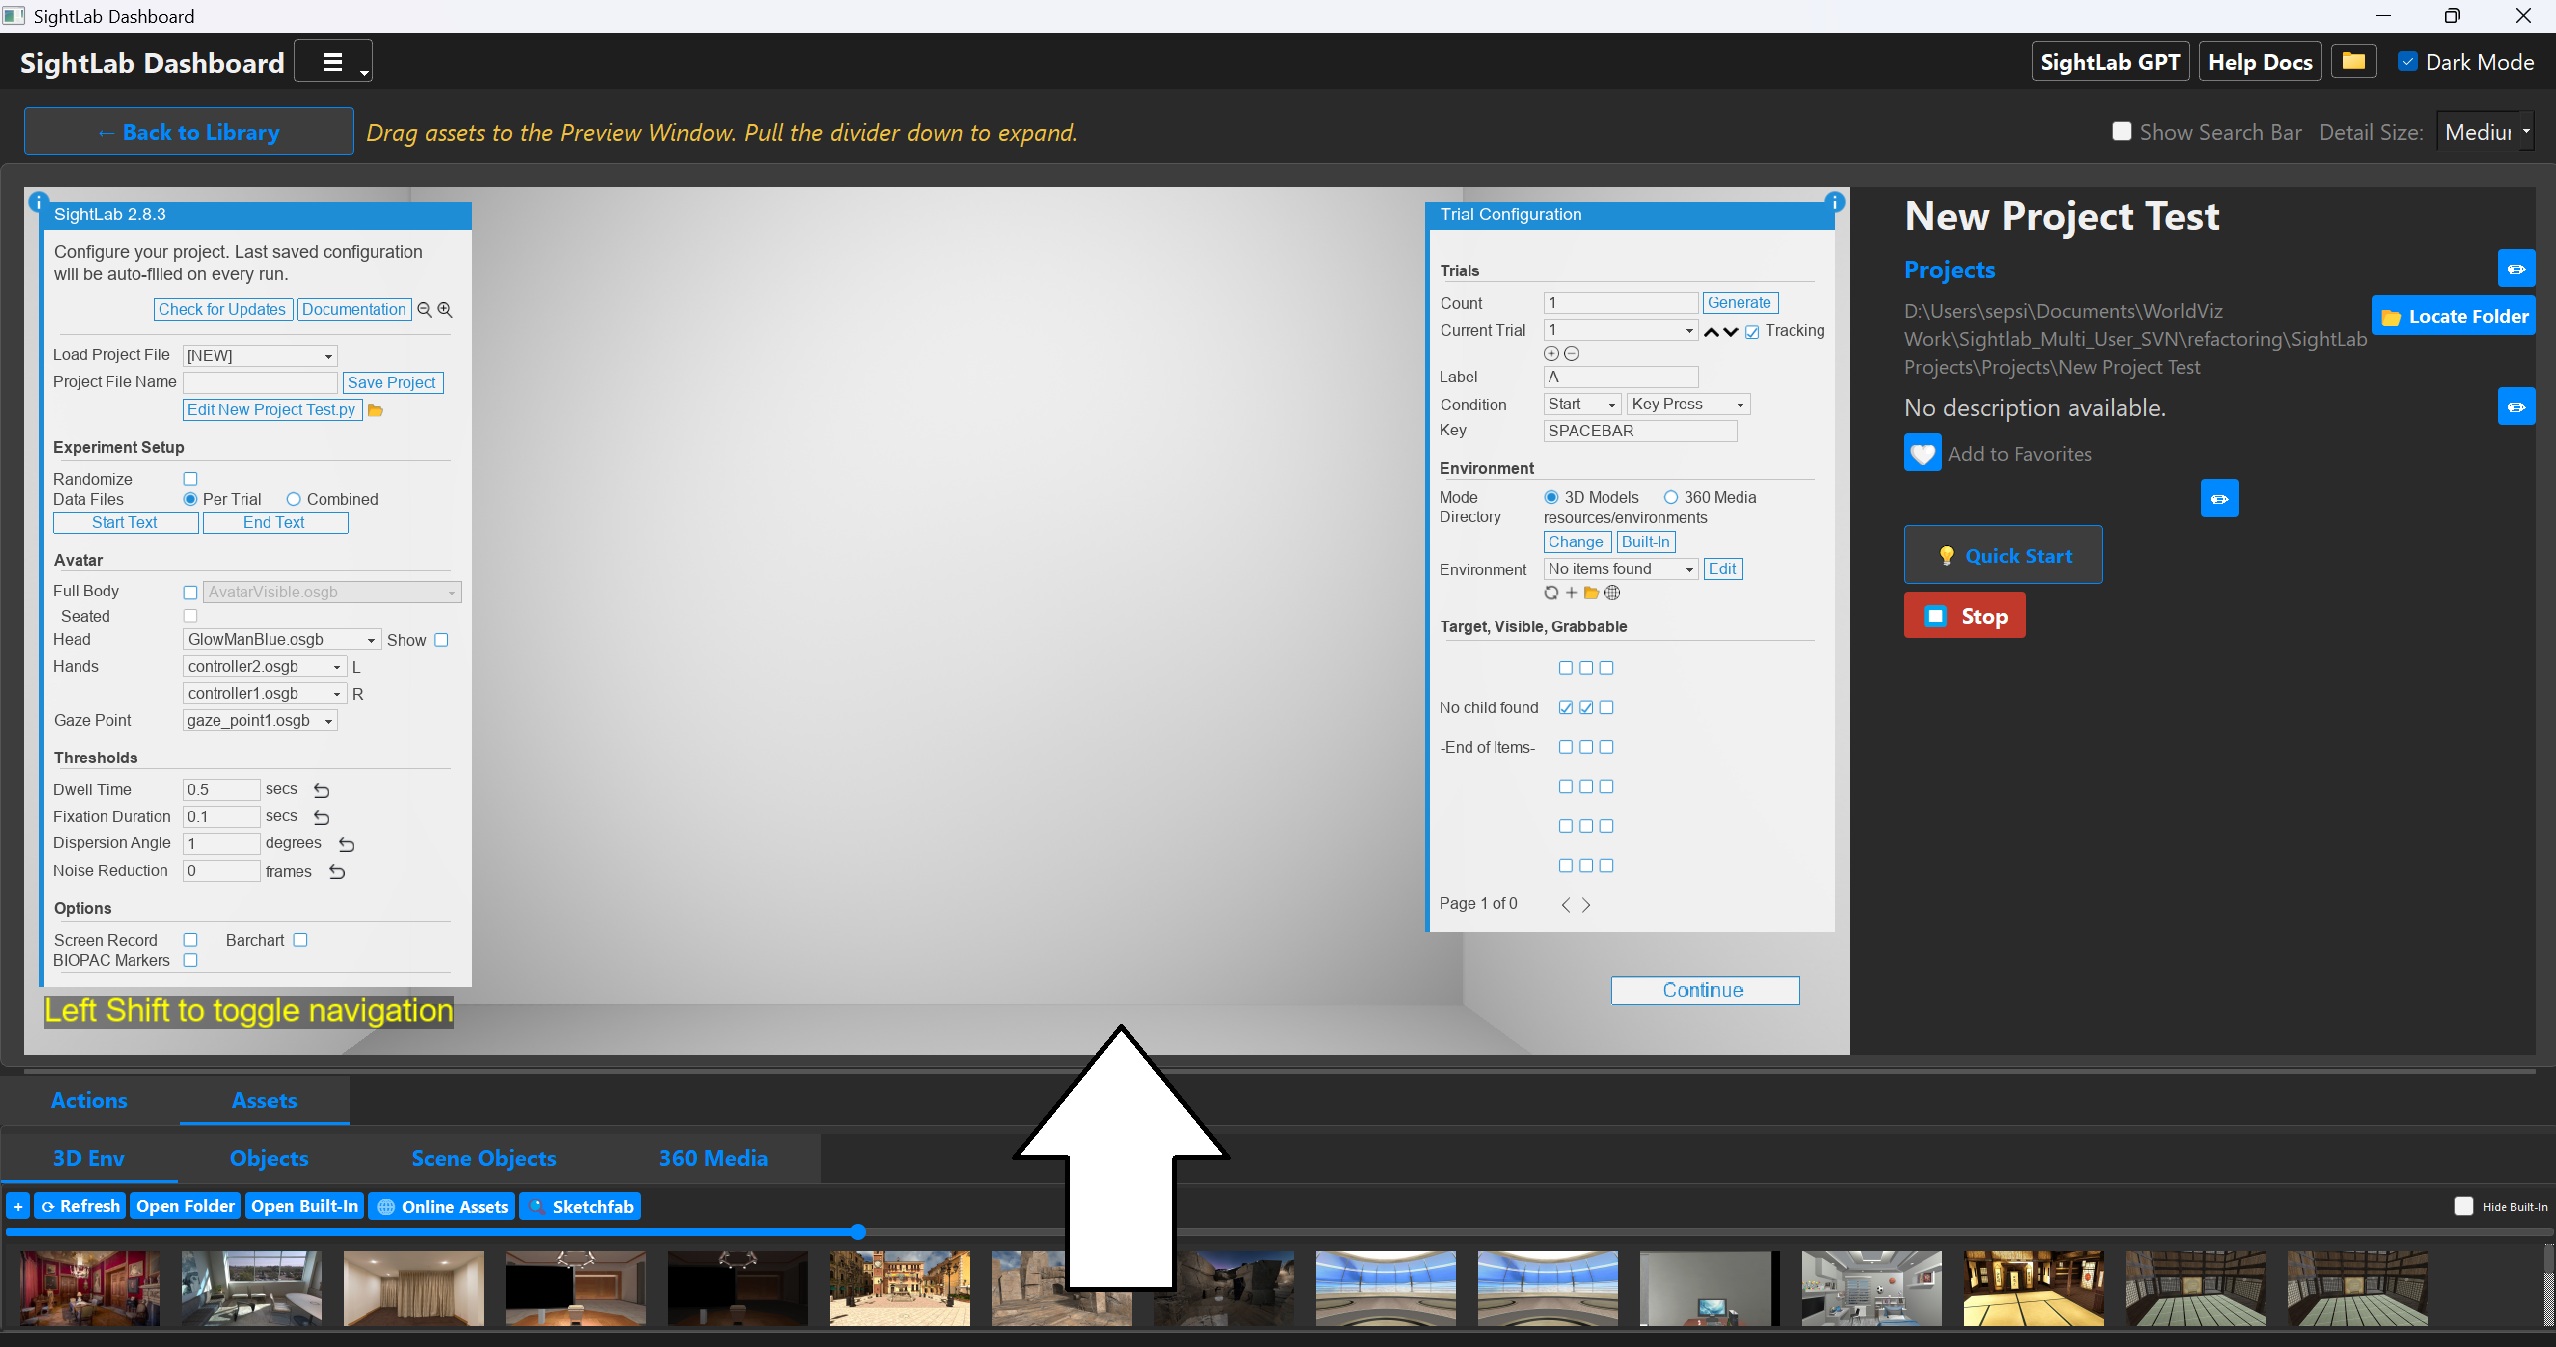
Note, this will automatically start embedded, but if you uncheck that in the options, you will need to click "Edit and Run to edit the experiment".
Sorting Projects
Use the Sort dropdown to order projects:
| Sort Mode | Description |
|---|---|
| Alphabetical | A–Z by project name |
| Last Modified | Most recently modified first |
| Last Accessed | Most recently accessed first |
The SampleProject is always pinned at the top.
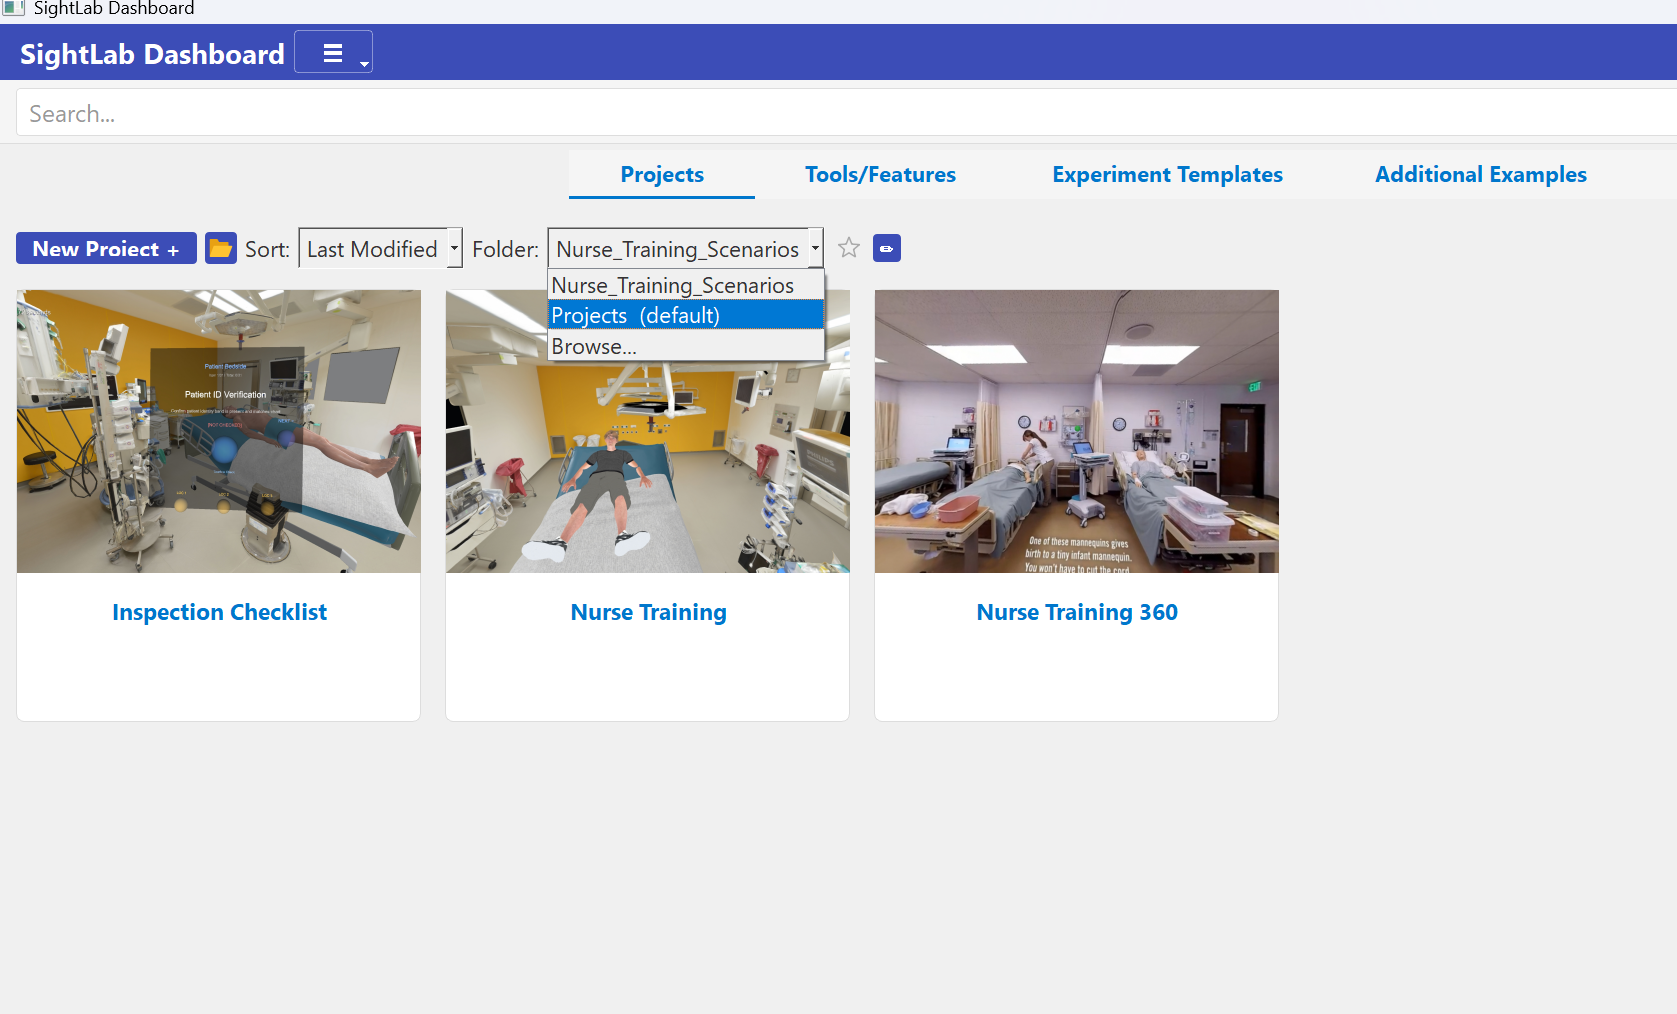
Changing and Organizing Projects Folders
Open Settings and set the default Projects Folder path, or click Browse to select a directory. Leave empty to use the default Projects/ folder. Changes take effect immediately with an automatic refresh. Note: By default you have the Projects and Shared folders (as of SightLab 2.8.19)
To add a new project folder path click the Folder dropdown and go to "Browse". Locate your specified folder and click the "Star" icon if you want to favorite it to always show in the list. You can manage and delete project paths by clicking the pencil icon.
Asset Browser
The SightLab Dashboard has a built-in Asset Browser that allows you to add, organize, manage and use assets. It is accessible in two ways:
- Assets tab — a standalone top-level tab available from the main dashboard without needing to open a project. Browse, import, generate, and manage assets at any time.
- Detail page > Assets panel — the same browser appears in the bottom panel when a project or example is open, with an additional "Add to Project" right-click option to copy assets directly into the open project.
The default view shows the built-in assets (in C:\Program Files\WorldViz\Sightlab2\sightlab_resources) together with any user assets added to the Assets folder in your SightLab2 folder. Check Hide Built-In to show only user-added assets.
To add new assets you can simply drag and drop into the specific bin. There are bins for 3D Environments, Objects, Scene Objects, 360 Media, and Avatars.
Double clicking on any asset opens it in the default program (Inspector for 3D models, media player for videos, image viewer for photos).
Dragging from the Assets panel to the Preview window (standard or embedded) automatically adds that asset to the open project.
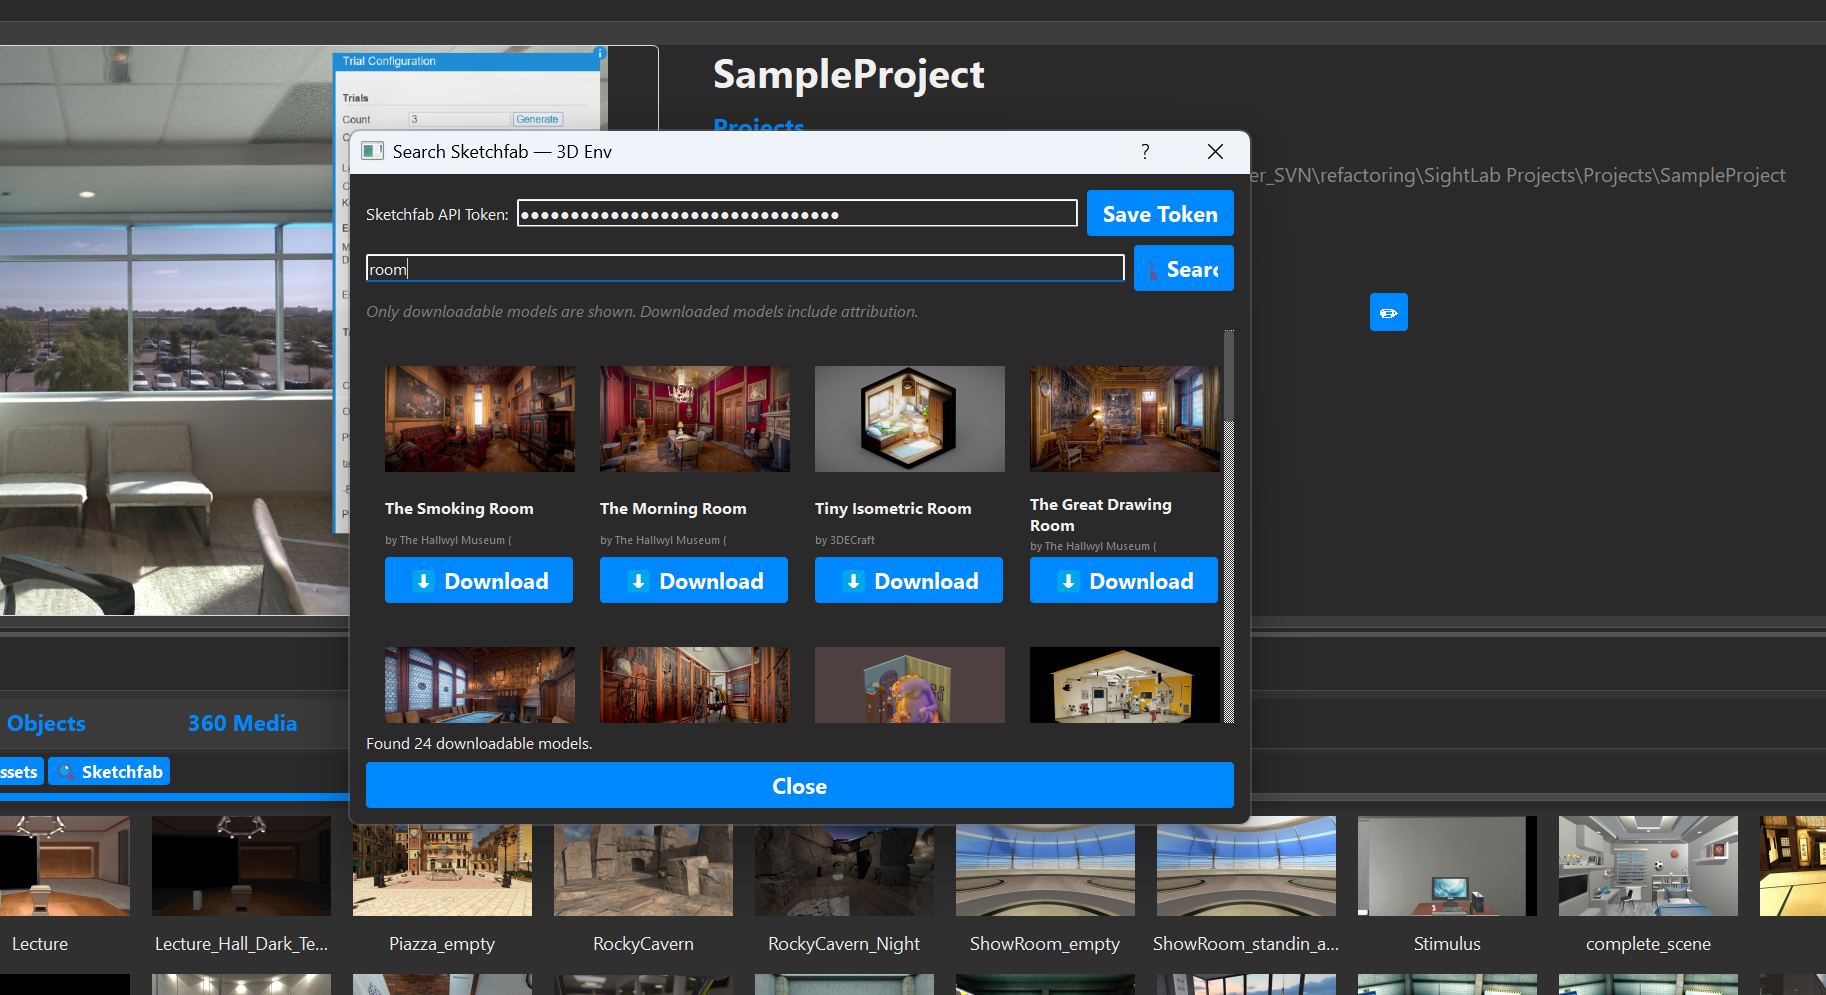
Searching with Sketchfab
In the assets browser you can also search and download directly in Sketchfab, where there are over 150,000 creative commons free models you can use. When you download it will save the thumbnail, convert the model and download the license. To use this you just need to input your Sketchfab API, which can be acquired here https://sketchfab.com/settings/password
Generating Assets with AI Tools
As of SightLab 2.8.8 there are now built-in connections to Meshy and Tripo 3d for generating 3D models and Avatars, Gemini and OpenAI GPT-Image for generating 360 images, and Veo 3 for 360 Video. Click the 🤖 Generate with AI button in the toolbar of any supported asset tab.
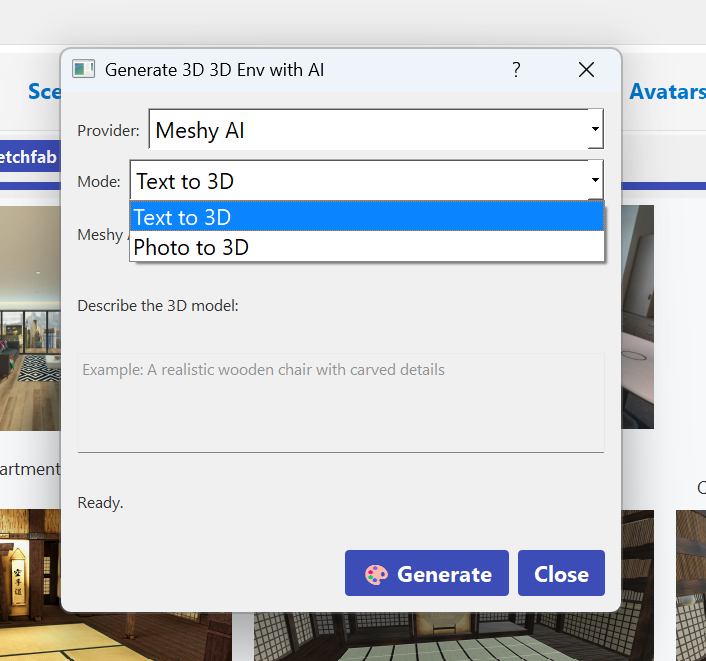
Generating 3D Models (3D Env / Objects tabs)
Powered by Meshy or Tripo. Requires a Meshy or Tripo API key (save it once via the Save Key button).
| Mode | Description |
|---|---|
| Text to 3D | Describe the model in text; Meshy runs a preview pass then a higher-quality refine pass |
| Photo to 3D | Upload a reference image; Meshy reconstructs the geometry with textures |
Downloaded models are automatically converted from GLB to OSGB via Vizard in the background. Sketchfab thumbnails are used when available.
Generating Avatars (Avatars tab)
![]()
The Avatars tab has a dedicated 🤖 Generate with AI flow that produces fully rigged, animated humanoid avatars using Meshy or Tripo. Avatar files are kept as GLB to preserve skeleton and animation data — OSGB conversion is skipped.
Options:
| Option | Description |
|---|---|
| Mode | Text to 3D (describe the character) or Photo to 3D (upload a reference image) |
| Art Style (Meshy only) | realistic, cartoon, low-poly, sculpture, or pbr |
| Height (m) | Target height for the rig in metres (default 1.7) |
| Auto-rig | Adds a full humanoid skeleton (~2 credits) |
| Basic walk + run | Downloads walking and running animations bundled with the rig |
| Extra preset animations | Select from Idle, Casual Walk, Run, Jump, Wave Hello, Dance, Nod/Agree, Fall Down, Attack, Arise/Get Up, Angry Stomp, Special Skill (~1 credit each) |
An unrigged base GLB is always saved first as a fallback. When rigging completes the base file is removed and the rigged version (plus any selected animations as separate GLB files) are saved to Assets/Avatars.
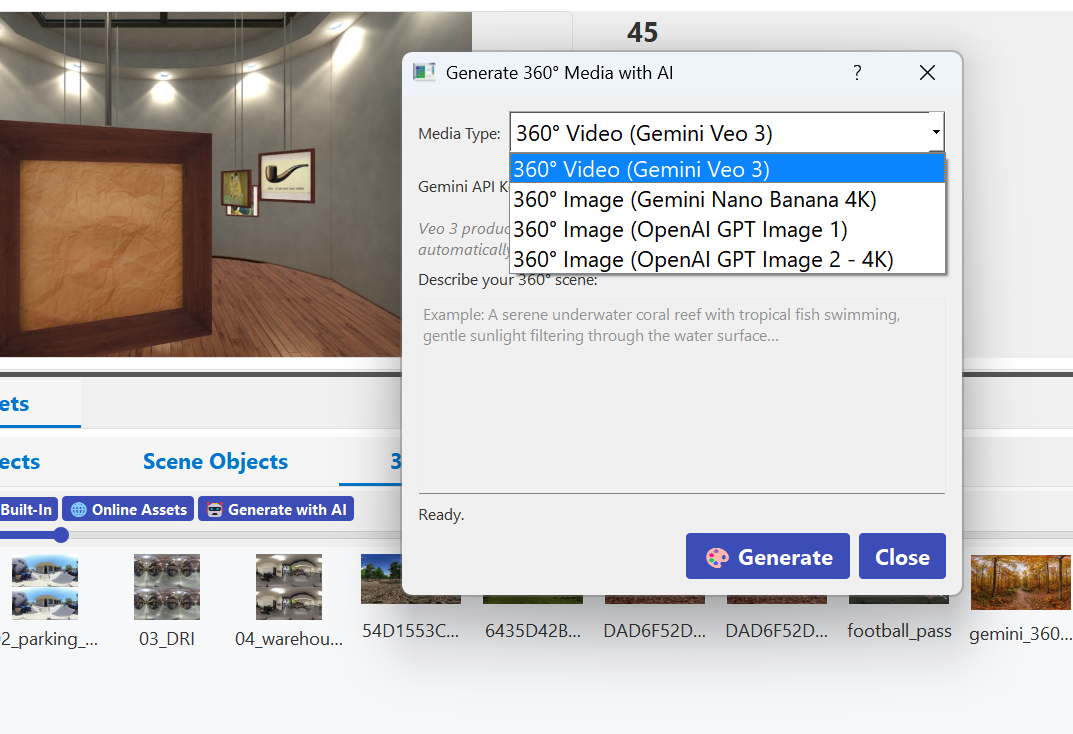
Generating 360° Media (360 Media tab)
| Option | Description |
|---|---|
| 360° Video (Gemini Veo 3) | Generates a 720p equirectangular video. Requires a Gemini API key. |
| 360° Image (Gemini Nano Banana 4K) | Generates a 4K equirectangular image using Gemini's image model. |
| 360° Image (OpenAI GPT Image 1) | Generates a 1536×1024 equirectangular image via OpenAI. |
| 360° Image (OpenAI GPT Image 2 – 4K) | Generates a 3840×1920 equirectangular image via OpenAI. |
The prefix "360 Equirectangular image of" (or "360 Equirectangular:" for video) is automatically prepended to your prompt. Thumbnails are generated from the output file after saving.
Converting Mono 360° Images to Stereo
Right-click any mono equirectangular 360° image in the 360 Media tab and choose Convert to Stereo (Top/Bottom). This creates a new top/bottom stereo image (left eye on top, right eye on bottom) using depth-based horizontal parallax.
- The option only appears for images with a 2:1 aspect ratio that do not already have
stereo,_tb, or_sbsin their filename. - Requires Pillow and numpy (
pip install pillow numpy). - If transformers and torch are installed, depth is estimated using the Intel/dpt-swinv2-tiny-256 model for more accurate parallax; otherwise a positional heuristic is used.
- The converted file is saved alongside the original with a
_tb_stereosuffix.
Asset Context Menu (Right-Click)
Right-click any asset in the browser for the following options:
| Action | Description |
|---|---|
| Add to Project | Copy the asset into the open project's Resources folder (only available from the detail page asset panel, not the standalone Assets tab) |
| Delete | Remove the asset file and its thumbnail |
| Rename | Rename the asset and its matching thumbnail |
| Swap Thumbnail | Choose a custom thumbnail image for this asset |
| Copy Path | Copy the full file path to the clipboard |
| Convert to Stereo (Top/Bottom) | (360 Media only) Convert a mono equirectangular image to top/bottom stereo |
Running Vizard and SightLab Scripts Embedded
In addition to launching Vizard and SightLab scripts in a separate window, you can also choose to run them embedded if you check that option in the settings. Note that server and client (Multi-User) scripts do not work embedded and must be run in a separate window. You can either right click on any script (except for a server or client script) and choose "Run Embedded" or can set that option to run all scripts embedded in the settings. When running embedded can either press F2 or click and drag the divider bar to see the window larger.
New projects open embedded by default so you can quickly drag in assets, continue adding more assets, and configure trials without switching windows. Use separate window launch when you want a larger run view.
Favorites
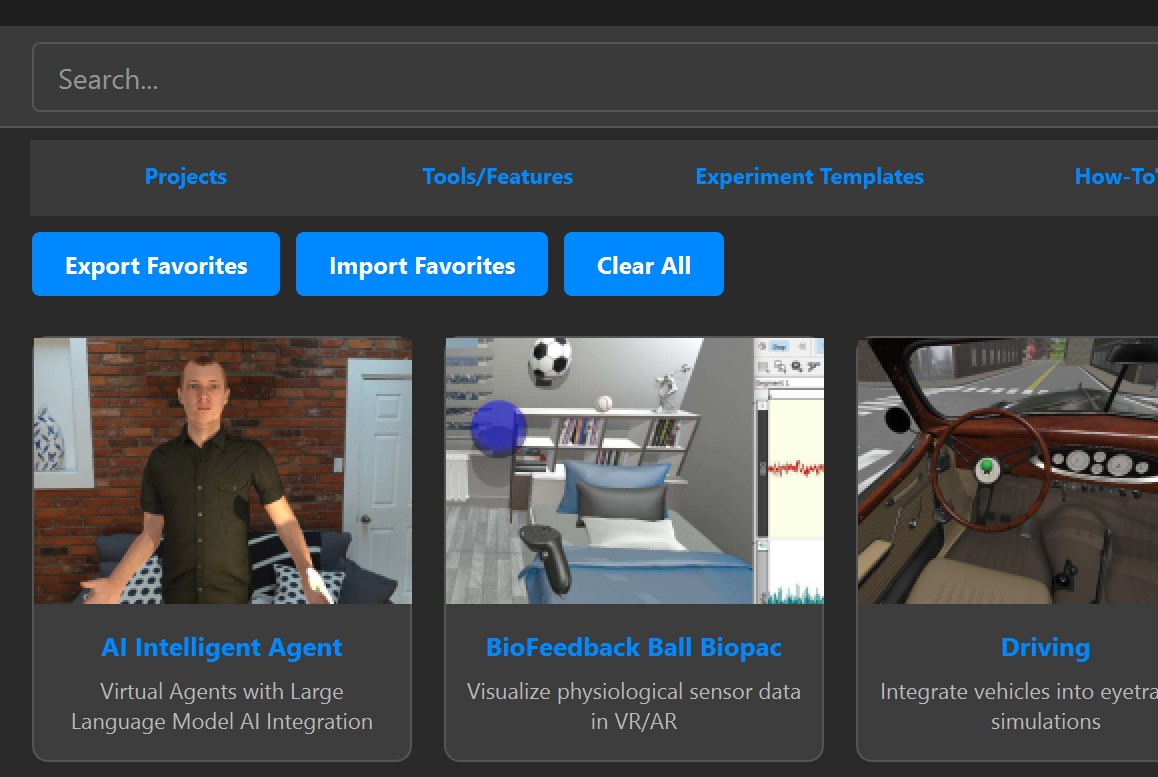
Adding & Removing Favorites
- Click the ❤ heart icon on any detail page to toggle favorite status.
- Favorites appear in the Favorites tab at the top level.
Exporting Favorites
Click "Export Favorites" in the Favorites tab to save your favorites list as a JSON file. This can be shared or backed up.
Importing Favorites
Click "Import Favorites" to load a previously exported JSON file. This replaces all current favorites with the imported list.
Clearing All Favorites
Click "Clear All" to remove all favorites (with confirmation).
Apps Tab
The Apps tab provides quick-launch tiles for frequently used applications.

Built-in Shortcuts
| App | Description |
|---|---|
| Vizard | Opens the Vizard IDE |
| Inspector | Opens the SightLab Inspector tool |
| E-Learning Lab | Opens E-Learning Lab (only if the ELearning folder exists) |
| Syncthing | Launches Syncthing (only if it is installed) — useful for synchronizing the Shared projects folder across machines |
Adding Custom Shortcuts
Click "Add Shortcut +" to add your own application:
- Enter a display name.
- Browse for the executable (.exe, .bat, or .py).
- Optionally browse for a custom icon.
Removing Custom Shortcuts
Right-click a custom shortcut tile and select "Remove Shortcut".
Multi-User Scripts
Scripts in the Multi User ExamplesScripts/ folder are automatically matched to corresponding single-user examples by folder name and appended as alternate actions with a "(Multi)" prefix. Server scripts are listed before client scripts.
Editing Metadata
Several metadata fields can be customized per-example and persist across sessions:
| What | How | Saved To |
|---|---|---|
| Category | ✏ button on detail page | overrides.json |
| Description | ✏ button on detail page | overrides.json (or _description.txt for projects) |
| Tags | ✏ button on detail page | overrides.json |
| Thumbnail | Right-click → Swap Thumbnail | overrides.json (or _thumbnail.* for projects) |
| Primary Script | Right-click script button → Set as Primary | overrides.json |
| Hidden Scripts | Right-click script button → Hide | overrides.json |
| Folder Location | 📂 Locate Folder button | overrides.json |
| Videos/ReadMe | ✏ button on Available Actions header | overrides.json |
| Favorites | ❤ heart icon | overrides.json |
| App Shortcuts | Add/Remove in Apps tab | overrides.json |
Downloadable Examples
Some examples are hosted remotely and appear with a ⬇ Download button instead of Run. When downloaded:
- Drag the zip download into the Details window
- The archive is extracted to
ExampleScripts/_downloaded/. - The example will then have full Run/Edit/Open actions.
- Downloaded examples are treated like any other local example.
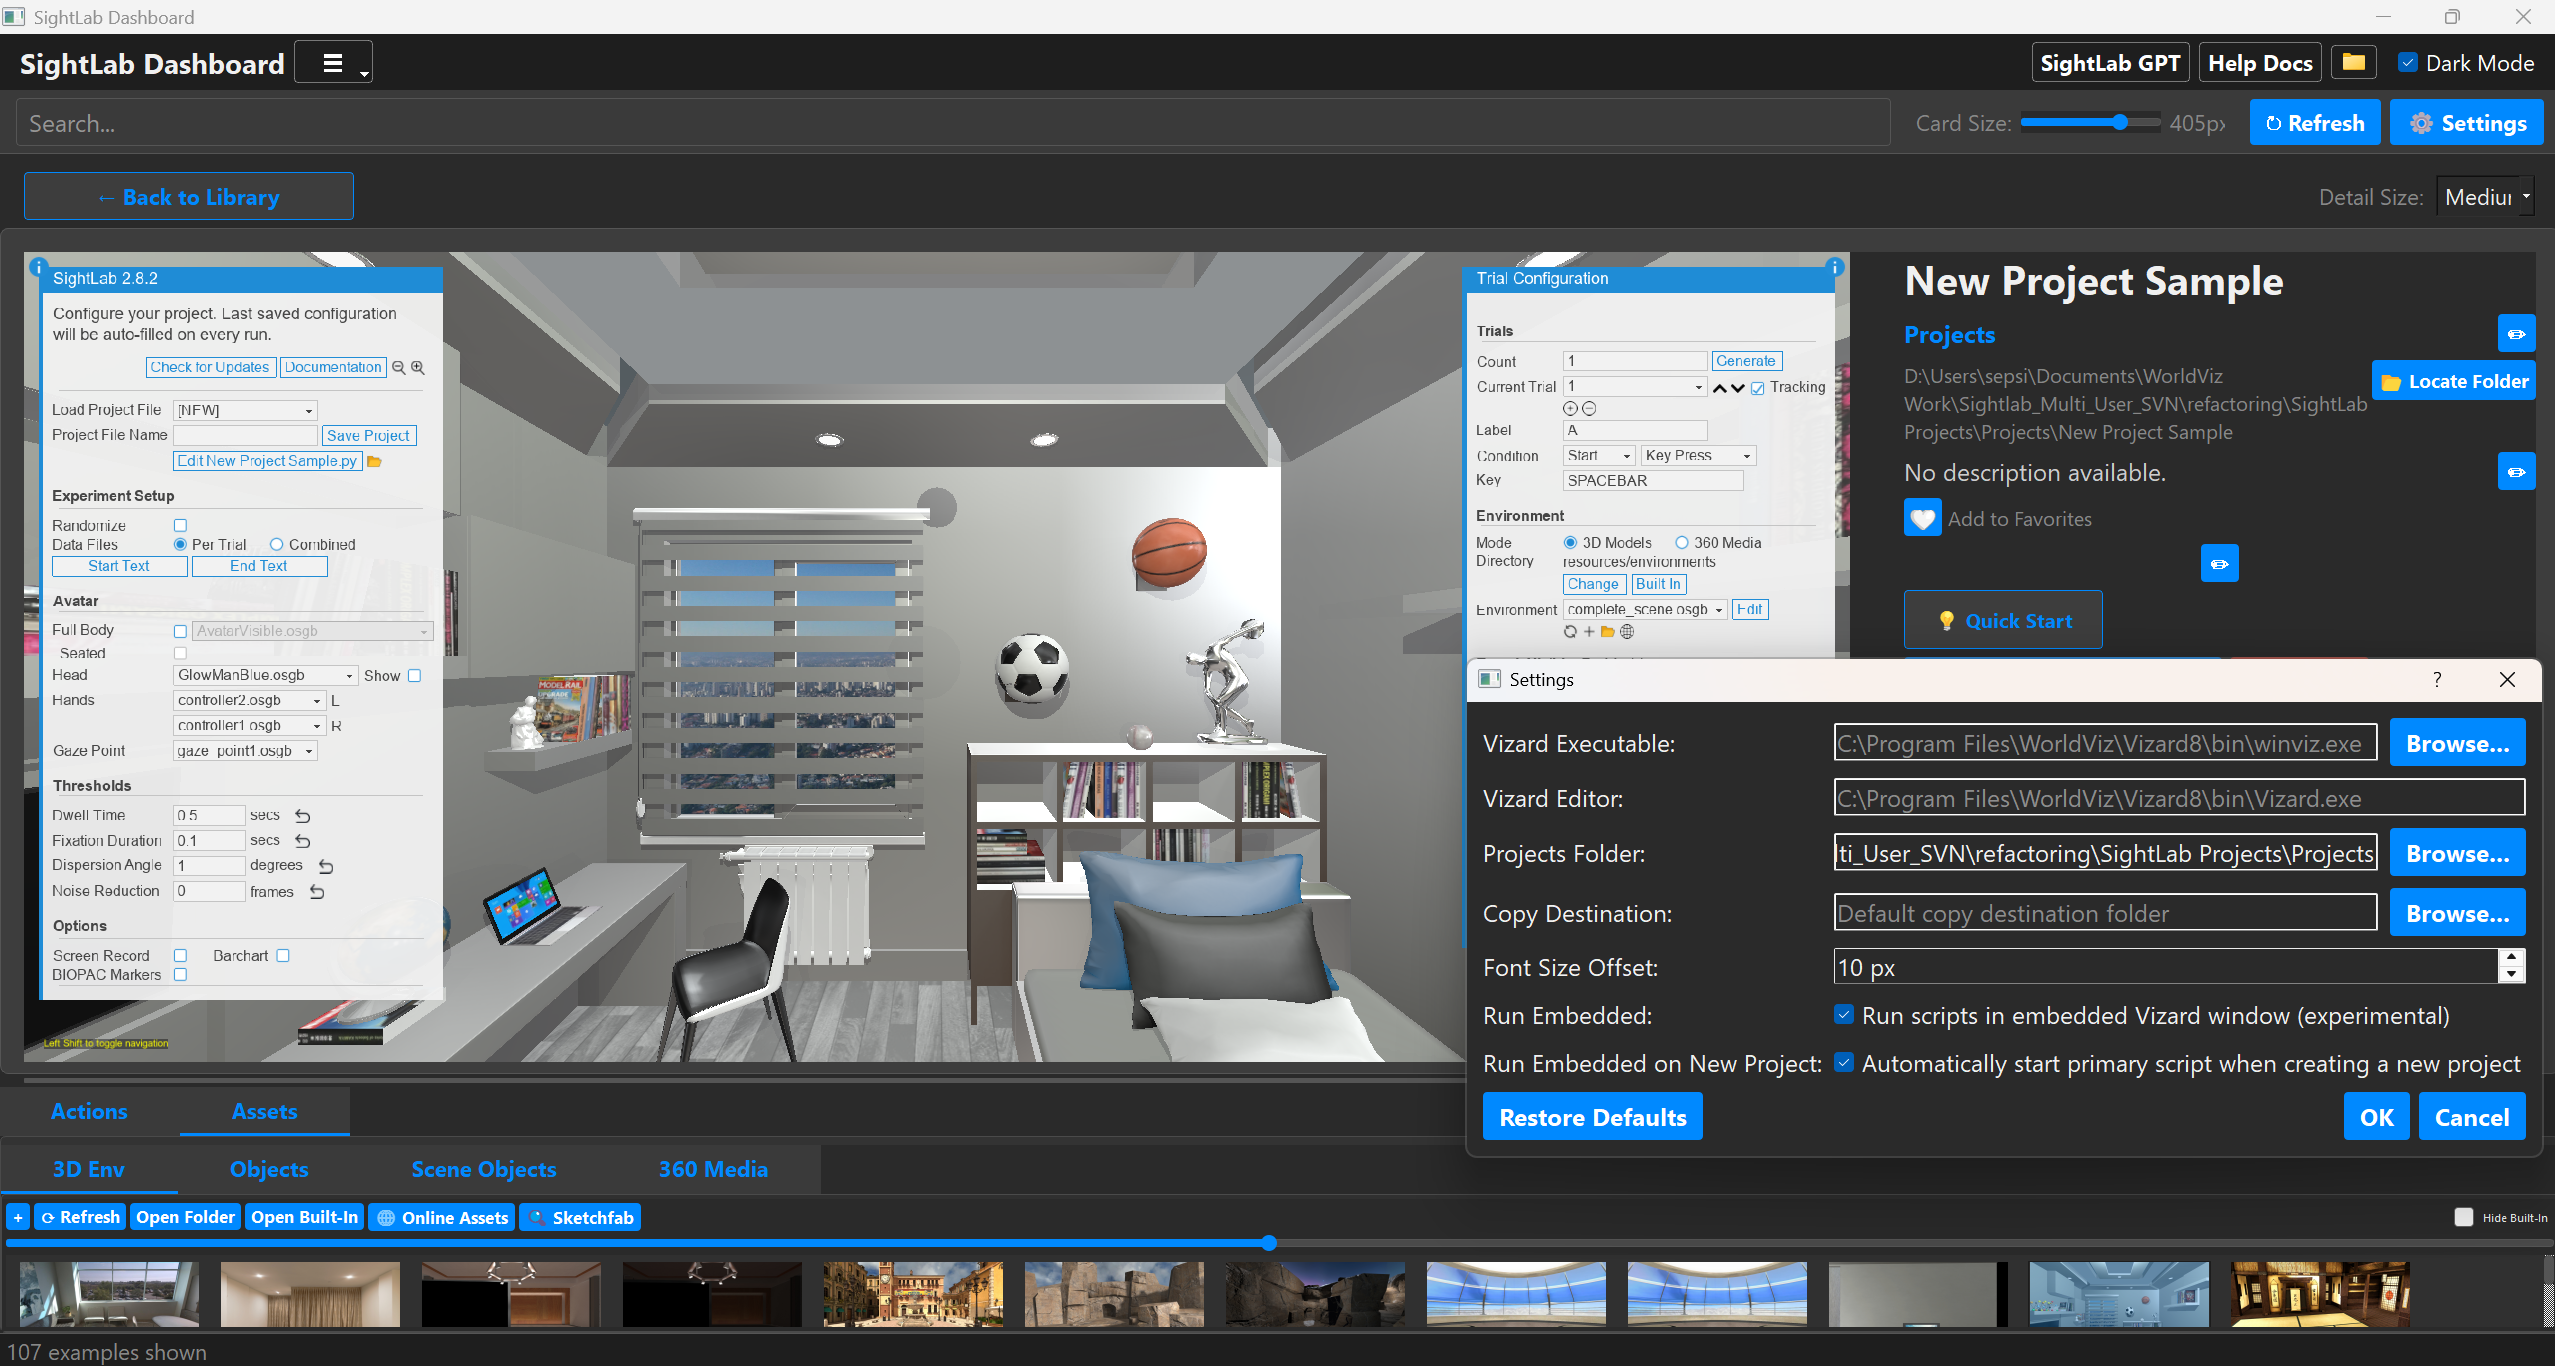
Settings
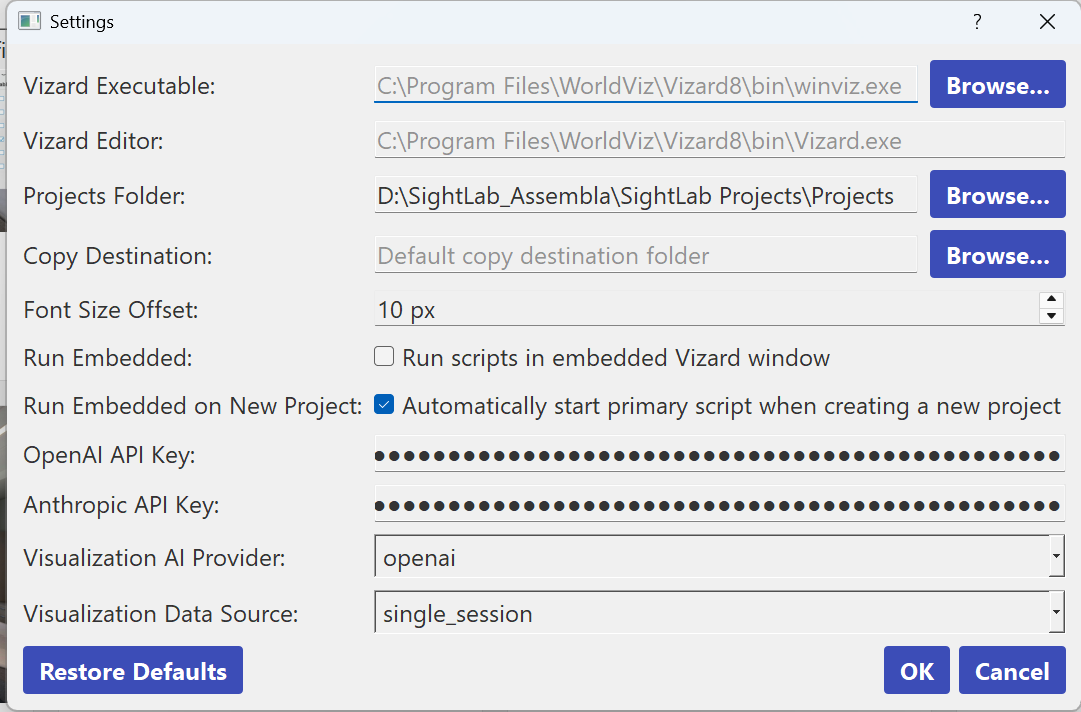
Click ⚙ Settings to configure:
| Setting | Description |
|---|---|
| Vizard Executable | Path to winviz.exe for running scripts |
| Vizard Editor | Path to Vizard.exe IDE for editing code |
| Projects Folder | Custom projects directory (empty = default Projects/ folder) |
| Copy Destination | Default folder for the "Make Copy" action |
| Font Size Offset | Increase or decrease the size of fonts |
| Run Embedded | Run Vizard and SightLab scripts directly in the Dashboard (doesn't work if running from the exe) |
| Run Embedded on New Project | Open a new project with an embedded Vizard window (checked by default) |
| Inspector Embedded | Embed Inspector inside the Dashboard when editing a 3D model (off by default, as it is not yet fully integrated) |
| OpenAI API Key | API key for OpenAI (used by Generate Visualizations when provider is set to openai). Saved to ExampleScripts/_dashboard/keys/openai_key.txt. |
| Anthropic API Key | API key for Anthropic Claude (used by Generate Visualizations when provider is set to claude). Saved to ExampleScripts/_dashboard/keys/anthropic_key.txt. |
| Visualization AI Provider | AI backend used by Generate Visualizations: gemma (local Ollama — free, no key needed), openai (OpenAI API), or claude (Anthropic Claude API). |
| Visualization Data Source | Choose if generating visualizations using a single session or all sessions |
Click Restore Defaults to reset all settings to factory values.
Changing the specific model: Each provider has a default model (
gemma3:12b,gpt-4o,claude-opus-4-5). To use a different model, opengenerate_visualizations.pyin the SightLab root and edit theDEFAULT_MODELSdictionary near the top of the file.
Adding Your Own Content
Example Scripts
Add folders to the ExampleScripts/ directory. They appear under "Uncategorized" by default — use the category editor on the detail page to assign them to a tab.
Projects
Add folders to the Projects/ directory (or your custom projects folder). They automatically appear in the Projects tab.
Script Detection
The dashboard automatically classifies Python files in each folder:
| Pattern | Classification |
|---|---|
| Named after parent folder | Primary script |
SightLab_VR.py |
Primary script |
| Contains "main" or "gui" | Primary script (ranked) |
| Contains "replay" | Replay action |
| Starts with "config" | Config action |
| Contains "readme" or "help" | ReadMe action |
| All others | Alternate scripts |