Creating a New Scene
This guide will walk you through the process of creating and setting up a scene in SightLab VR. Whether you're working with 3D models or 360 media, this will help you get started with your project. SightLab experiments can be set up with a GUI, with code, or a combination of both.
Setting Up Your Project
New Project (2.8.0 and higher)
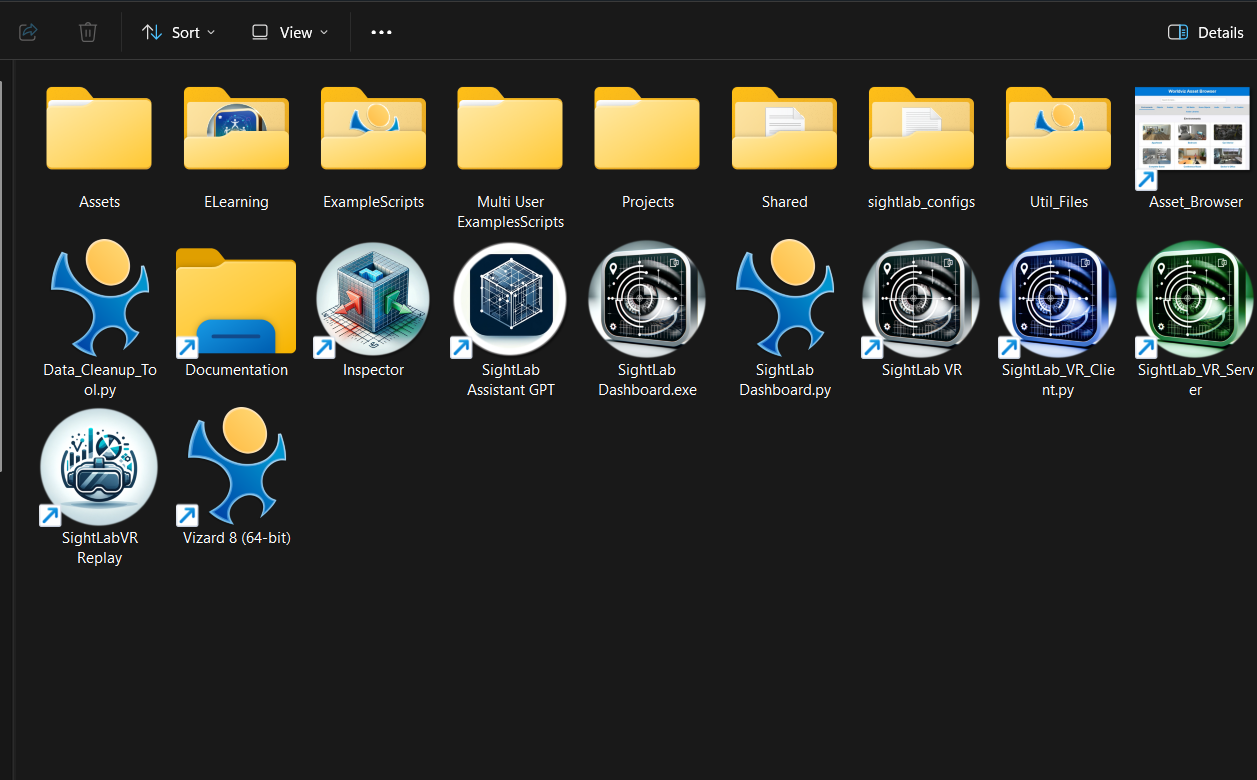
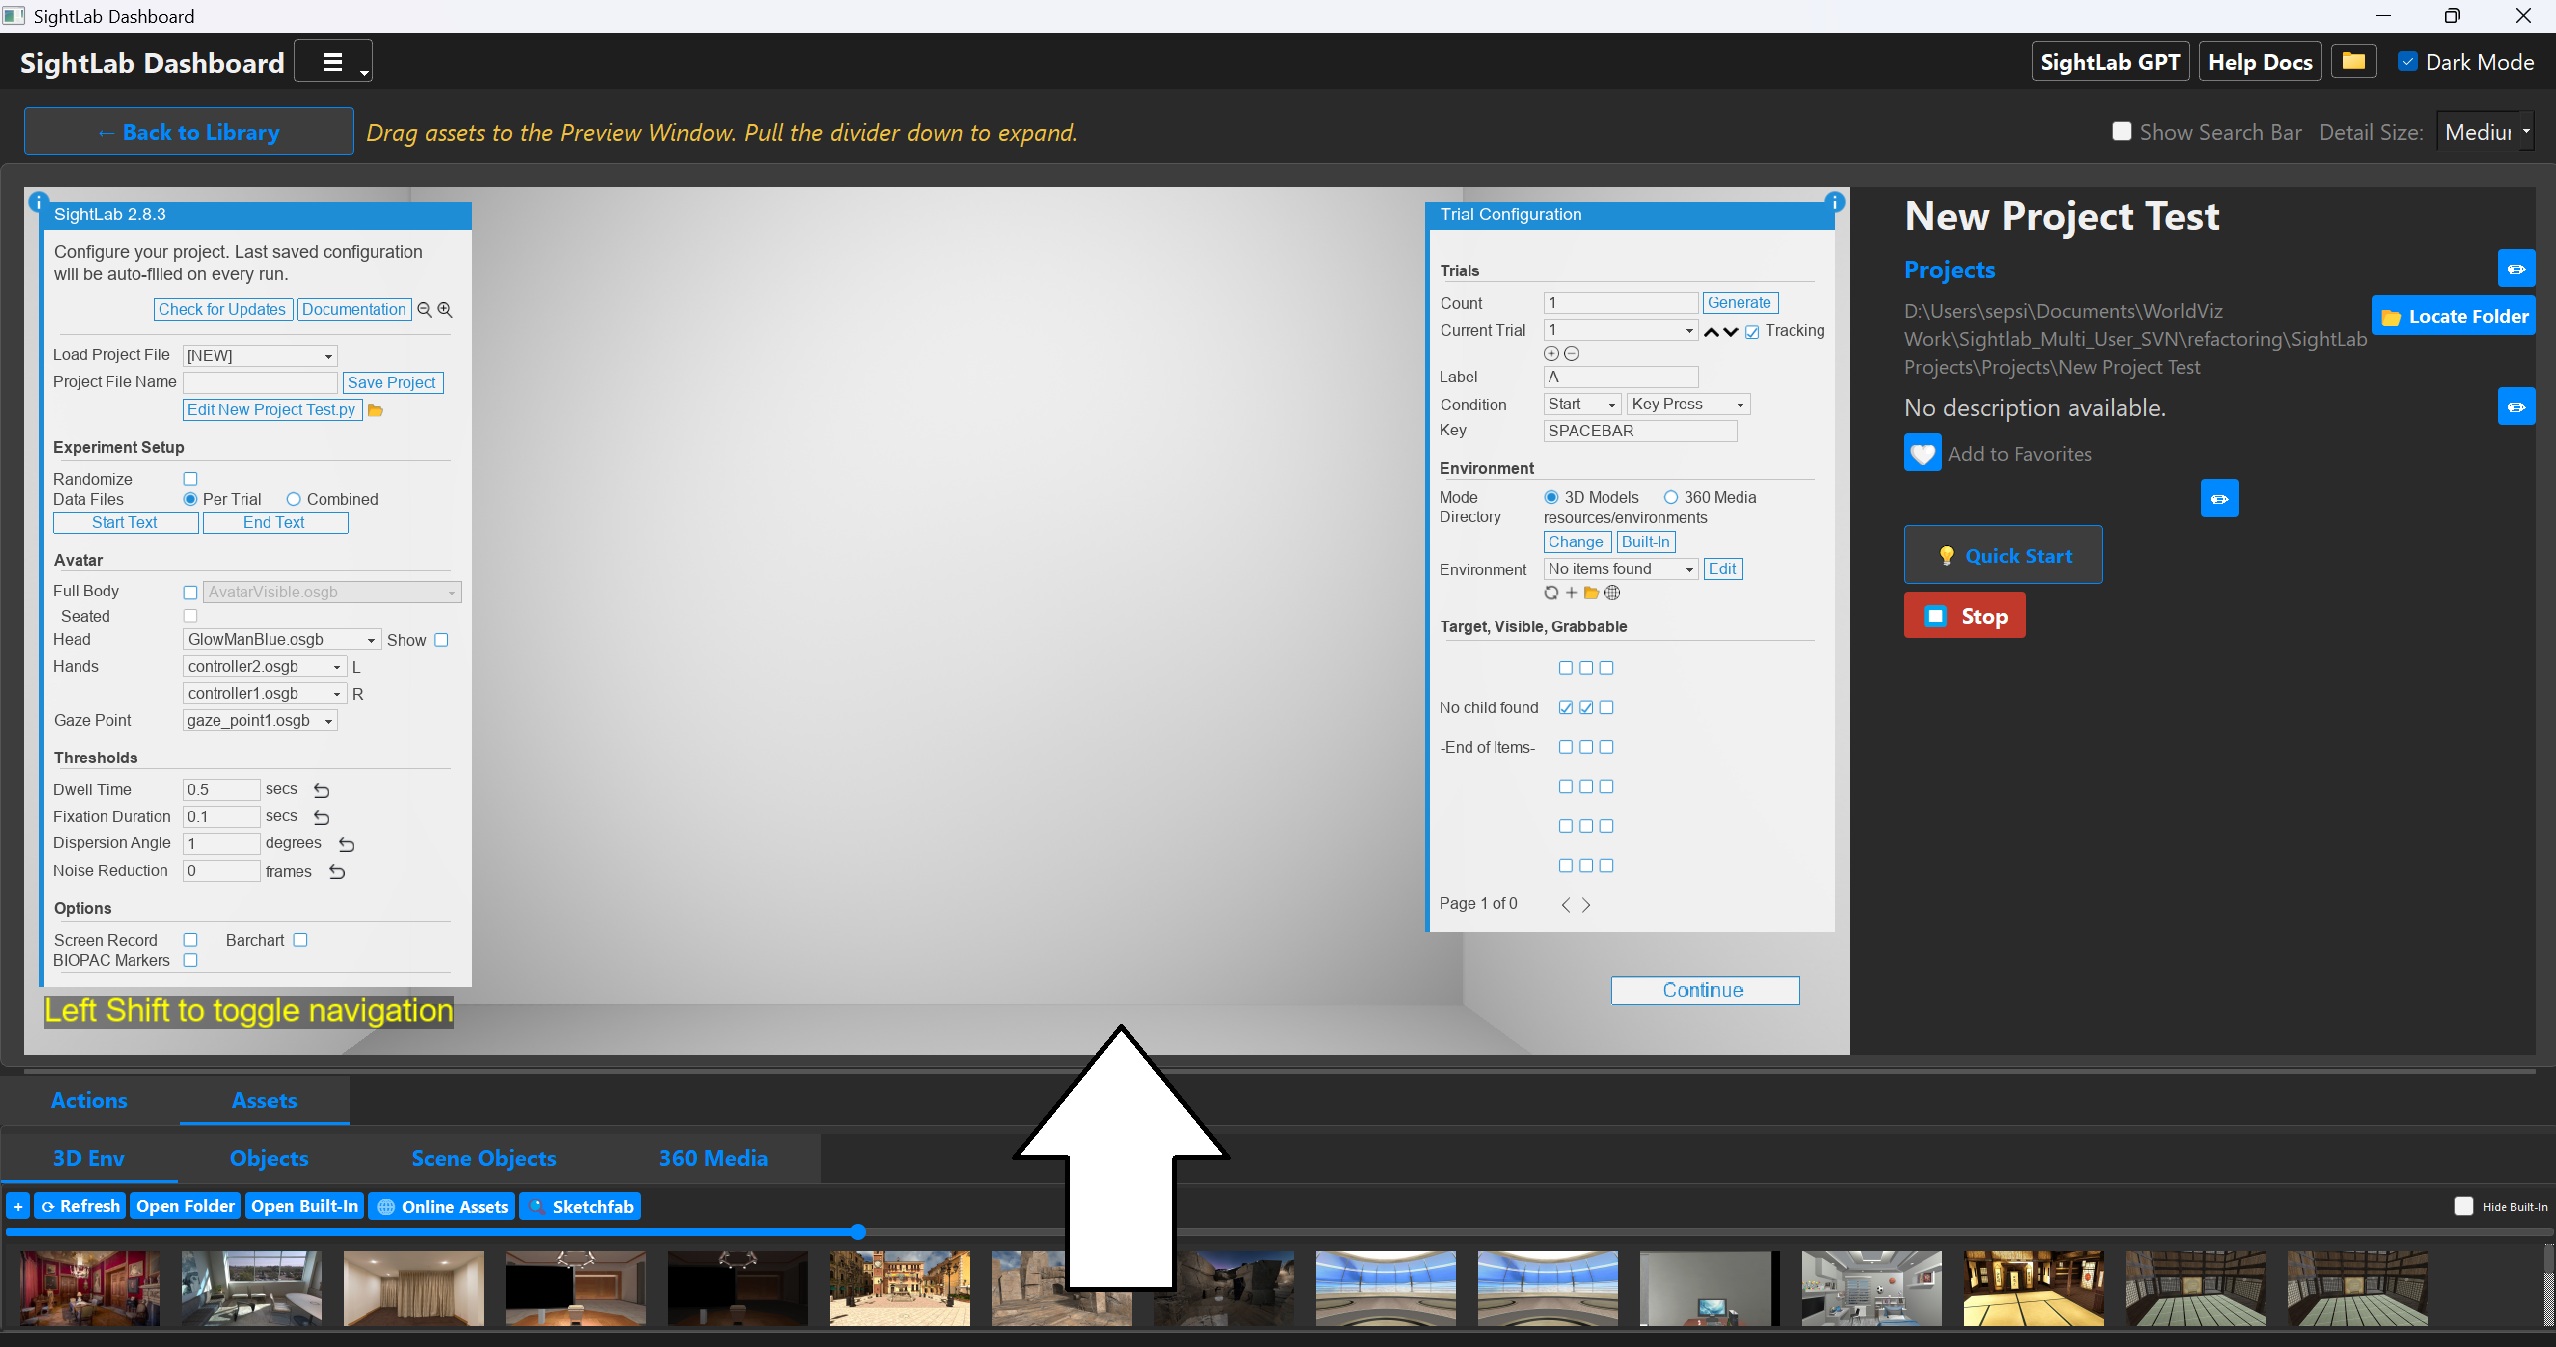
Open the dashboard either from the desktop shortcut or by double clicking on SightLab Dashboard.py
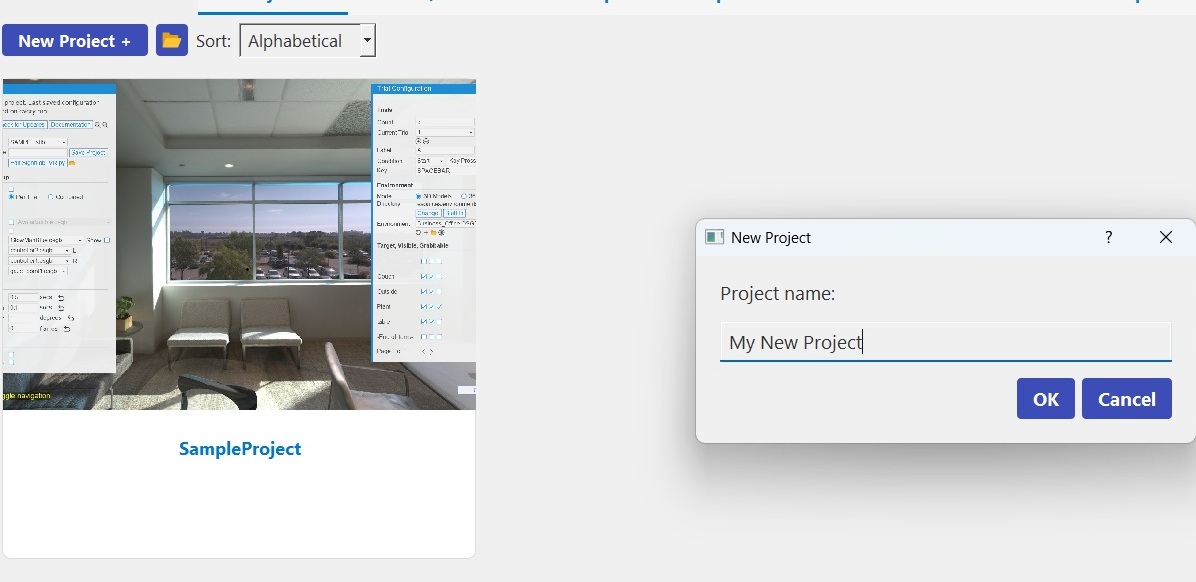
On the Projects tab in the Dashboard, click New Project and give it a name.
Add Assets
Drag and drop from the Assets library to the preview window to add 3D Models or 360 Media. See Getting 3D Models and Assets or the Asset Browser for some places to gather assets. You can also add more assets by dragging them into the Assets browser or directly searching Sketchfab.
Note: If you don't see the editor window, click "Edit and Run" — it should launch by default.
Earlier Versions (before 2.8.0)
The SightLab projects folder is by default in Documents/SightLab2
-
Create Your Project Folder (can use one of these options):
-
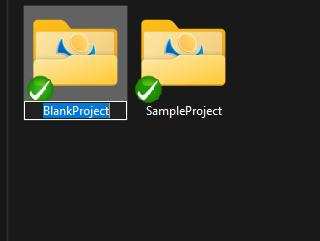
Make a copy of the "BlankProject" folder (recommended).
-
Use the SightLab SampleProject
-
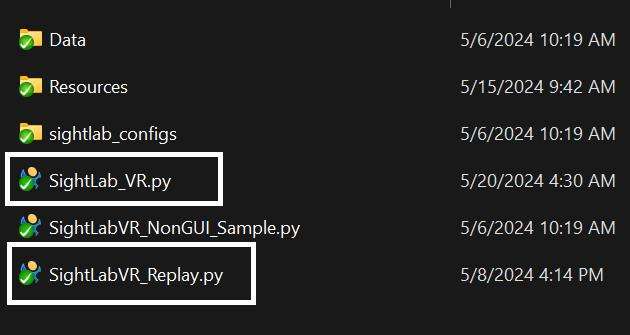
Create a new folder and copy over essential files:
- SightLab_VR.py
- SightLabVR_Replay.py
- A folder called
Resourceswith sub-folders forenvironmentsandmedia
-
Note: The sightlab_configs, Data, and recordings folders will be created automatically when you first run your session.
While you can place your project folder anywhere on your computer, the recommended location is within the SightLab projects folder.
Key Files
- SightLab_VR.py: Use this for creating and running your project and leverage the GUI (note that SightLab can also be attached to any existing Vizard or SightLab script).
- SightLabVR_Replay.py: Use this for replaying your project.
- SightLabVR_NonGUI.py: A template for creating a scene using only code
Add Resources
2.8.0 and higher
Assets can be added by dragging and dropping from the Assets library into the preview window, or by dragging files directly into the Assets browser. You can also search Sketchfab directly from the editor.
Earlier Versions
-
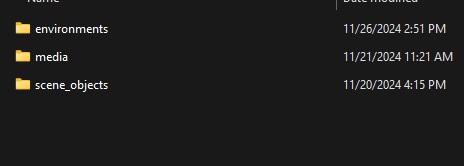
Add your 3D models to the
resources/environmentsfolder (see below for editing the models). -
Add media files to the
resources/mediafolder.
-
A good place to get started if you don't have any assets is the Worldviz Asset Browser.
-
You can also use included assets in the Sample Project or click "Built In" for using the built-in resources (note: "Built In" resources would need to be taken out of the
sightlab_resourcesfolder before they can be modified).

Using the GUI Editor
2.8.0 and higher
The editor launches automatically when you create a new project from the Dashboard. If you don't see the editor window, click Edit and Run.
-
Open the SightLab VR Script:
- Click "Run SightLab VR (or the name of your script)" or double-click
SightLab_VR.pyin your project folder - This will launch the GUI editor.
Note: If other Python editors are installed on your system, ensure that the file opens in the Vizard Python environment. If the GUI doesn't load, right-click on the script and choose "Open With - Vizard 7" or "Vizard 8" (found at
C:\Program Files\WorldViz\Vizard\<versionNumber>\bin\winviz.exe). - Click "Run SightLab VR (or the name of your script)" or double-click

Choose Assets
Choose from the dropdown list (will show the resources already added) or drag and drop into the editor. Click 360 Media if using 360 media. Press the Left Shift key to look around (WASD and XZ to move if in 3D model mode).
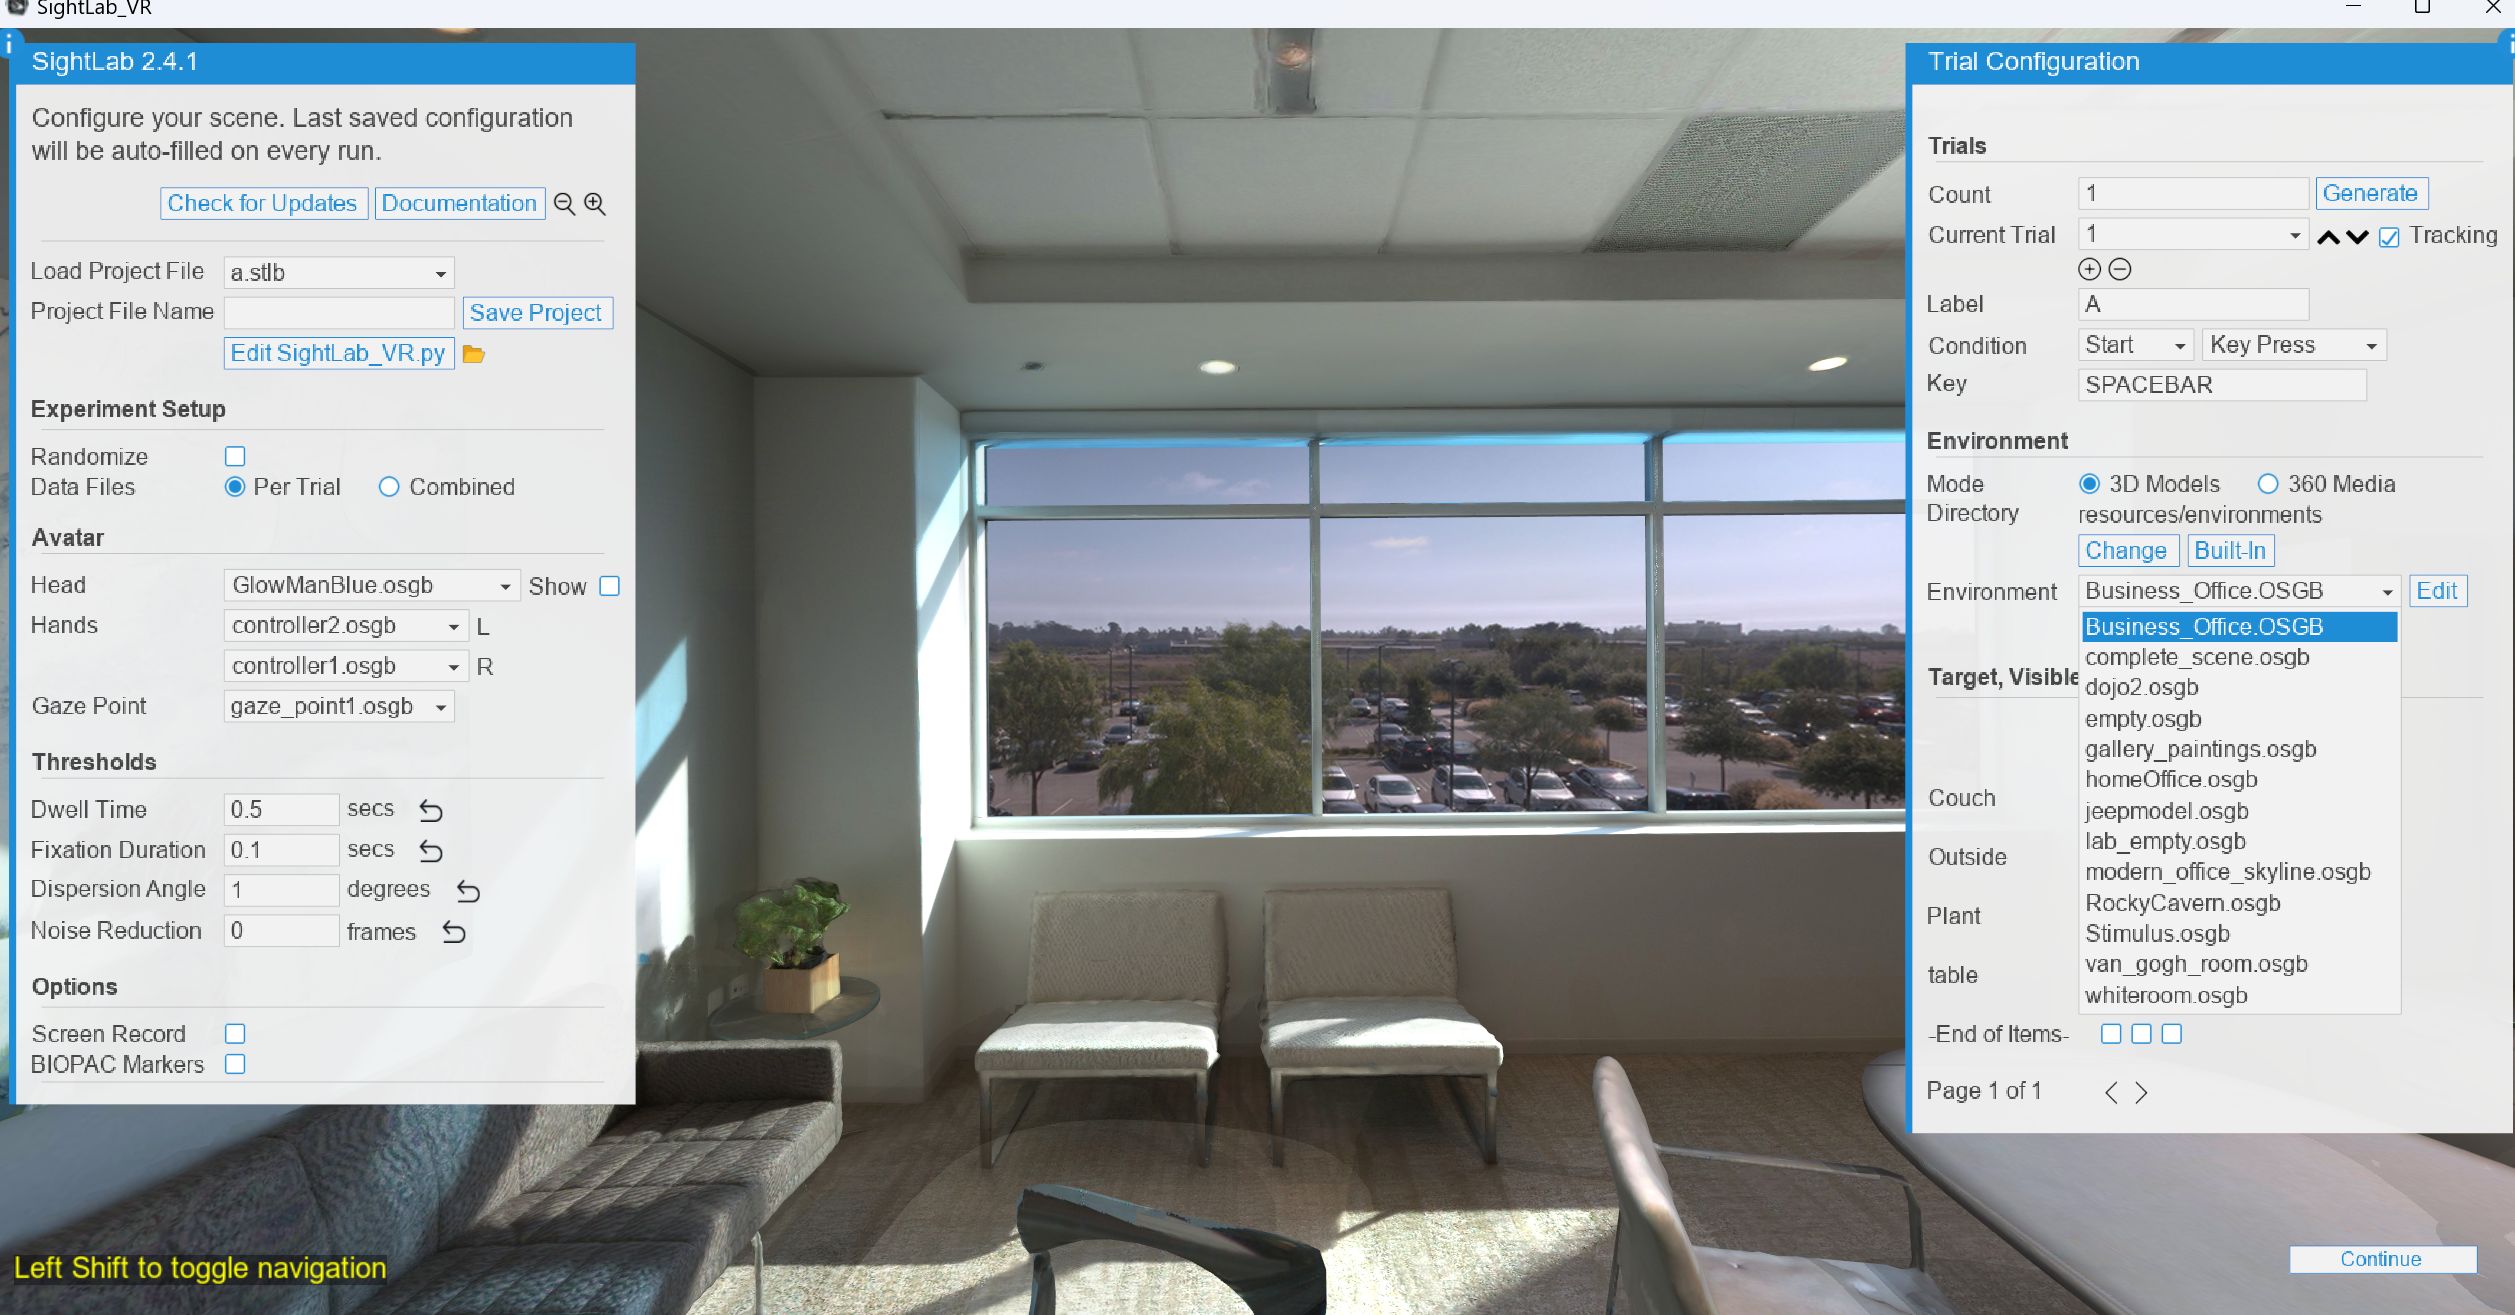
Open Scene Editor
For 3D models, set up your scene, add ROIs and objects in the scene editor "Inspector" by clicking on the Edit button.
Note: You can also run the Inspector 3D model editor directly from the Inspector shortcut in the main SightLab projects folder, or from the "Tools" menu in the Vizard IDE.
Tag Objects
Objects can be tagged for extra data collection, visibility as well as interactions, such as grabbing.
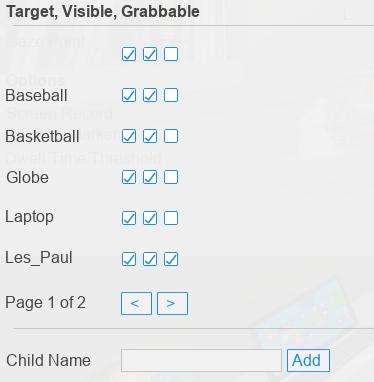
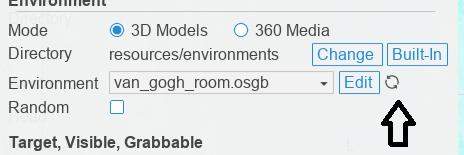
For SightLab 2.8.4 or earlier, make sure to click the Refresh button if changes were made to a 3D model or you added a new one (as of SightLab 2.8.5 this happens automatically).
Editor Controls Overview
- Left Shift: Toggle scene lock/ROI selection mode (360 media).
- . (Period)/F1: Hide/show the menu.
- Mouse: Look around.
- WASD/Arrow Keys: Move (left/right/forward/backward).
- Z/X: Move down/up (or PageUp/PageDown).
- Q/E: Rotate left/right.
- R: Reset viewpoint.
- /: Take screenshot.
- ;: Toggle mouse lock.
- ,: Toggle scene display.
- F2: Toggle fullscreen.
- F3: Toggle rendering/wireframe modes.
- F4: Show frame rate/performance metrics.
- Escape: Exit.
- Ctrl + F6: Dock/undock with code.
- Spacebar: Toggle media playback (360 media).
- 1: Select ROIs (360 media).
- IJKL: Move virtual gaze point (or use mouse).
- Alt + I: Float window and activate Vizard IDE interactive input.
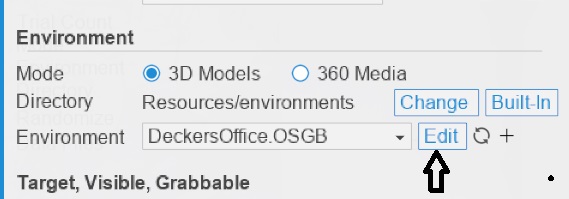
Editing Models
-
Open Models in Inspector:
-
Click Edit in the Experiment Options editor to open a model in Inspector.
- Use Inspector to add objects, tag ROIs, set starting points, adjust lighting, etc.
-
For more on Inspector see this page
-
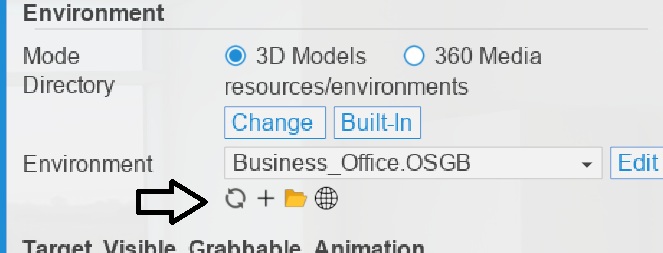
Add New Models:
-
Click + to load new models into your project.
Inspector Controls
- Left Mouse Drag: Orbit view.
- Shift + Left Click: Move view to clicked surface.
- Right Mouse Drag: Pan.
- Scroll Wheel: Zoom.
- Z: Zoom to selected node.
For more on Inspector, see Vizard Documentation.
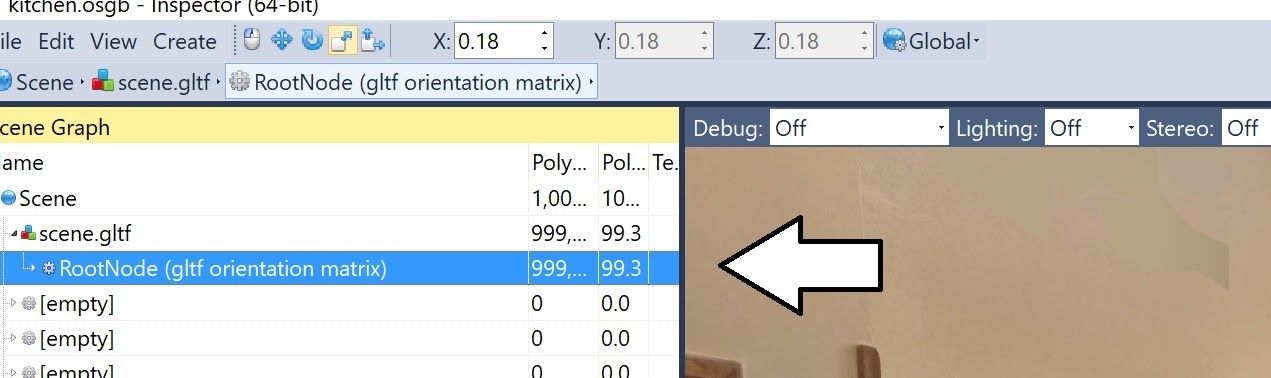
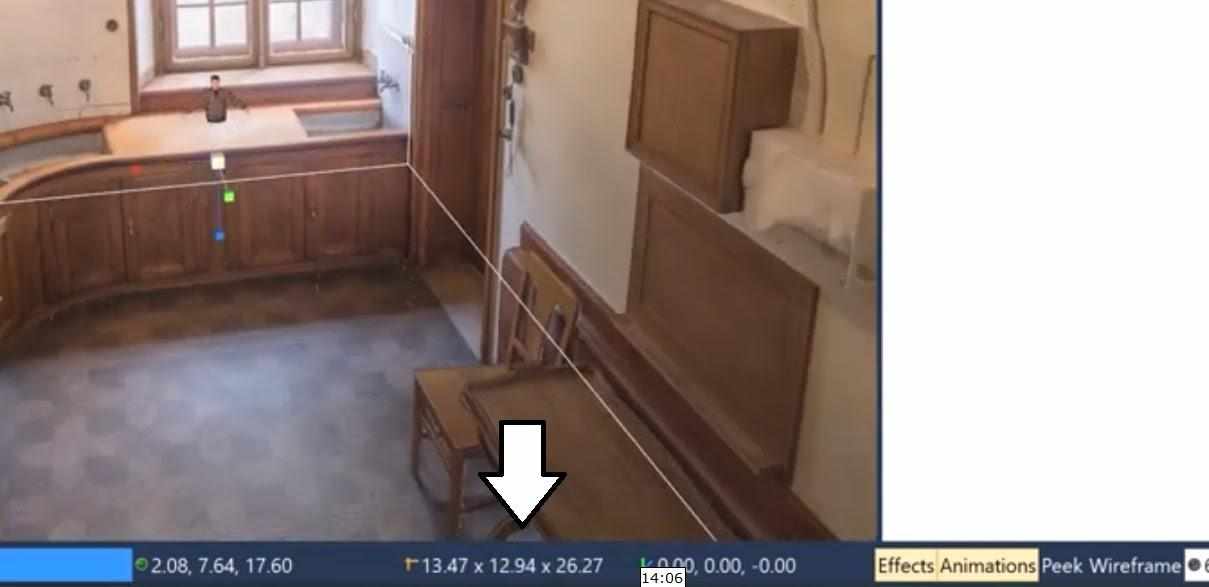
Environment Size Check
- Click the root node in the scene graph (top left).
- View the size in meters (bottom right).
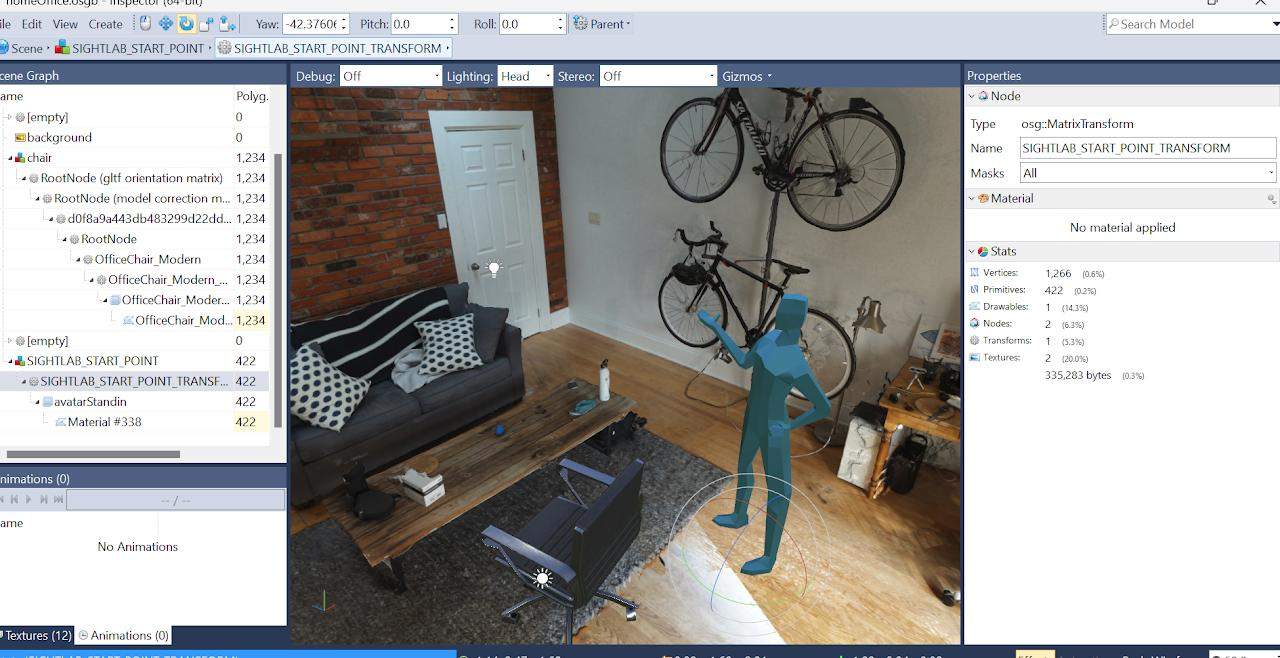
Setting the Starting Point
- Add the SIGHTLAB_STARTING_POINT:
- Use
File > Addto include the starting point. - Locate it in
BlankProject\Resources\scene_objectsorC:\Program Files\WorldViz\Sightlab2\resources\sightlab_resources\objects.
Or find shortcut in: Documents\SightLab2\Util_Files\SightLab_Resources.
Transforming Objects
- Move: Reposition objects.
- Scale: Resize objects.
- Rotate: Change orientation.
Adjust the participant's starting position by moving/rotating the SIGHTLAB_START_POINT.

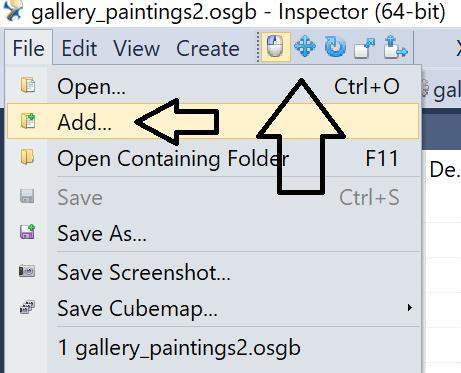
Adding Objects of Interest
- Add Objects:
- Use
File > Addto include objects. - Position and scale objects with transform tools.
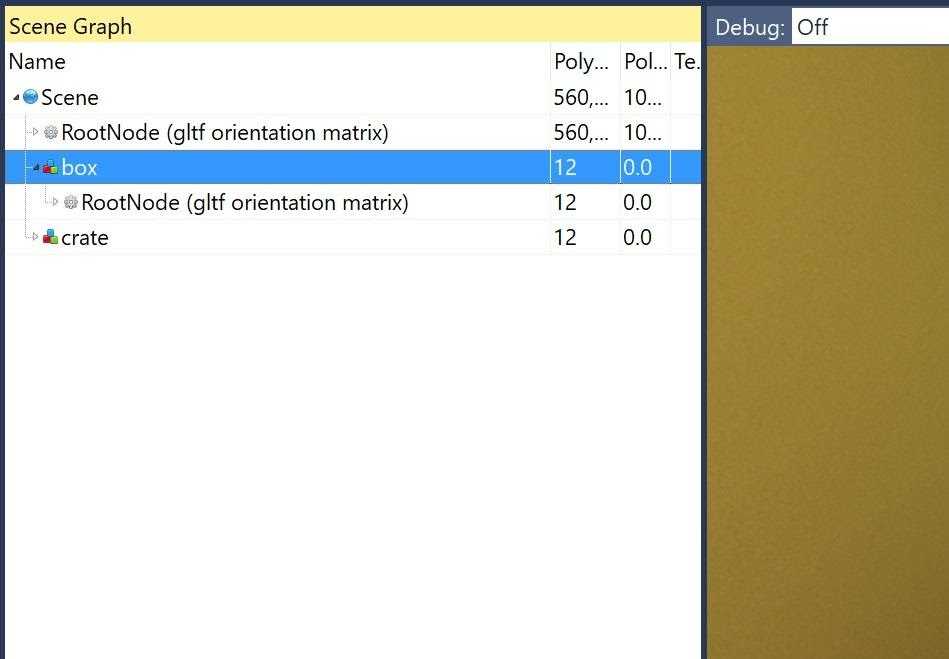
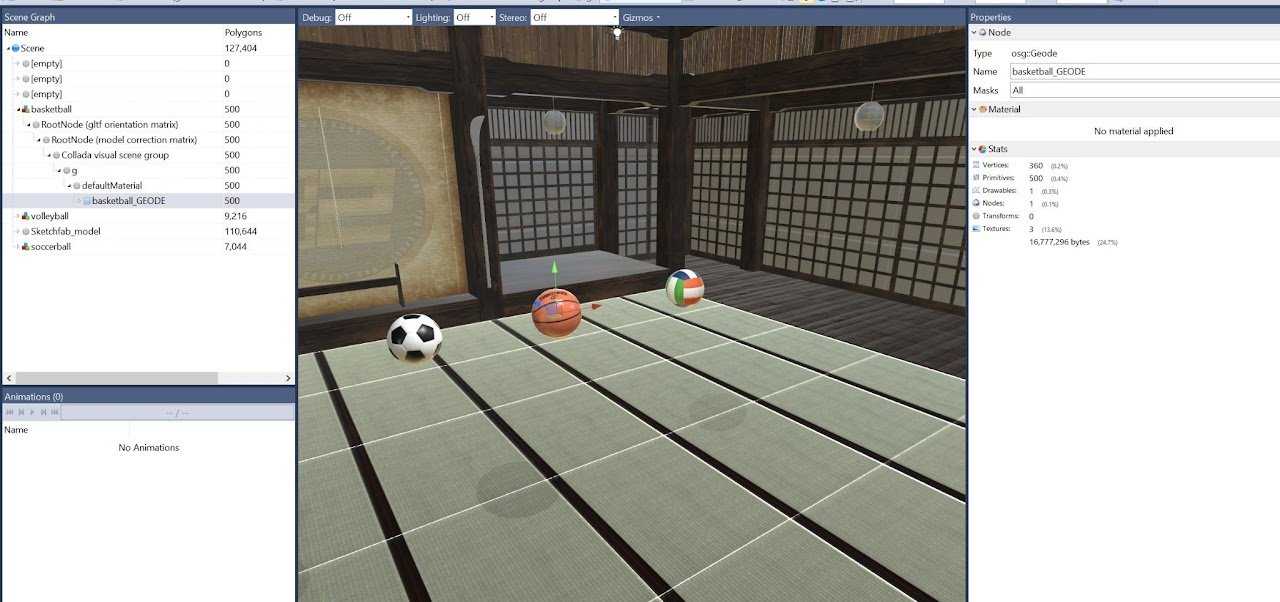
Understanding Nodes
- View and manage nodes in the scene graph (left panel).
- Group Nodes (red, blue, green) are essential for data collection.
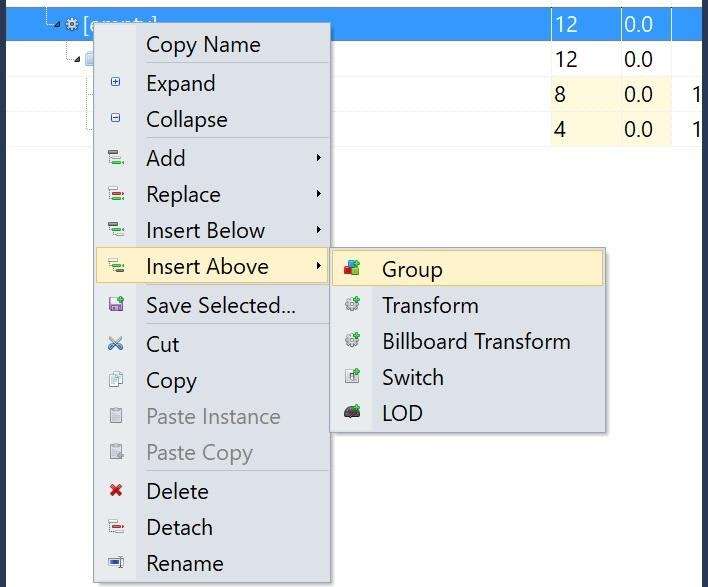
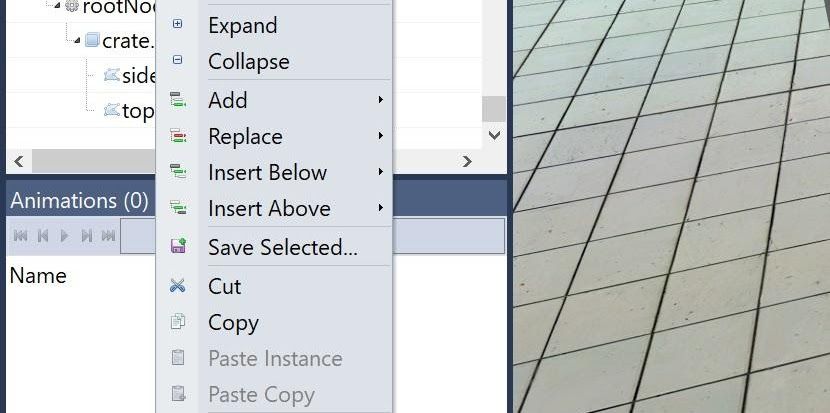
Creating Group Nodes
- Right-click on a node > Insert Above - Group for data collection.
- Add transform nodes for positioning objects (right-click > Insert Above - Transform).
- Note: Make sure to not have any other nodes in the scene with that same name, or they may not show up for tagging.
Renaming Objects
- Right-click on the group node > Rename.
- Enter a unique name. Check existing names using Search.
Tip: Use "_env" in the name to automatically exclude an object from data collection.
Adding Regions of Interest (ROIs) to 3D Scenes
Adding ROI Objects
- Add ROIs:
- Use
File > Addand selectRegionOfInterest.osgbfromscene_objectsor the resources folder.
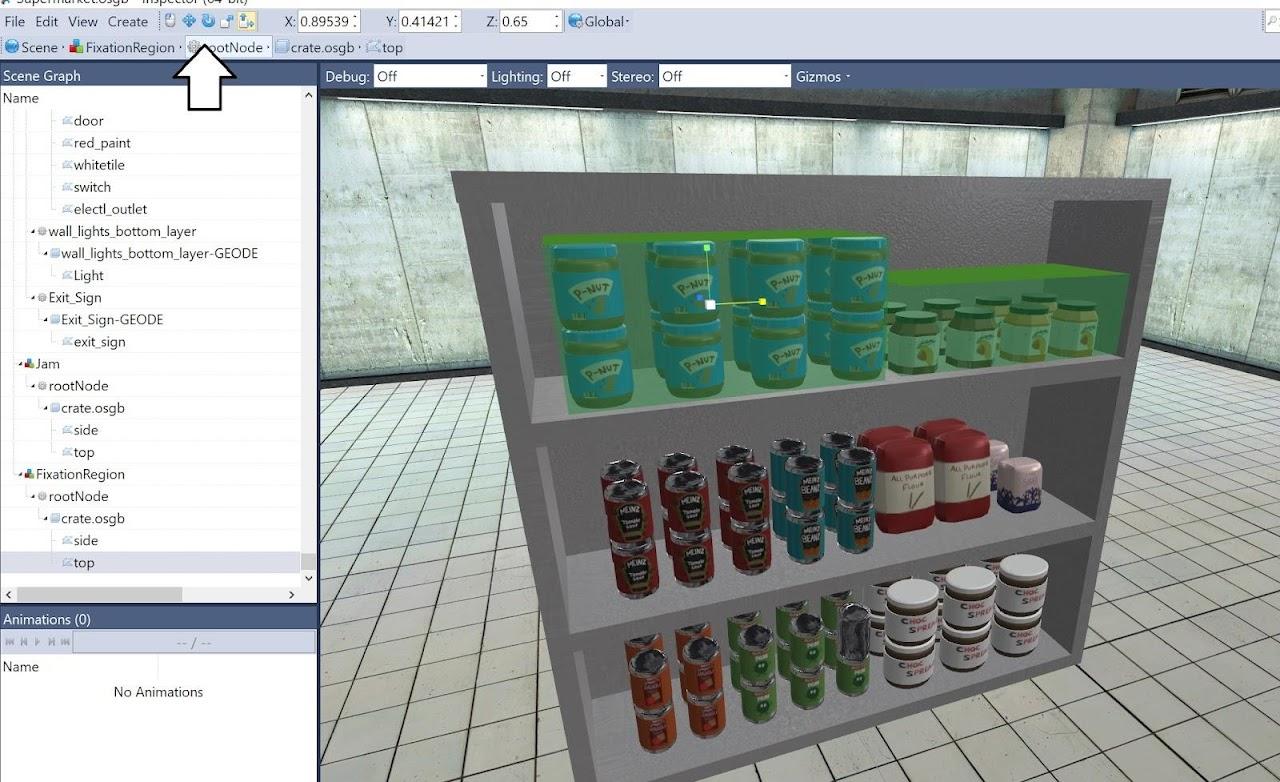
Positioning ROIs
- Select rootNode under FixationRegion.
- Use transform tools to adjust position, size, and orientation.
Naming ROIs
- Right-click the region in the scene graph > Rename.
- Name the region (e.g., "PeanutButter").
Creating Multiple ROIs
- Hold Shift and move an ROI to duplicate.
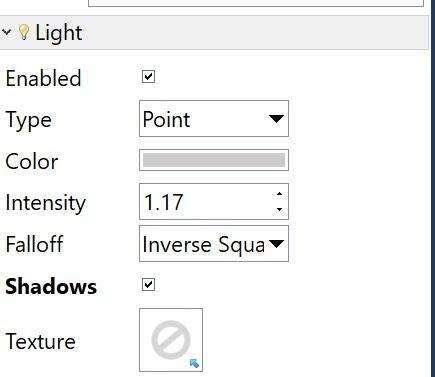
- Add lights, backgrounds, etc., via
Create > Light.
Saving Changes
- File > Save your work in Inspector.
- Refresh in SightLab to apply changes.
Working with 360 Media
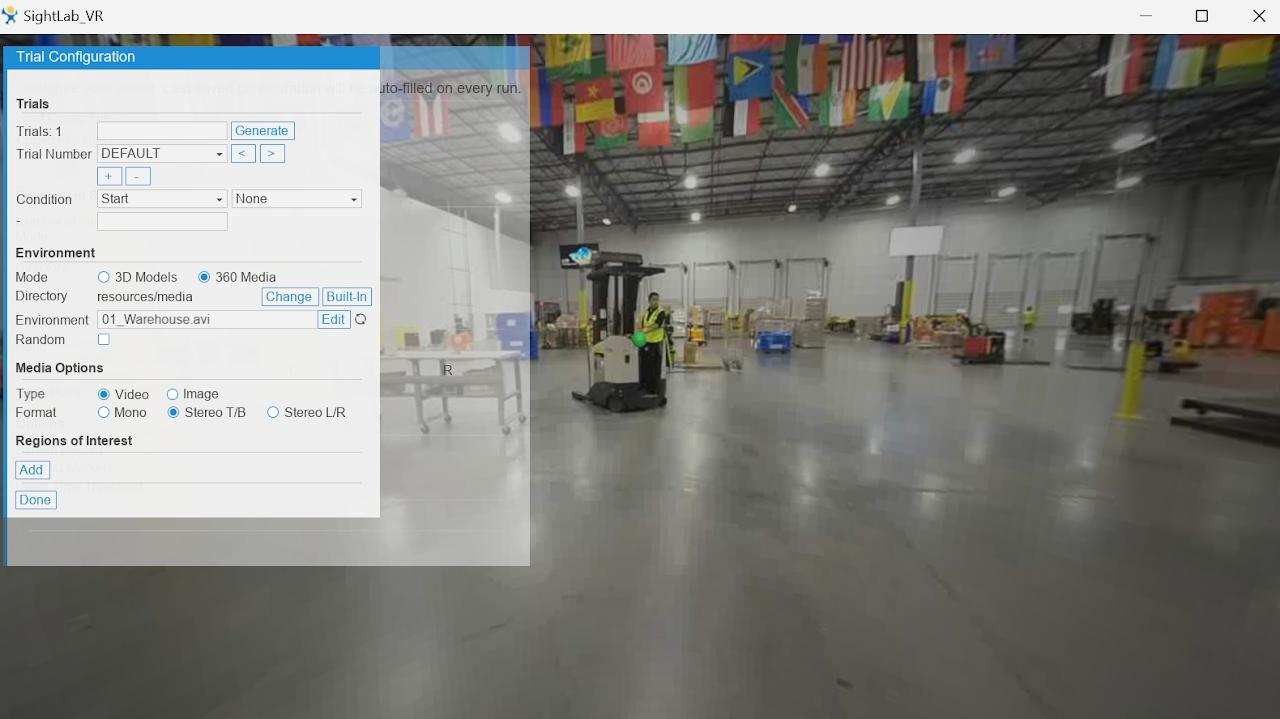
Switching to 360 Media Mode
- Select 360 Media in the Experiment Options editor.
Selecting Media
- View media in the
resources/mediafolder. - Use Change to switch directories.
- Use Built-In for default 360 media.
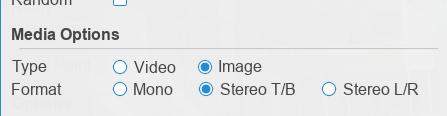
Media Options
- Choose media type (video/image).
- Select stereo or mono format.
Adding ROIs to 360 Media
- Press Add or Left Shift to enter ROI mode.
Tip: Press ; to lock the mouse cursor.
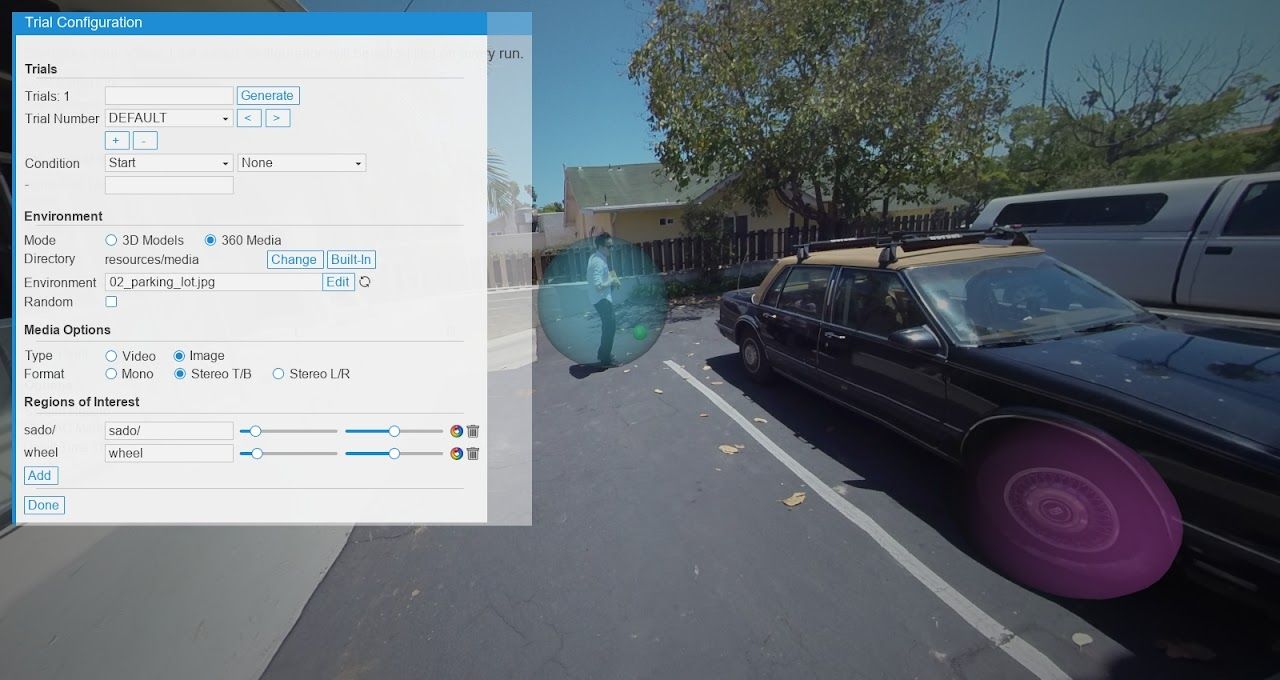
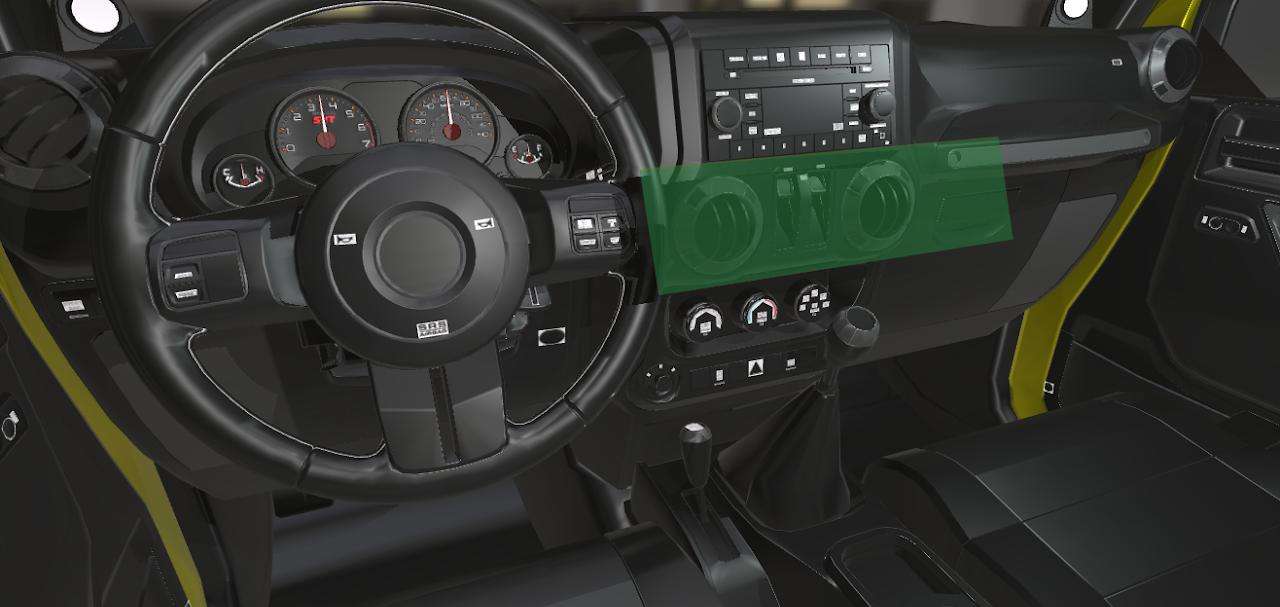
Placing and Customizing ROIs
- Move the virtual gaze point and press 1 to set ROIs.
-
Customize region name, scale, opacity, and color.
-
Use the i,j,k,l,u & o keys to move the region or fgh and Shift FGH to scale in x,y or z (use the slider to scale in )
Tip: Lower opacity to hide ROIs during the experiment.
Refer to this YouTube Tutorial for more information.
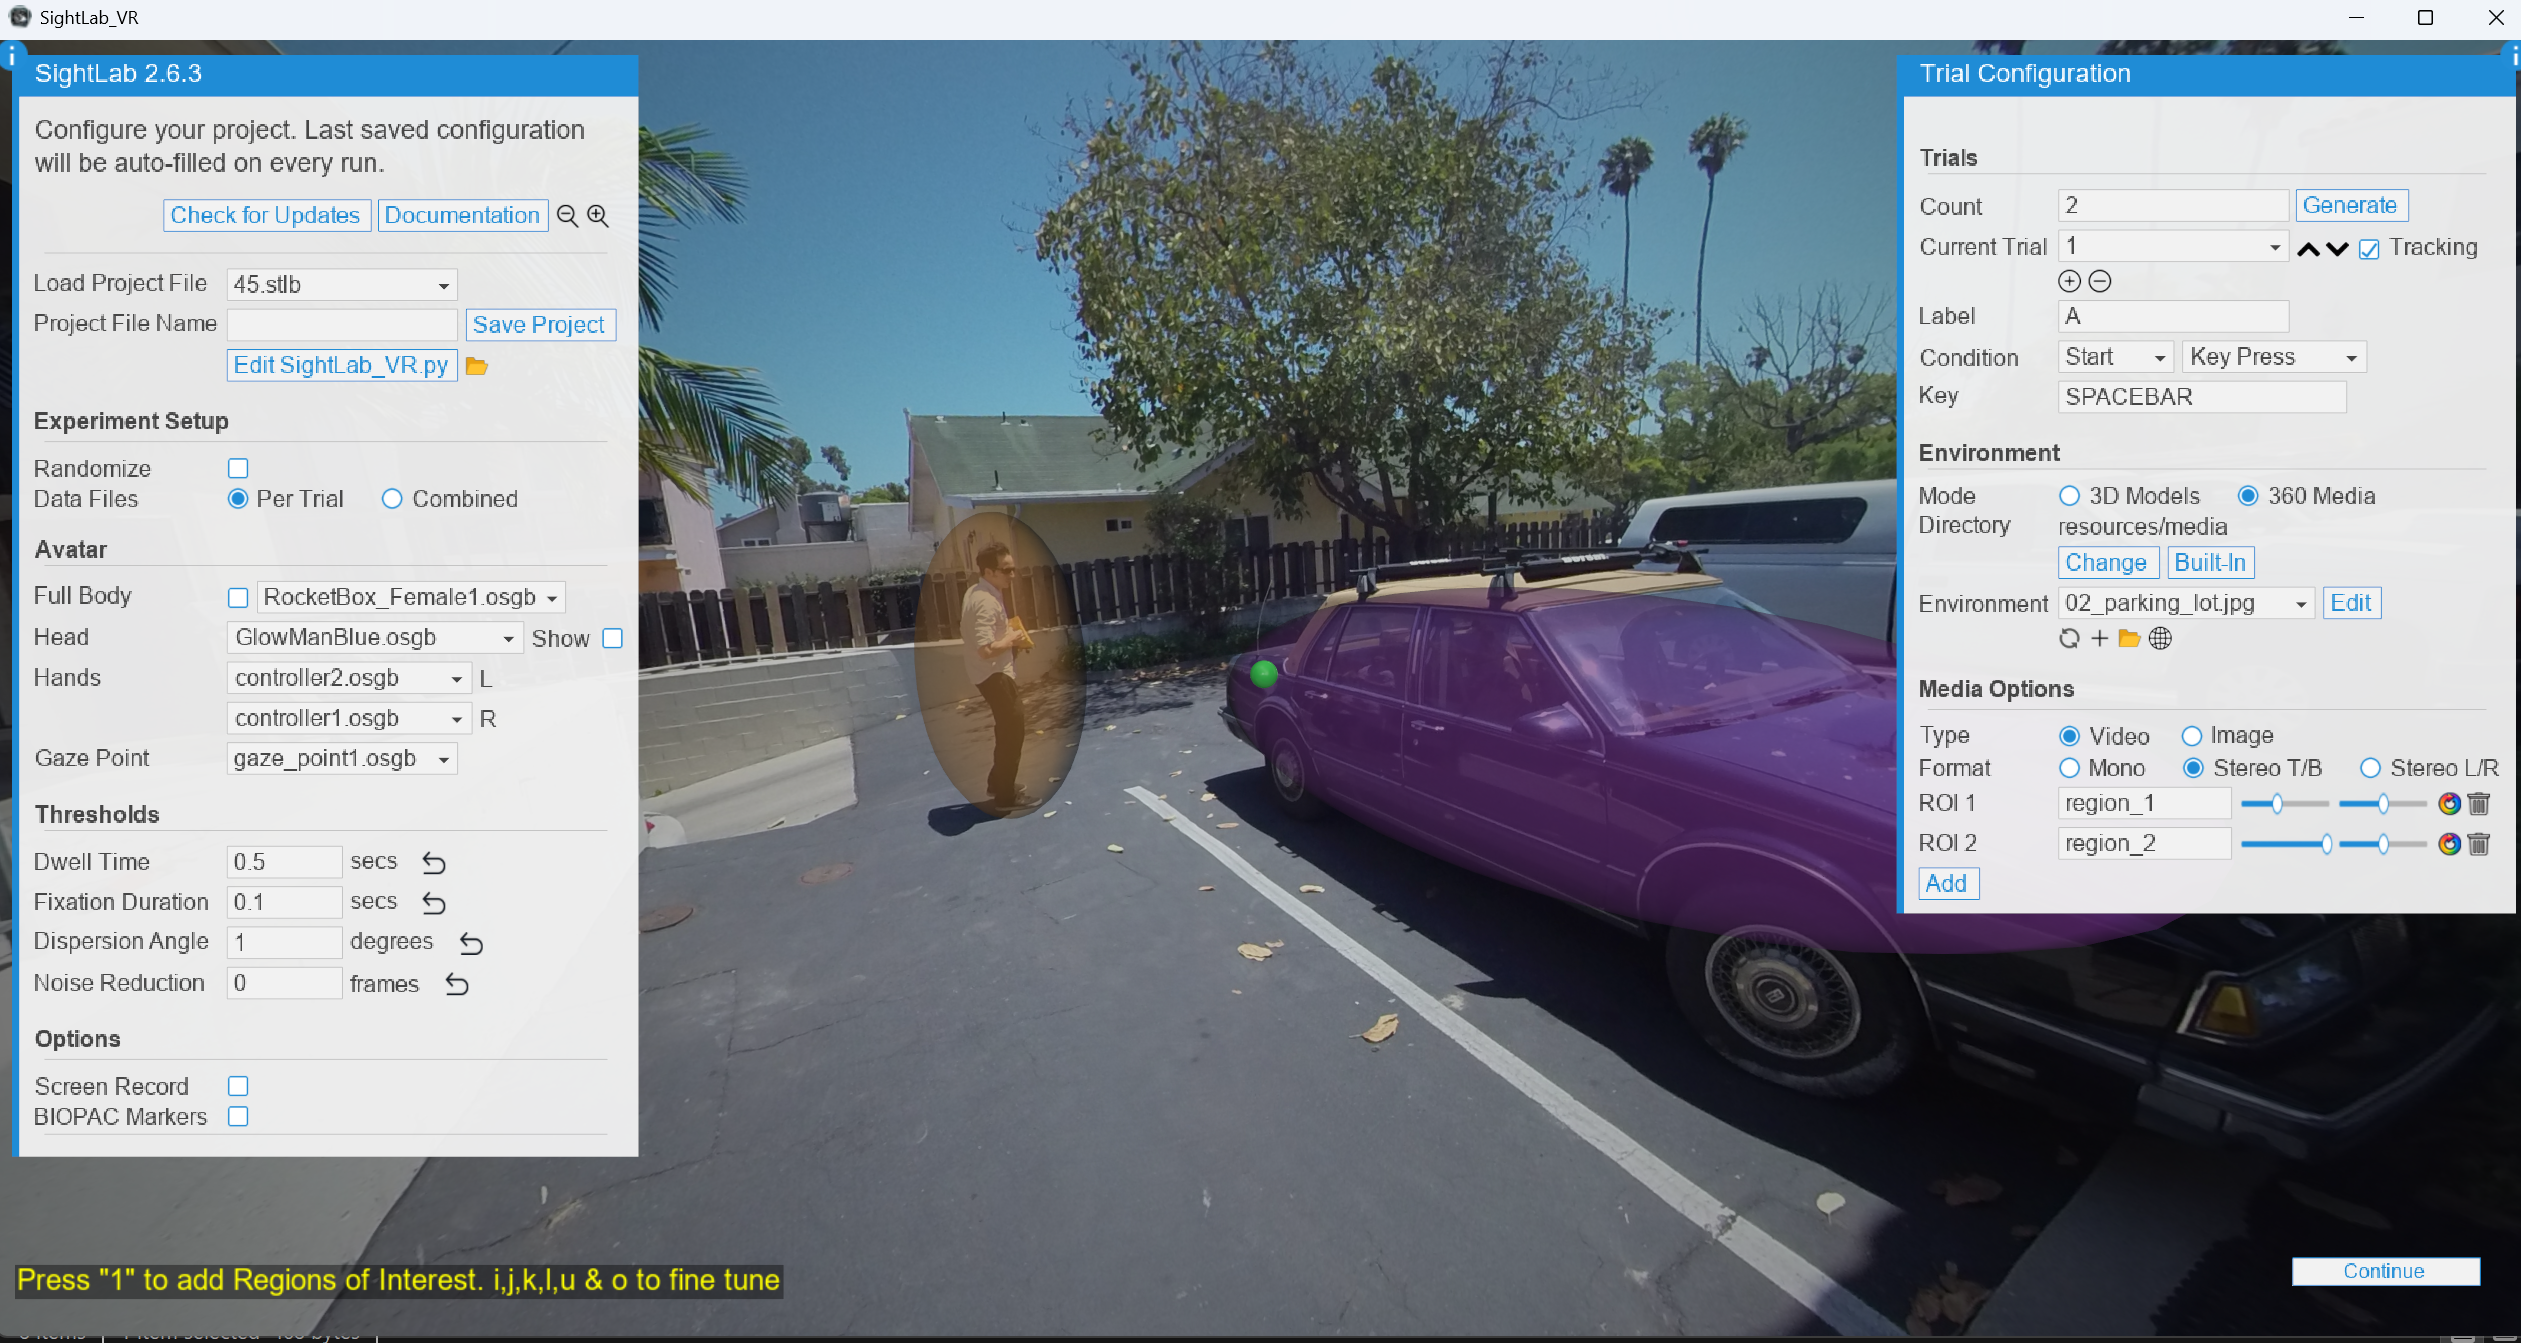
Configuring Trials
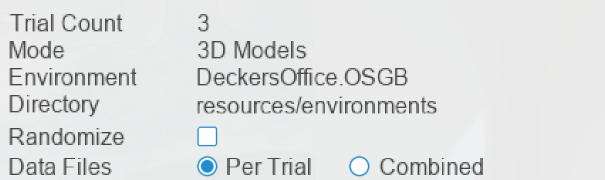
- Generate Trials: Enter a count and click Generate.
- Current Trial: Use the dropdown to edit individual trials.
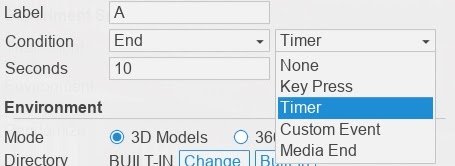
Trial Parameters
- Label: Enter trial-specific labels.
- Start/End Conditions:
- Key/button press
- Timer
- Custom Event
- Media end
- Gaze Event (specify object name)
- None (specified in code)
Finalizing Your Project
- Name your project.
- Click Save Config.
- Use Randomize to randomize the trial order.
- Choose combined or per-trial data file saving.
Note: For advanced randomization, use the code.
Thresholds and Options
- Dwell Time Threshold: Default 500ms (modifiable).
- Fixation Duration: Default 100ms.
- Dispersion Angle: Default 1 degree.
- Noise Reduction: Adjust frame averaging.
Options
- Screen Record: Records session videos.
- BIOPAC Markers: Synchronize with Biopac's AcqKnowledge.
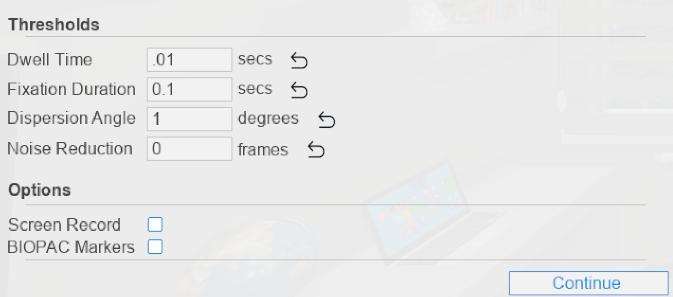
Running the Project
Click Continue to test your project. See "Running a Session Single User" or "Running a Session Multi-User"
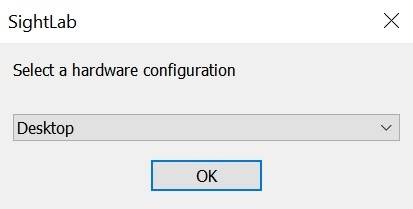
Choose Your Hardware Mode:
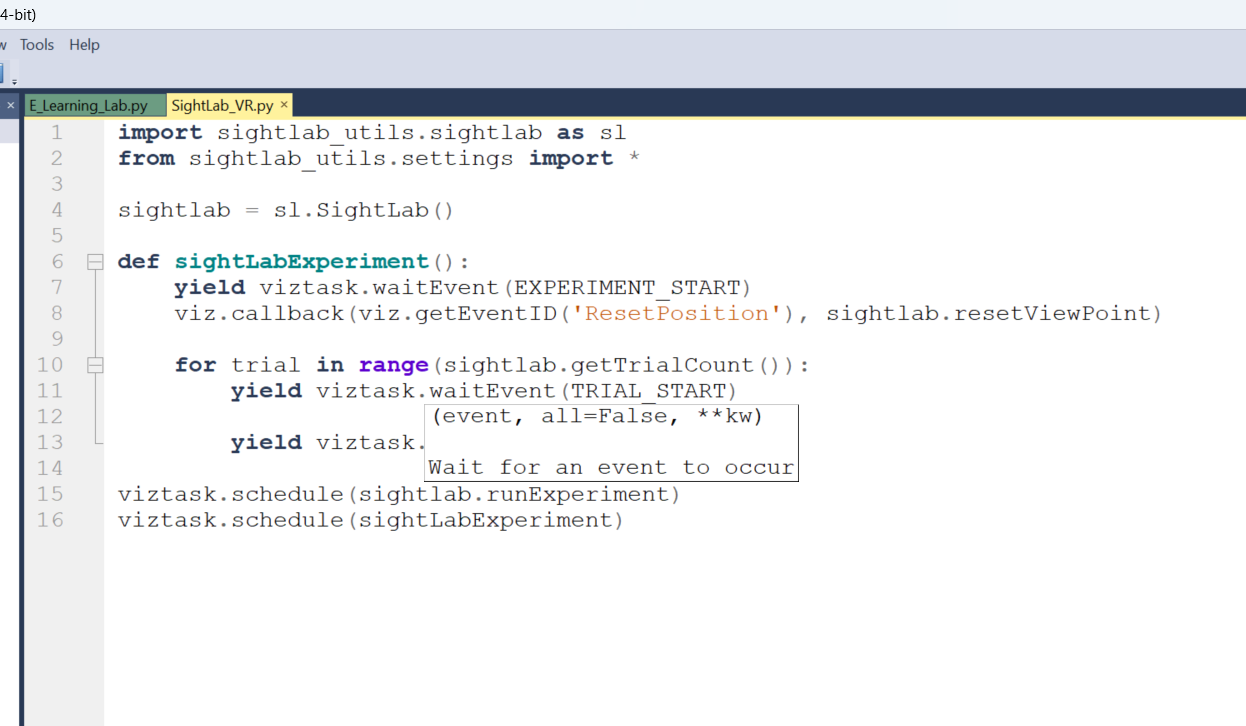
Editing with Code
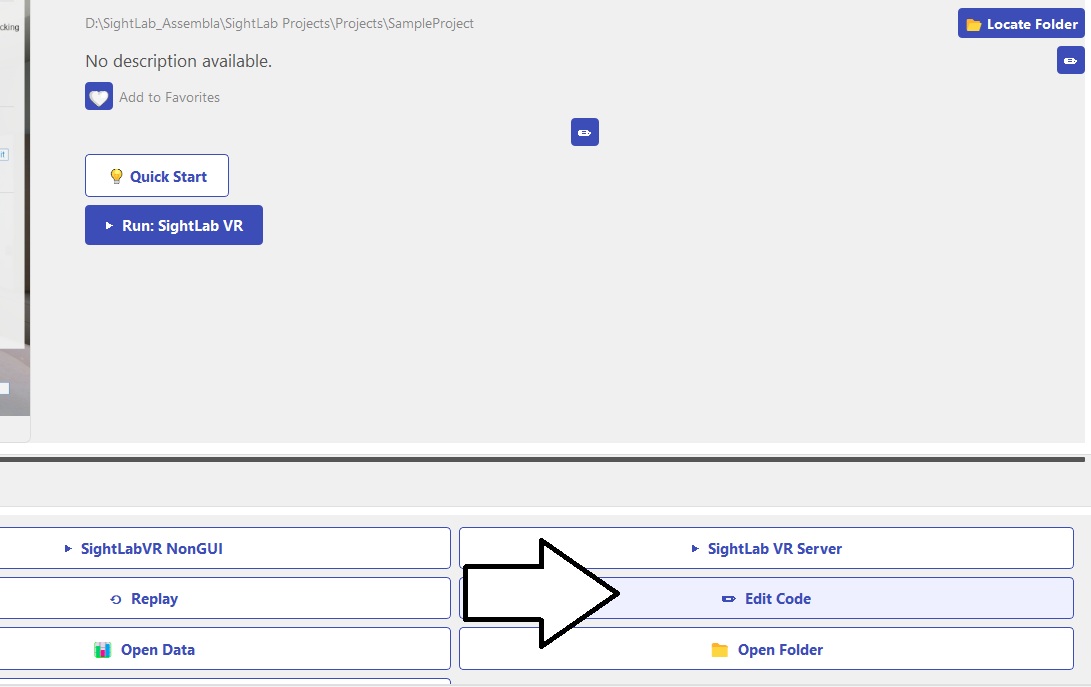
Any script can also be modified with code. See this page for more information. Additionally, for help with coding see the Custom trained SightLab GPT Assistant.
- Edit your Python script by clicking Edit [filename]. Or "Edit Script on the Actions button" This will open the script in the Vizard python editor.