Driving Example
Overview
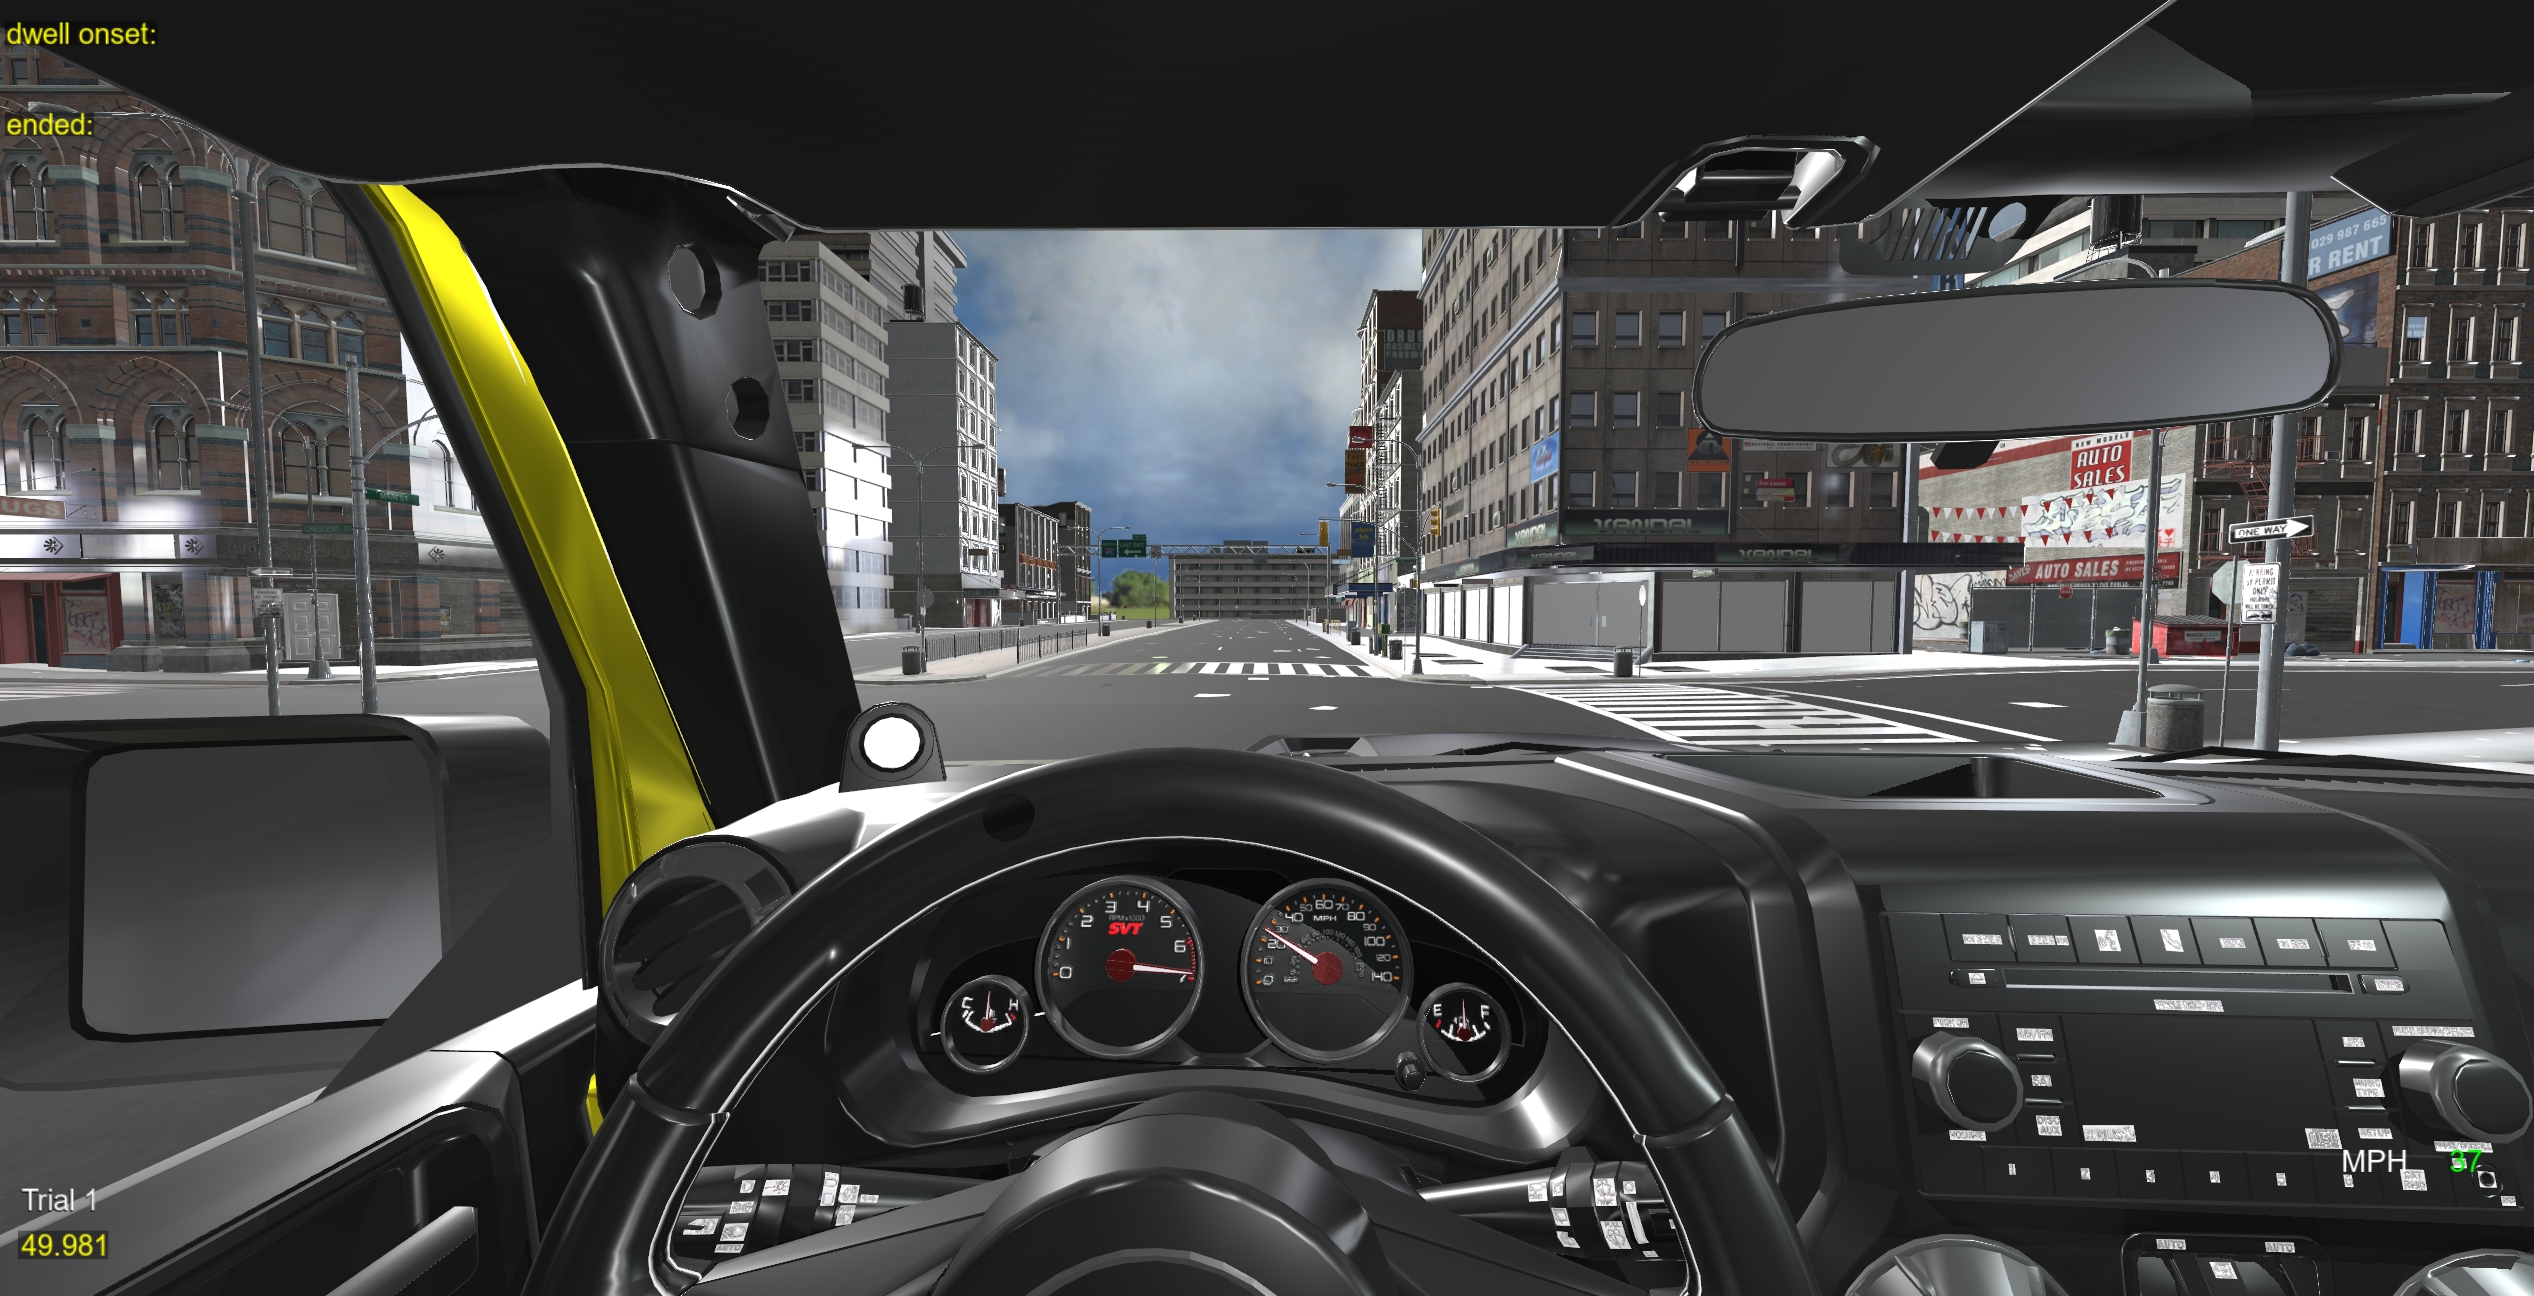
The SightLab Driving Simulation provides a flexible platform for creating and customizing driving experiences. Located in the ExampleScripts-Driving folder, it supports various hardware configurations including desktop, VR headsets, and custom input devices. See the Download Button below for an expanded version with more city maps and features.
Features
Core Features
- Modifiable car models and environments
- Realistic vehicle controls (gas, brake, steering)
- Real-time collision detection
- Solid-world collision: the car cannot drive through buildings, props, or other vehicles (lightweight raycast system, no physics engine needed)
- Interactive headlights system
- Dynamic engine audio with speed-based pitch adjustment
- Elevation and ramp support
- Variable Speed Control
- HUD display of speed, fixations, timestamp, and gear status
- Gear shift system to toggle between Drive and Reverse
- Dynamic animations of RPM, MPH gauges, steering wheel, tires, and more
- Multi-user capabilities
- Eye tracking, physiological data, data collection (see below)
Analysis Features
- Driver attention and fixation tracking
- Car velocity, average mph per trial or condition, position and rotation saved to data files (can add custom data as well)
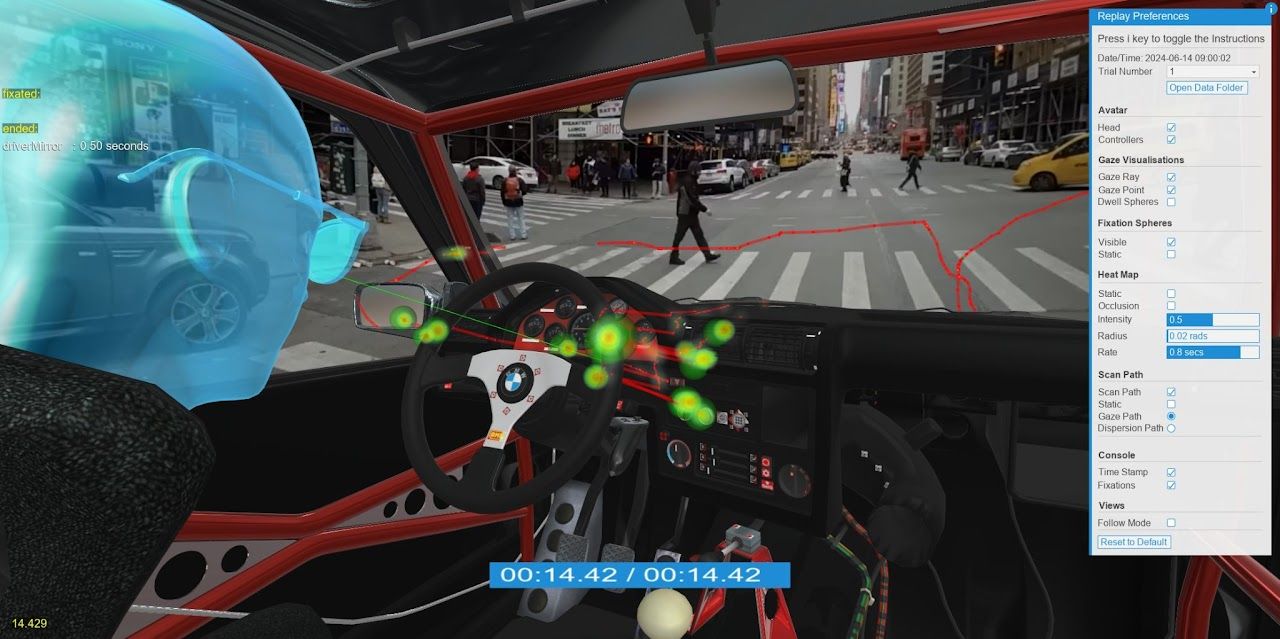
- Interactive session replay
- Gaze pattern visualization
- Performance metrics logging
- Physiological tracking integration
- Heat map analysis
- Instructor view with real time control and monitoring
Environmental Features
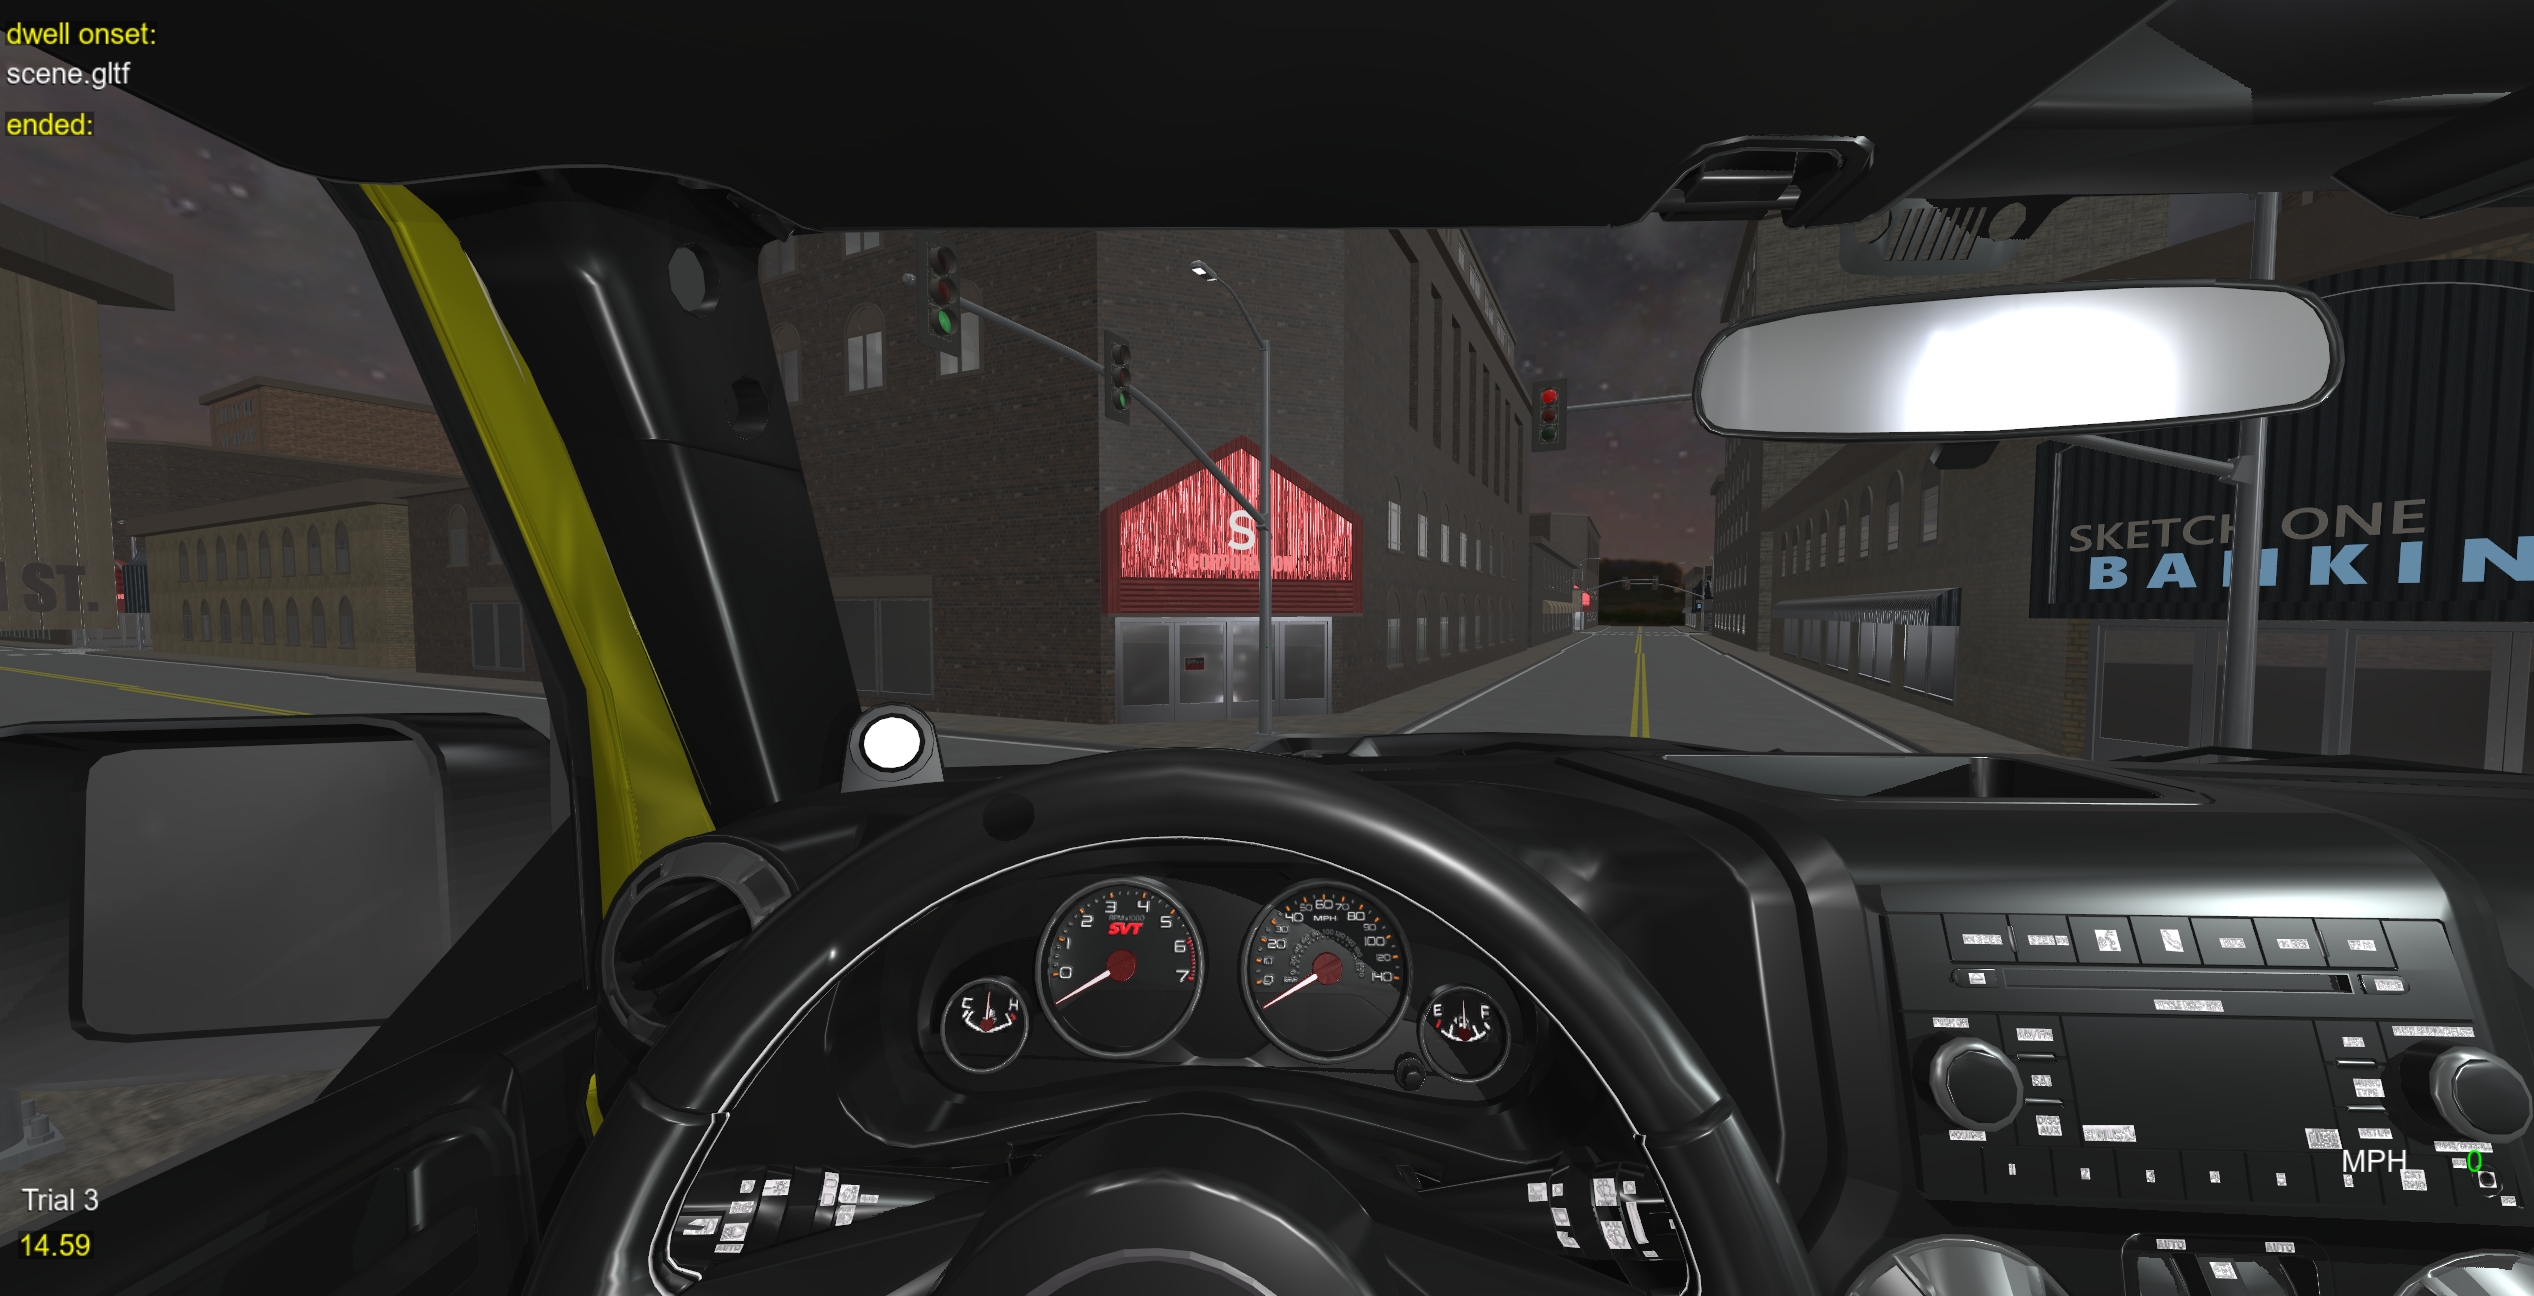
- Day/Night/Fog cycles
- Variable lighting conditions
- Traffic simulation
- 360° media integration
- Customizable obstacles and pedestrians
Included Scripts
Driving_GUI_Main.py This is the main script to run. uses the GUI to select environments. If you downloaded the expanded version this includes 3 city maps, freeway ramps and night and day scenes. The standard version in SightLab Example Scripts just has one city with day and night cycles (note: SightLab 2.6.6 and later now include all the maps)
Driving_Main_noGUI.py uses only code, but has similar functionality to Driving_GUI
Driving_GUI_Traffic.py shows adding some cross traffic flow. Can modify the code and stim file (in Resources) to adjust speed and number of additional cars. Collisions with traffic vehicles are handled by the same raycast bumper system used for buildings (plus a proximity check so a moving car ramming a stationary player still registers), so no physics engine is required. Note: can add traffic to all scripts if set ADD_TRAFFIC = True in the config file (see below)
Driving_Simulator_360 (additional download) - shows using a 360 video to simulate driving in New York
Driving_Config.py Used to configure additional options (see below)
In the expanded driving download there is also a folder called Longer_Road that has an endlessly stretching highway
For 360 Video Drive through example with Mixed Media contact support@worldviz.com (see below for info)
Controls
Keyboard controls available to all. Additionally, see the SightLab Controls page for more.
- View adjustment: T, F, G, H keys
- Start/Next trial: Spacebar
- Save/Store Position:
vkey - Select Viewpoint:
bkey - Reset Viewpoint
i
XBOX/Game Controller
- Steering: Left Stick- Turn left or right
- Gas: Right Trigger
- Brake: Left Trigger
- Toggle Gear: Press X to toggle between reverse and drive (must come to a stop first)
- Look Around: Right stick or use the mouse
- Select Button: Change Viewpoints
Desktop Controls
- Movement: WASD keys
- Gas:
=key - Brake:
-key - Toggle Gear: Press Y to toggle between reverse and drive (must come to a stop first)
VR Controls
General VR
- Steering: Left Stick- Turn left or right
- Gas: Right Trigger (for some headsets, also need to hold the RH
Bbutton) - Brake: Left Trigger
- Toggle Gear: Press Y to toggle between reverse and drive (must come to a stop first)
- View adjustment: WASD, X, and Z keys
SteamVR/Vive Specific
- Steering: RH trackpad (left/right)
- Gas: RH system button
- Brake: RH grip button
Steering Wheel Controllers
Wheel motion - Turns car left and right
Gas and Brake - Mapped to gas and brake pedals
Tested and verified, but can easily add additional ones:
Thrustmaster
To add a new wheel, run the wheel_inspector.py script in the modules folder, then press on the gas to see which ID is for throttle and the same for brake. You can then also press each button to find the ID (or run the Set Up Game Controllers program in Windows). Modify one of the included wheel input files (such as the g923_input.py) and change the necessary IDs for the throttle, axis and clutch. Button mappings for things such as viewpoints can be set up by making a copy of one of the wheel vizconnect files and modifying those under "mappings". Contact support@worldviz.com for more information.
        self.wheel_axis = 0      # Steering wheel: -1 to +1
        self.throttle_axis = 1   # Throttle pedal: 1.0 when not pressed, -1.0 when fully pressed
        self.brake_axis = 2      # Brake pedal: 1.0 when not pressed, -1.0 when fully pressed
        self.clutch_axis = 3     # Clutch pedal: 1.0 when not pressed, varies when pressed
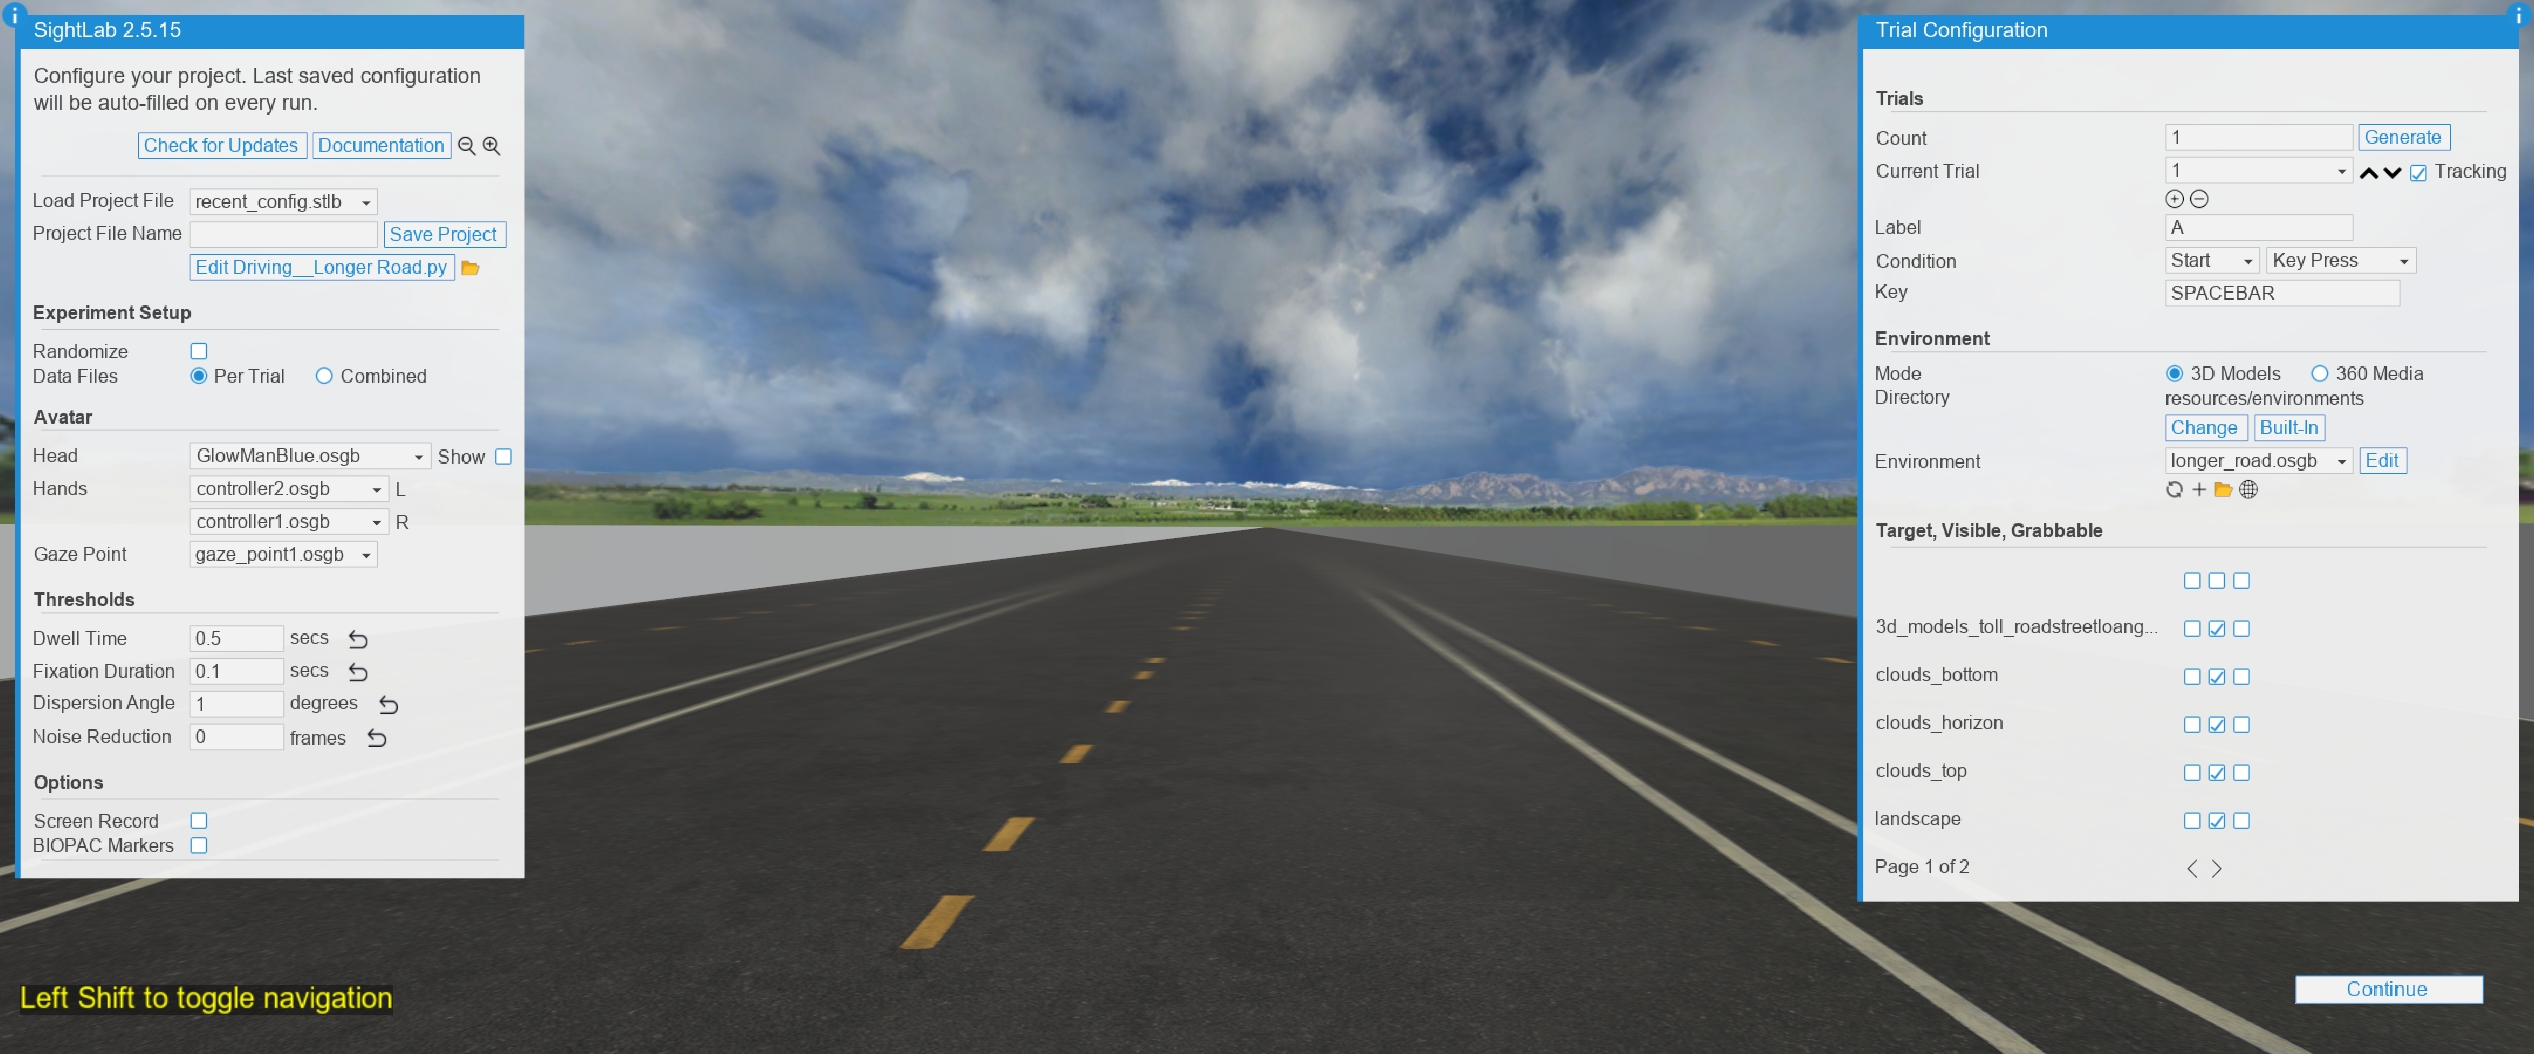
Running the GUI Example
Run Driving_GUI_Main.py. Pressing spacebar will start the experiment or proceed to the next trial. Data will be saved in the data folder.
Notes
The car is kept non-intersectable (viz.INTERSECTION disabled) so the elevation and bumper collision rays never hit the car's own geometry. If you attach new geometry to the scene that should ride along with the car, parent it to the car so it is automatically excluded from collision rays.
Collision System
The demo uses two complementary, raycast-based collision systems (no physics engine, so framerate stays high even in large city models):
- Elevation / ground clamping (
USE_COLLISION,modules/collision.py) — casts a downward ray to keep the car on the ground, letting it drive up ramps, hills, and curbs, and fall with gravity off edges. - Bumper collision (
USE_BUILDING_COLLISION,modules/vehicle_collision.py) — sweeps the car's per-frame movement with three horizontal rays (center + both bumper corners) in the direction of travel. If a wall, prop, or another vehicle is hit, the car is stopped flush against it and a crash sound plays. Reversing away always works, since the rays follow the actual movement direction. This blocks the car from driving through any intersectable geometry without needing collision shapes on the environment.
Key tuning options in Driving_Config.py:
BUMPER_HEIGHT— height of the bumper rays. Anything lower than this (curbs, low guard rails, medians) can be driven over; anything taller blocks. Keep it matched to the elevation system's step height (0.8) and below traffic-car hood height (~1.0).SLOPE_LIMIT— surfaces inclined less than this many degrees are treated as drivable (hills, ramps) and ignored by the bumper rays; steeper surfaces block (walls are 90°). Raise it (e.g. 75) if steep drivable hills are being treated as walls.COLLISION_LOOKAHEAD— distance from the transport pivot to the bumper, i.e. how far ahead of the pivot the car stops. Increase if the car nose clips into walls, decrease if it stops too early.CAR_HALF_WIDTH— lateral offset of the corner rays; match to half your car model's width.CRASH_SOUND/CRASH_COOLDOWN— impact sound and the minimum seconds between plays.TRAFFIC_HIT_DISTANCE— center-to-center distance for the traffic proximity check.
Settings can also be changed per trial at runtime, e.g. to allow steeper hills only on one trial:
if sightlab.getTrialNumber() == 2:
    building_collision.setSlopeLimit(75)   # allow extra-steep hills
else:
    building_collision.setSlopeLimit(SLOPE_LIMIT)
(setBumperHeight() and setLookahead() are available as well.)
Note: the bumper system is created/reset immediately after the car is teleported to its starting position each trial. If you add code that teleports the transport mid-trial, call building_collision.reset() right after the teleport so the jump isn't treated as movement to collision-test.
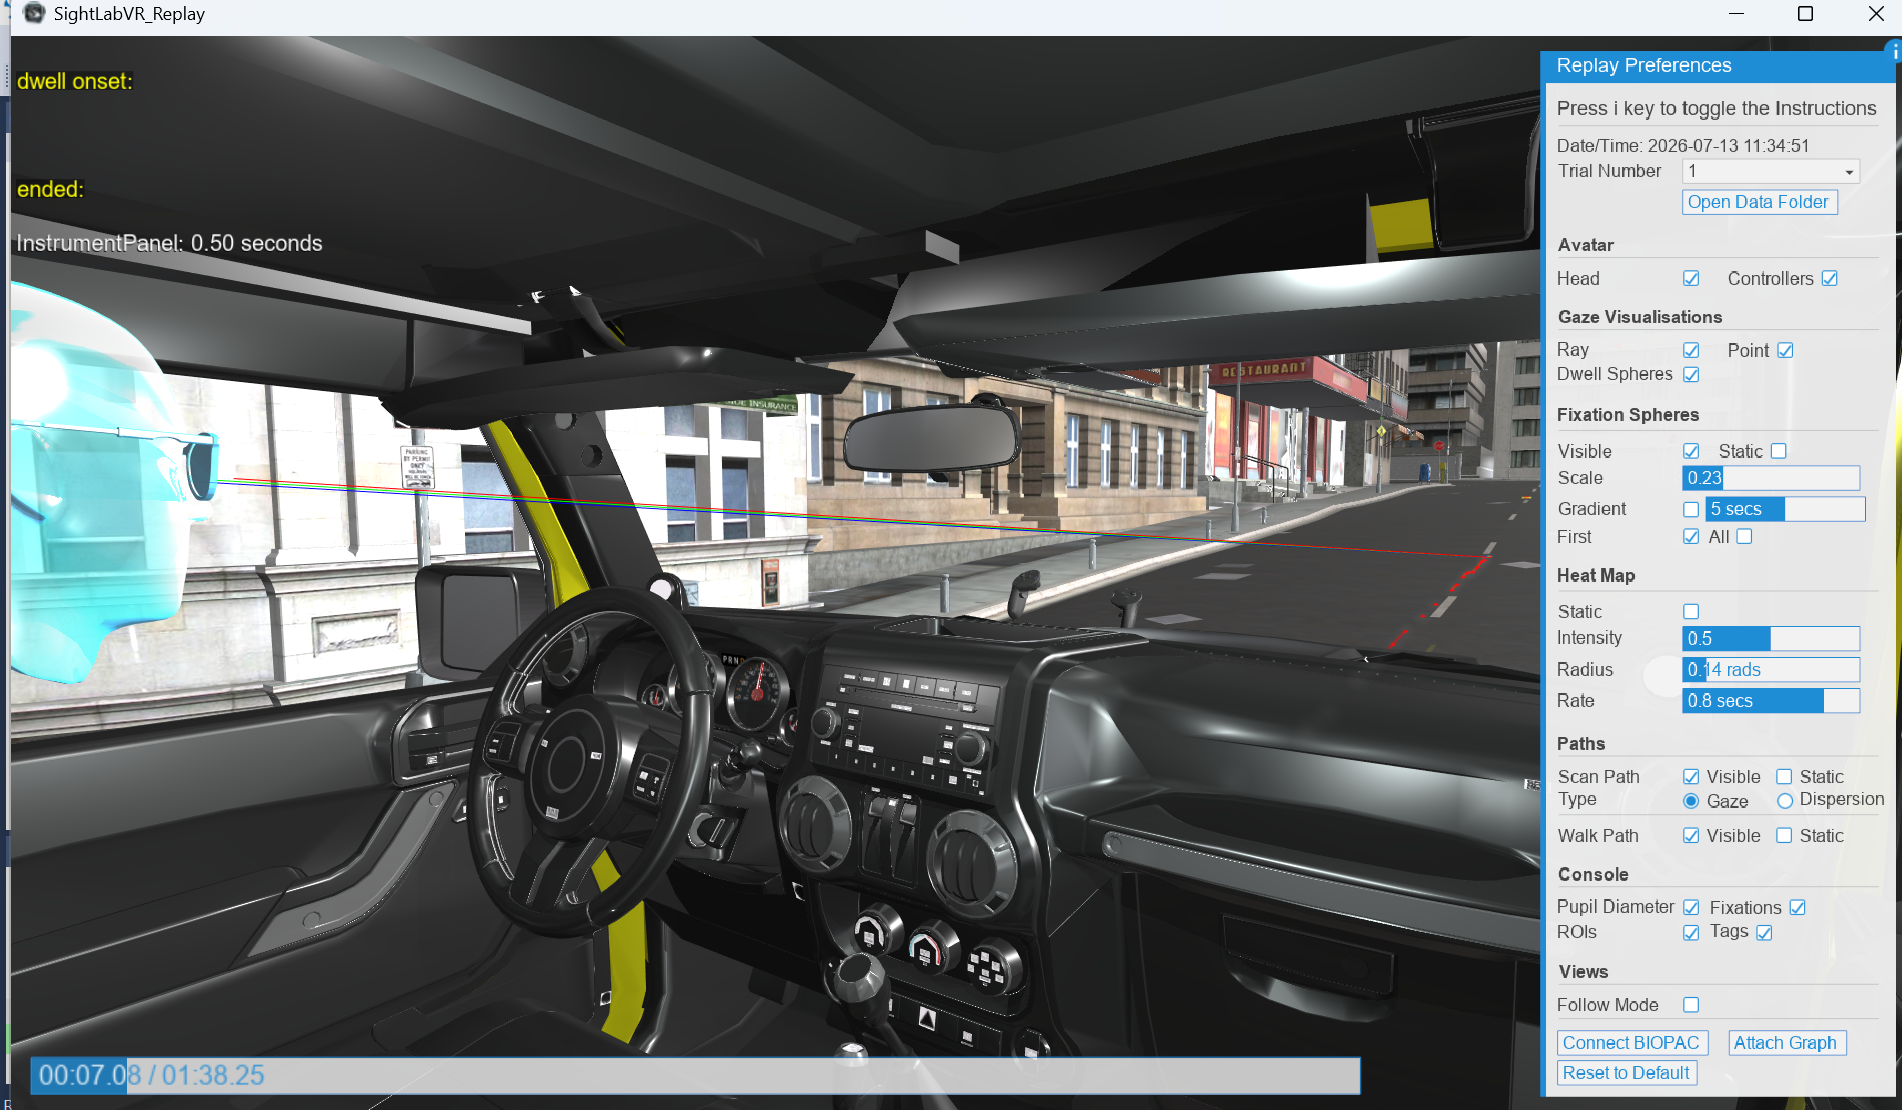
Session Replay
After running a session, use SightLabVR_Replay.py to view a playback of your session, including the car's movement. Can check "Follow Mode" to see the first person in the car or it will show the default third person view. The "Walk Path" will additionally show the direction and speed of the car.
Customization
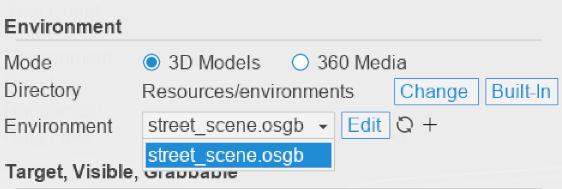
Changing the Environment
- Place a new environment file in the Resources/environments folder.
-
(for the GUI) Select the new environment using the GUI:
- Click "Modify" on the GUI screen
- Choose the new environment
-
With code
ENVIRONMENT_MODEL = 'path/to/environment.osgb'
vizfx.addChild(ENVIRONMENT_MODEL)
Changing the Vehicle
Change the path to your new vehicle in Driving_Config.py as well as references to items that can be animated or used (headlights, wheels, steering wheel, mph and rpm gauge)
CAR_MODEL = 'Resources/jeepmodel.osgb'
To add regions of interest to items inside the vehicle, this is a different setup since the car is set to disable intersections (for the elevation detection). You need to add a region in Inspector, then right click and choose "Save" in the scene graph on the left. Then add the regions directly and parent to the car, such as this code below.
instrumentPanel = vizfx.addChild('Resources/InstrumentPanel.osgb')
instrumentPanel.setParent(car)
Basic Setup Using Code
- Import car class from module (make sure car_module.py exists next to your main script):
from car_module import Car
- Set up the car instance in
Driving_Config.py(note that STEERING_WHEEL_NAME and individual wheels are optional if you want a steering wheel that turns and tires that spin).
my_car = Car(model_path=CAR_MODEL, use_headlights=True, steering_wheel_name=STEERING_WHEEL_NAME, engine_audio=ENGINE_AUDIO,
             front_left_wheel=FRONT_LEFT_WHEEL, front_right_wheel=FRONT_RIGHT_WHEEL,
             back_left_wheel=BACK_LEFT_WHEEL, back_right_wheel=BACK_RIGHT_WHEEL,
             mph_gauge=MPH_GAUGE, rpm_gauge=RPM_GAUGE, sightlab_instance=sightlab)
Code to access underlying car object
car = my_car.car - Add car as a sceneObject so that it will be tracked in the session replay
sightlab.addSceneObject("car", car) - Start the engine sound and perform other setup actions (such as toggling on headlights if needed) after the SightLab main loop starts
def sightLabExperiment():
    while True:
        for i in range(sightlab.getTrialCount()):
            if sightlab.getTrialNumber() == 1:
                print('trial 1 day')
            elif sightlab.getTrialNumber() == 2:
                print('trial 2 night')
                my_car.toggle_headlights(True)
            yield viztask.waitKeyDown(' ')
            yield sightlab.startTrial()
            my_car.start_engine_sound(volume=1)
5. Setup the link of the driving transport to the car
rawTransport = vizconnect.getRawTransport('driving')
transport = vizconnect.getTransport('driving')
transportNode = transport.getNode3d()
my_car.link_to_transport(transportNode)
#Optionally change position of transport
transportNode.setPosition([0.25, 0.65, 0.35])
Changing View Position in Car
- Run the script using the Vizard editor and use either the TFGH, ZX keys to position your viewpoint if Desktop or WASD, ZX for HMD
- Press the 'v' key when your position looks correct
- This will print out your current position in the Vizard interactive window
- Copy and paste this position into the
Driving_Config.pyPASSENGER_POSITION or in the code under the hardware options
if sightlab.getConfig() in ['Driving Desktop']:
    transportNode2.setPosition([0.25, 0.65, 0.35])

elif sightlab.getConfig() in ['Driving SteamVR']:
    transportNode2.setPosition([0.188, 1.315, 0.8676])
Driving Configuration
The Driving Config provides extensive customization options:
# Driving_Config.py

CAR_MODEL = 'Resources/jeepmodel.osgb'
#CAR_MODEL = 'sightlab_resources/objects/car.osgb'
#CAR_MODEL = 'Resources/bmw.osgb'
STEERING_WHEEL_NAME = 'Steering_Real Car 22_Body_0'
ENGINE_AUDIO = 'Resources/engine_sound8.wav'
PASSENGER_POSITION = [-0.08379964530467987, -0.23322515189647675, 0.14180484414100647]
PASSENGER_POSITION_TRUCK = [0.2632506489753723, 0.556177020072937, 0.3184721767902374]
THIRD_PERSON_VIEW = [0.6829884052276611, 1.5265825986862183, -3.218057870864868]
CLOSER_IN_VIEW = [0.2637367844581604, 0.556177020072937, 0.5279949903488159]
CAR_STARTING_POSITION = [0.25, 0, 0.35]
ENGINE_VOLUME = 0.2
FRONT_RIGHT_WHEEL = 'FR_Real Car 22_Body_0'
FRONT_LEFT_WHEEL = 'FL_Real Car 22_Body_0'
BACK_RIGHT_WHEEL = 'BR_Real Car 22_Body_0'
BACK_LEFT_WHEEL = 'BL_Real Car 22_Body_0'
MPH_GAUGE = 'mph_gauge'
RPM_GAUGE = 'Dok 1_Real Car 22_Body_0'
ENVIRONMENT_MODEL = "Resources/environments/street_day.osgb"  #Fallback environment model for non-GUI
USE_COLLISION = True #Set to true for elevation detection
COLLISION__UPDATE_TYPE = "update"
#set to "timer" if frame rate going too low. "update" is smoother
COLLISION_UPDATE_INTERVAL = 0.07 #If using timer set the rate to update. Lower numbers smoother but lower framerate
USE_BUILDING_COLLISION = True #Raycast bumper collision: blocks the car from driving through any scene geometry
CAR_HALF_WIDTH = 0.85 #Lateral offset of the corner bumper rays (half the car width, meters)
BUMPER_HEIGHT = 0.8 #Height of the bumper rays; anything lower (curbs, guard rails) can be driven over
COLLISION_LOOKAHEAD = 2.4 #Distance from the transport pivot to the front/rear bumper (meters)
CRASH_SOUND = 'Resources/CarCrash.wav'
CRASH_COOLDOWN = 1.0 #Minimum seconds between crash sounds
TRAFFIC_HIT_DISTANCE = 3.0 #Proximity distance for a moving traffic car hitting the player
SLOPE_LIMIT = 60 #Surfaces inclined less than this many degrees are drivable (hills/ramps); steeper blocks (walls are 90)
#CAR_TYPE = 'Truck'
CAR_TYPE = 'Car'
COAST_RATE = 0.1 #Higher Number, faster stop. Reduced from 0.35 to allow longer coasting and turning
MAX_SPEED = 27.5 #Note this is multiplied by 2, so for 50mph, put 25
ADD_TRAFFIC = True
Customizing Controls
- Navigate to the vizconnect file in util_files/sightlab_utils/vizconnect_configs.
- Go to Advanced > Transports > Driving > Mappings and Acceleration/Deceleration under "Events".
- Modify the mappings as needed.
Note: You may need to set permissions on the file to edit the vizconnect.
Advanced Versions
Contact sales@worldviz.com for information on advanced versions:
-
Version that shows driving over elevations and ramps
-
360 video driving simulator (combining 3D models and 360 videos)
-
Flying simulator
360 Driving Simulator Instructions (Available Upon Request)
Controls
- Reset Position: R key
- Start/Stop Simulation: Spacebar
- Pause Video: V key
- Reset Video: B key
- Fast Forward: F key
- Get Current Position: T key
- Toggle Overlays: H key
- Toggle Gaze Point: P key
- Take Screenshot: / key
Notes
- May require K-Lite Codec Pack installation:https://codecguide.com/download_kl.htm
- For positioning, use transportNode2.setPosition after getting the current position.