Stand Alone Mode — E-Learning Lab
Stand Alone Mode is an optional authoring workflow that replaces Vizard Inspector with Blender and targets WebXR / standalone VR headsets (e.g. Meta Quest) instead of a tethered Vizard runtime. All existing Vizard-based workflows are completely unchanged when the flag is False.
Enabling Stand Alone Mode
Open global_config/globalConfig.py and set:
STAND_ALONE_MODE = True
Set it back to False at any time to return to the standard Vizard Inspector workflow.
What Changes When Enabled
1. Blender replaces Vizard Inspector
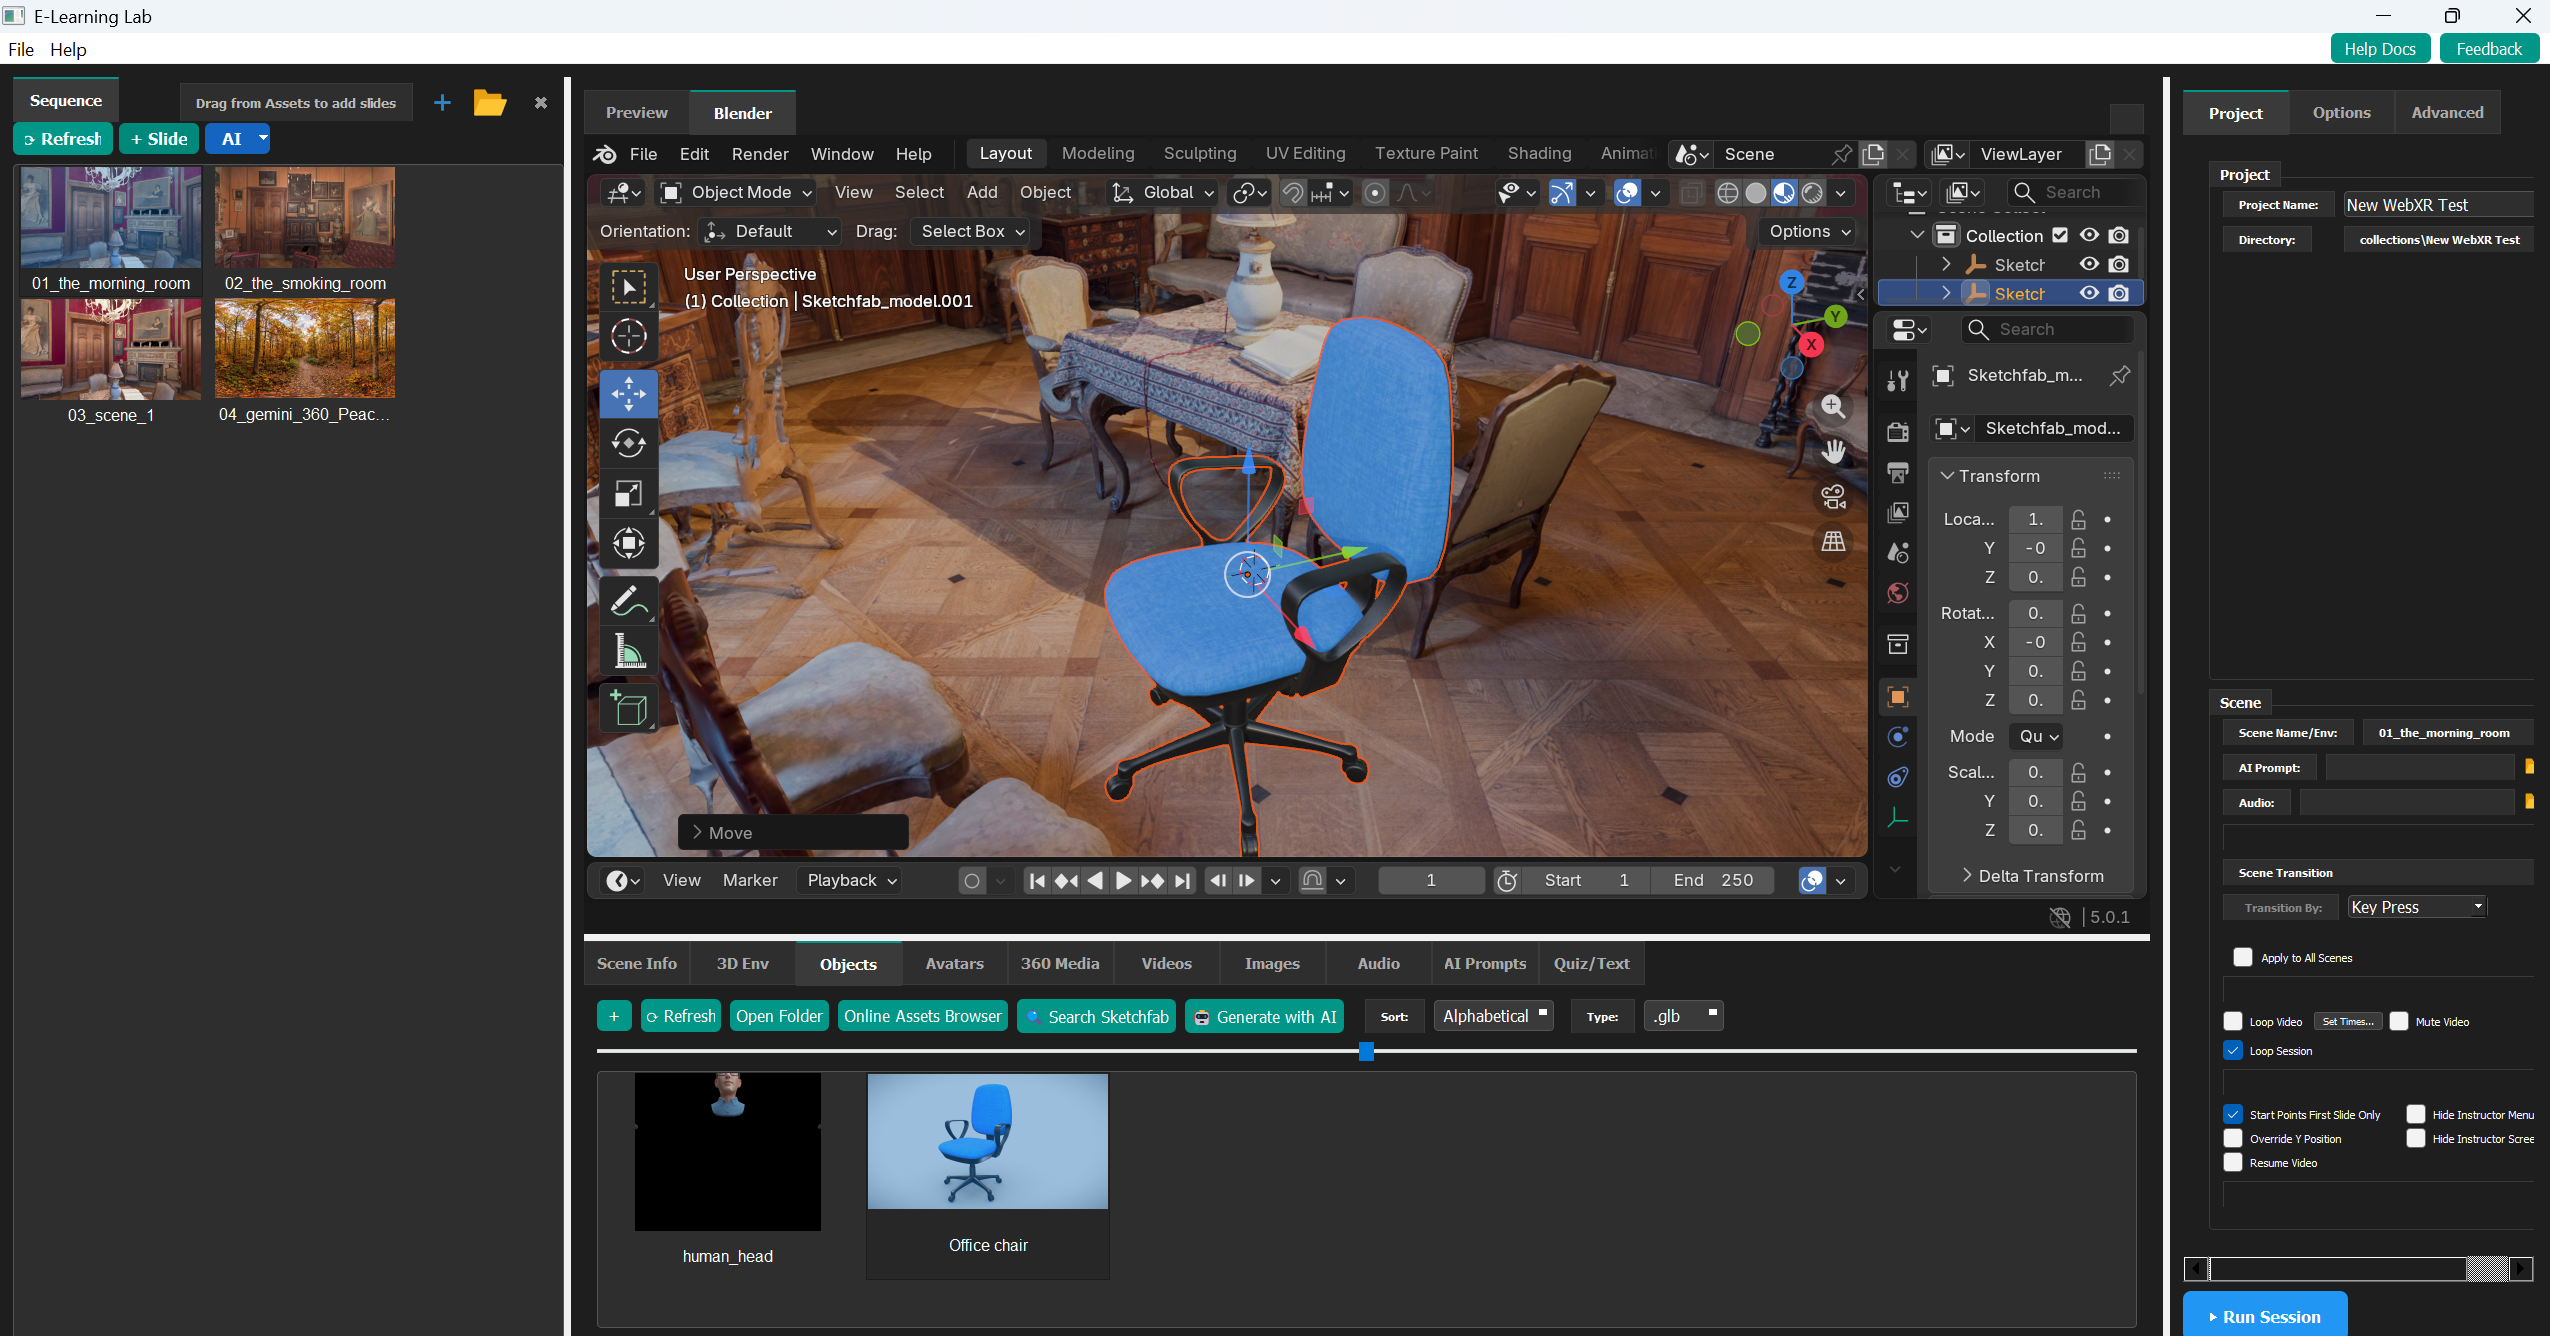
Any action that would normally open Vizard Inspector now opens Blender instead (note: with BLENDER_EMBEDDED = True (the default) Blender will open embedded in E-Learning Lab next to the main Preview window):
| Action | Normal mode | Stand Alone mode |
|---|---|---|
| Double-click environment | Opens Inspector | Opens in Blender |
| Double-click scene object | Opens Inspector | Opens in Blender |
| Double-click avatar | Opens Inspector | Opens in Blender |
| Right-click → Edit Model | Opens Inspector | Opens in Blender |
| Preview window Edit button | Opens Inspector | Opens in Blender |
_tag node convention for interactive objects
The Scene Objects panel (the checkboxes for Grabbable, Animate, Visible, etc.) normally scans all group nodes in the loaded Vizard scene. In Stand Alone mode it filters to only nodes whose name ends with _tag. This will also now carry over to non-stand alone mode, so scenes edited in Blender will work in the non-stand alone workflow as well.
When authoring a model in Blender, name any object you want to be interactive with a _tag suffix:
Chair_tag        ← will appear in the panel as "Chair_tag", can be marked Grabbable
Lever_tag        ← will appear as "Lever_tag", can be marked Animate
BackgroundWall   ← will NOT appear (no _tag suffix)
Can then check "Grabbable", "Hidden" or "Animate" in the E-Learning Lab GUI
Authoring Workflow
Step 1 — Enable the flag
# global_config/globalConfig.py
STAND_ALONE_MODE = True
Step 2 — Import models into the E-Learning Lab
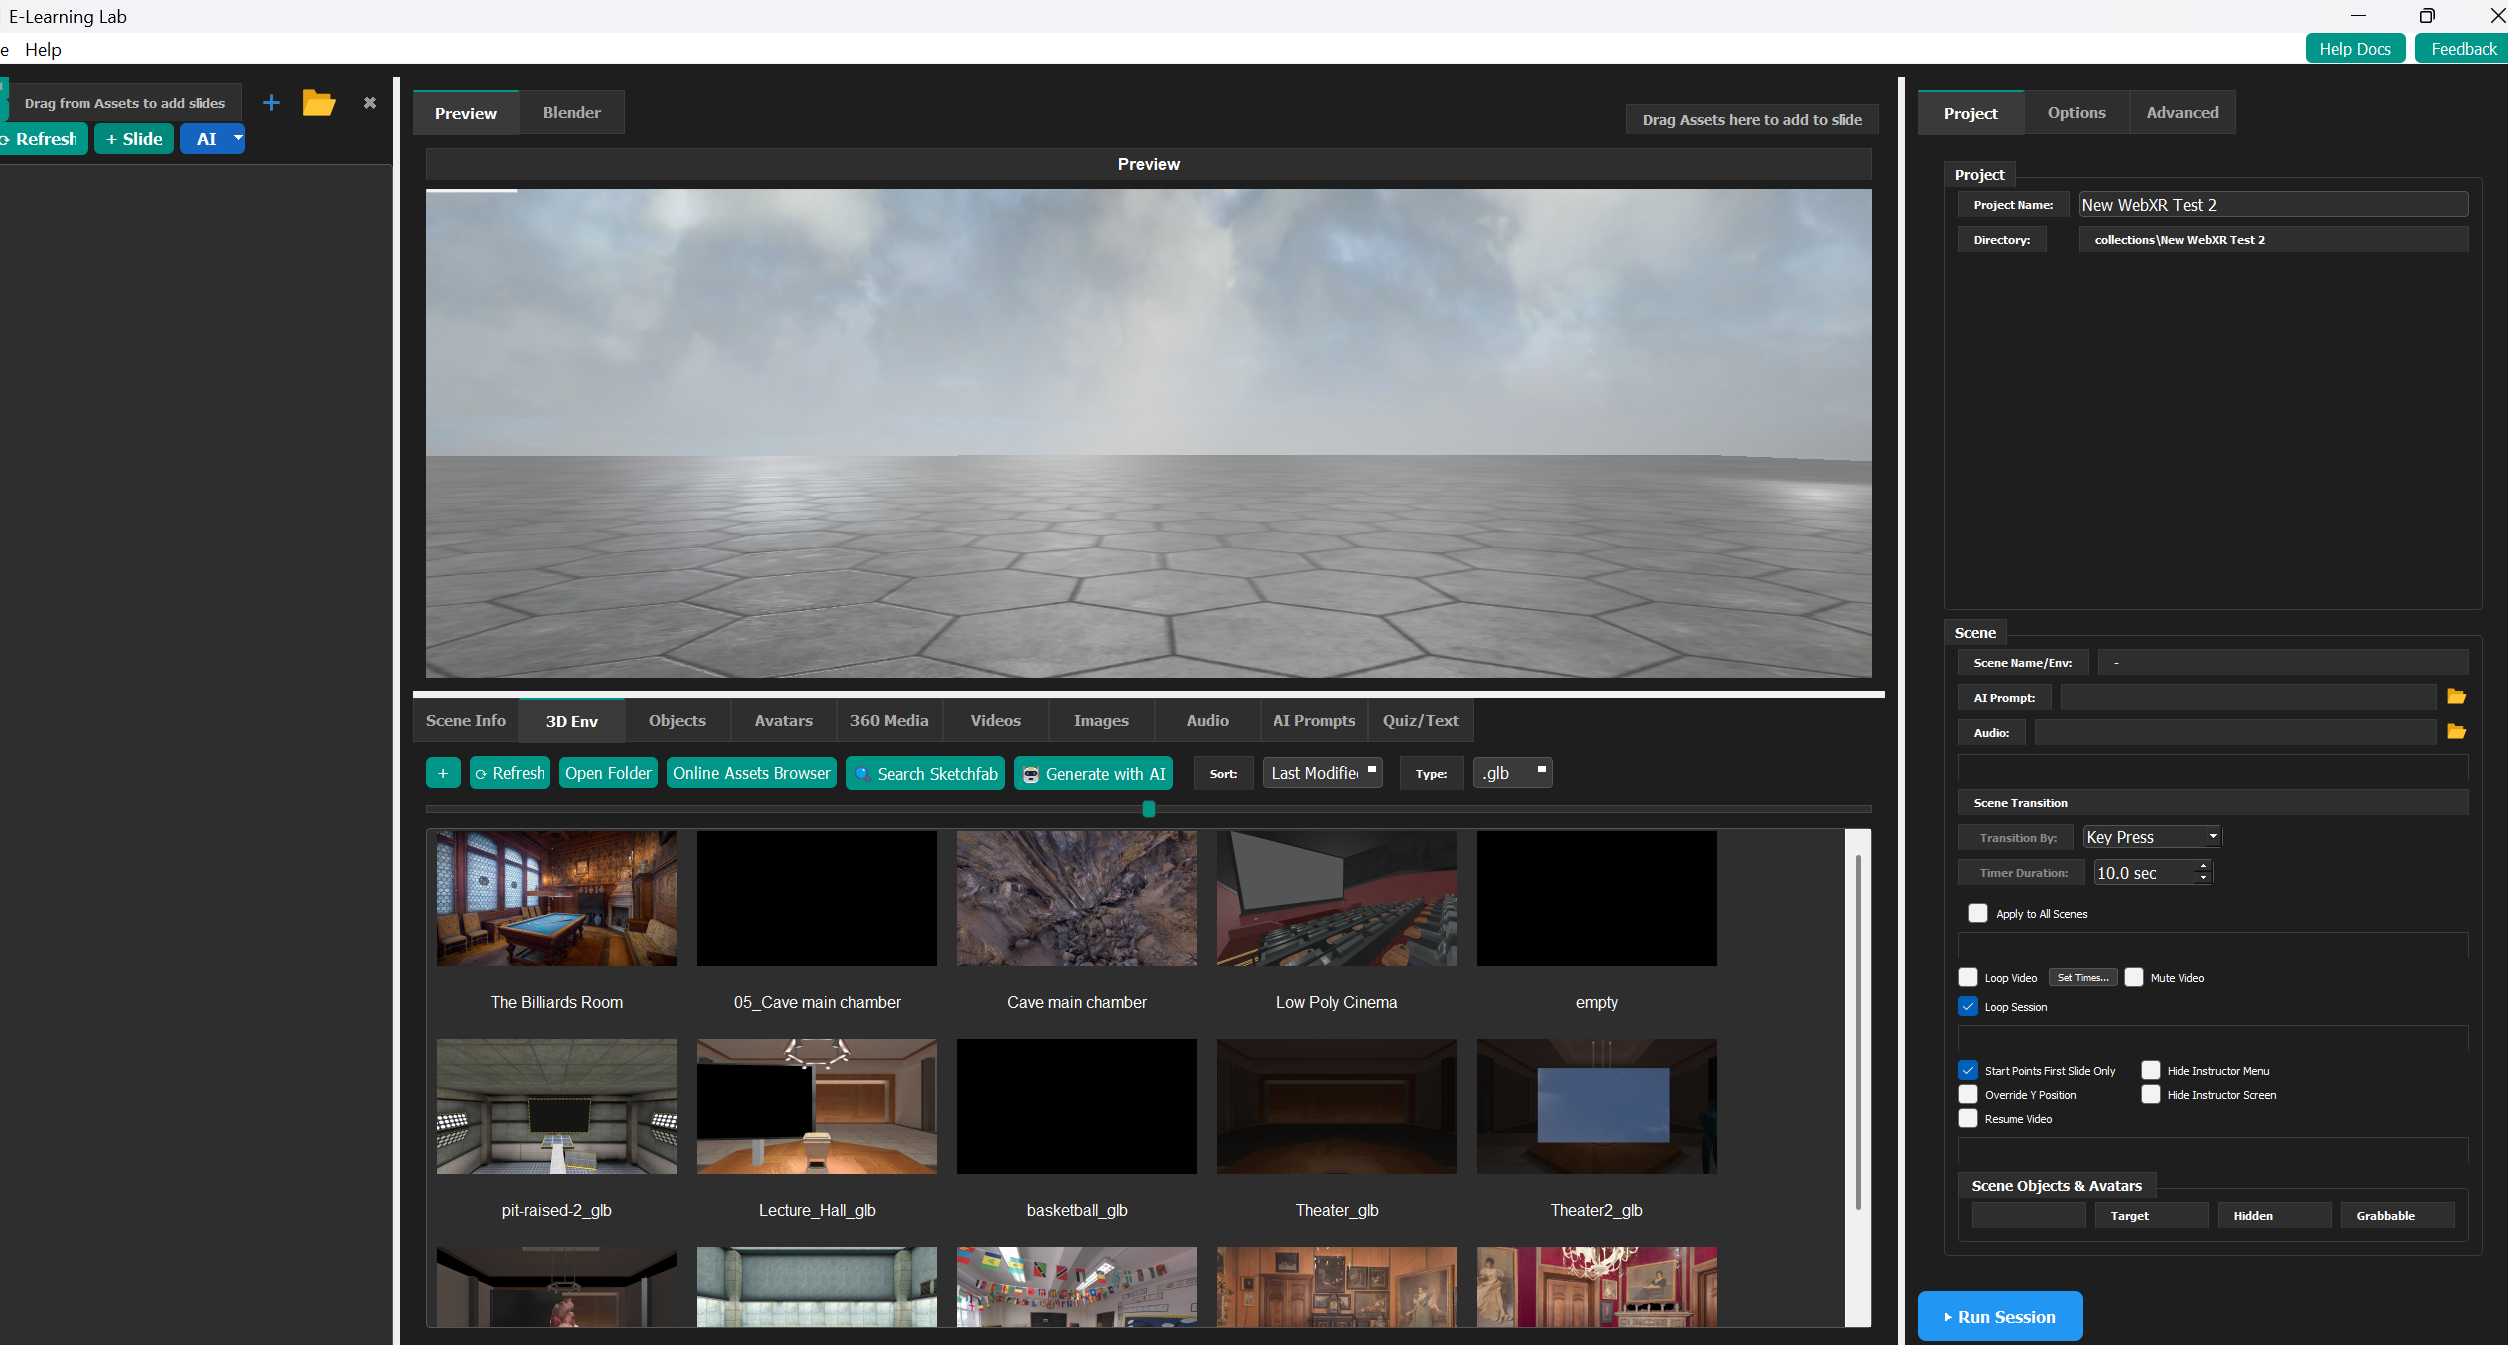
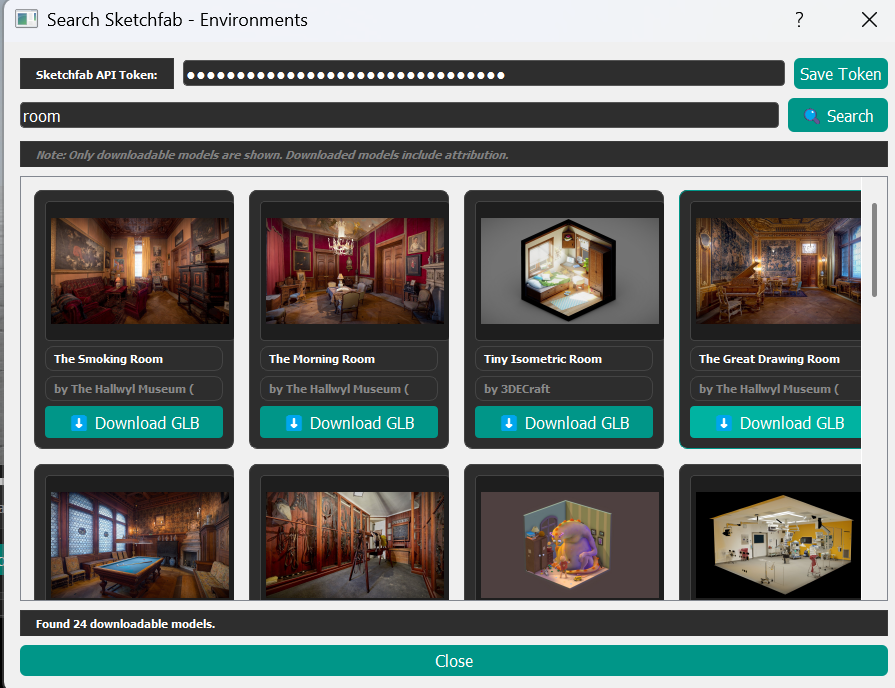
Drag .glb files from Windows Explorer onto the Environments or Objects asset bins or use the built in connections to Sketchfab or AI Generation.
Click "Search Sketchfab" to search Sketchfab
Step 3 — Prepare your .glb models in Blender
- Drag a .glb environment to the preview window
- In the Vizard preview window you can add videos, images, audio, AI prompts, same as before
- Click "Edit" to edit your model
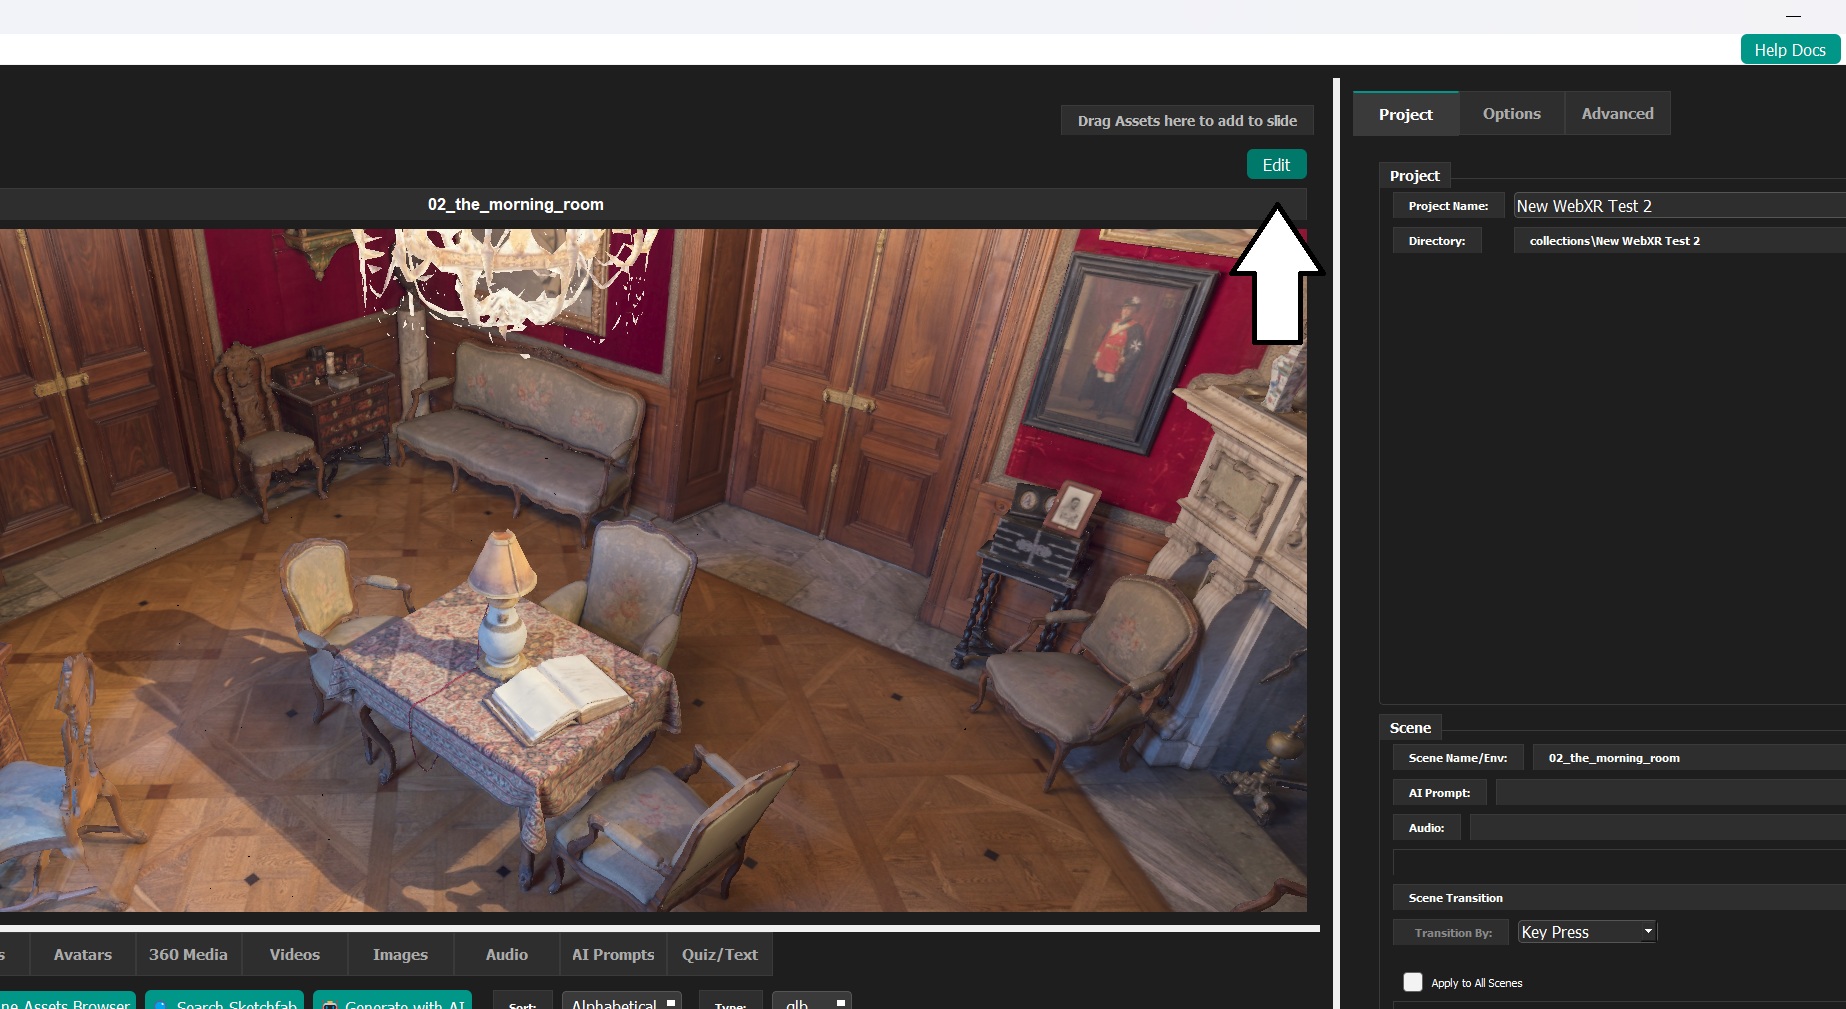
-
Hold the middle mouse button and mouse to look around the scene or use the tools on the right of the Blender editor window.
-
Drag in additional objects directly to the embedded Blender window from the Objects bin and use Blender's translate, rotate and scale tools to place the object
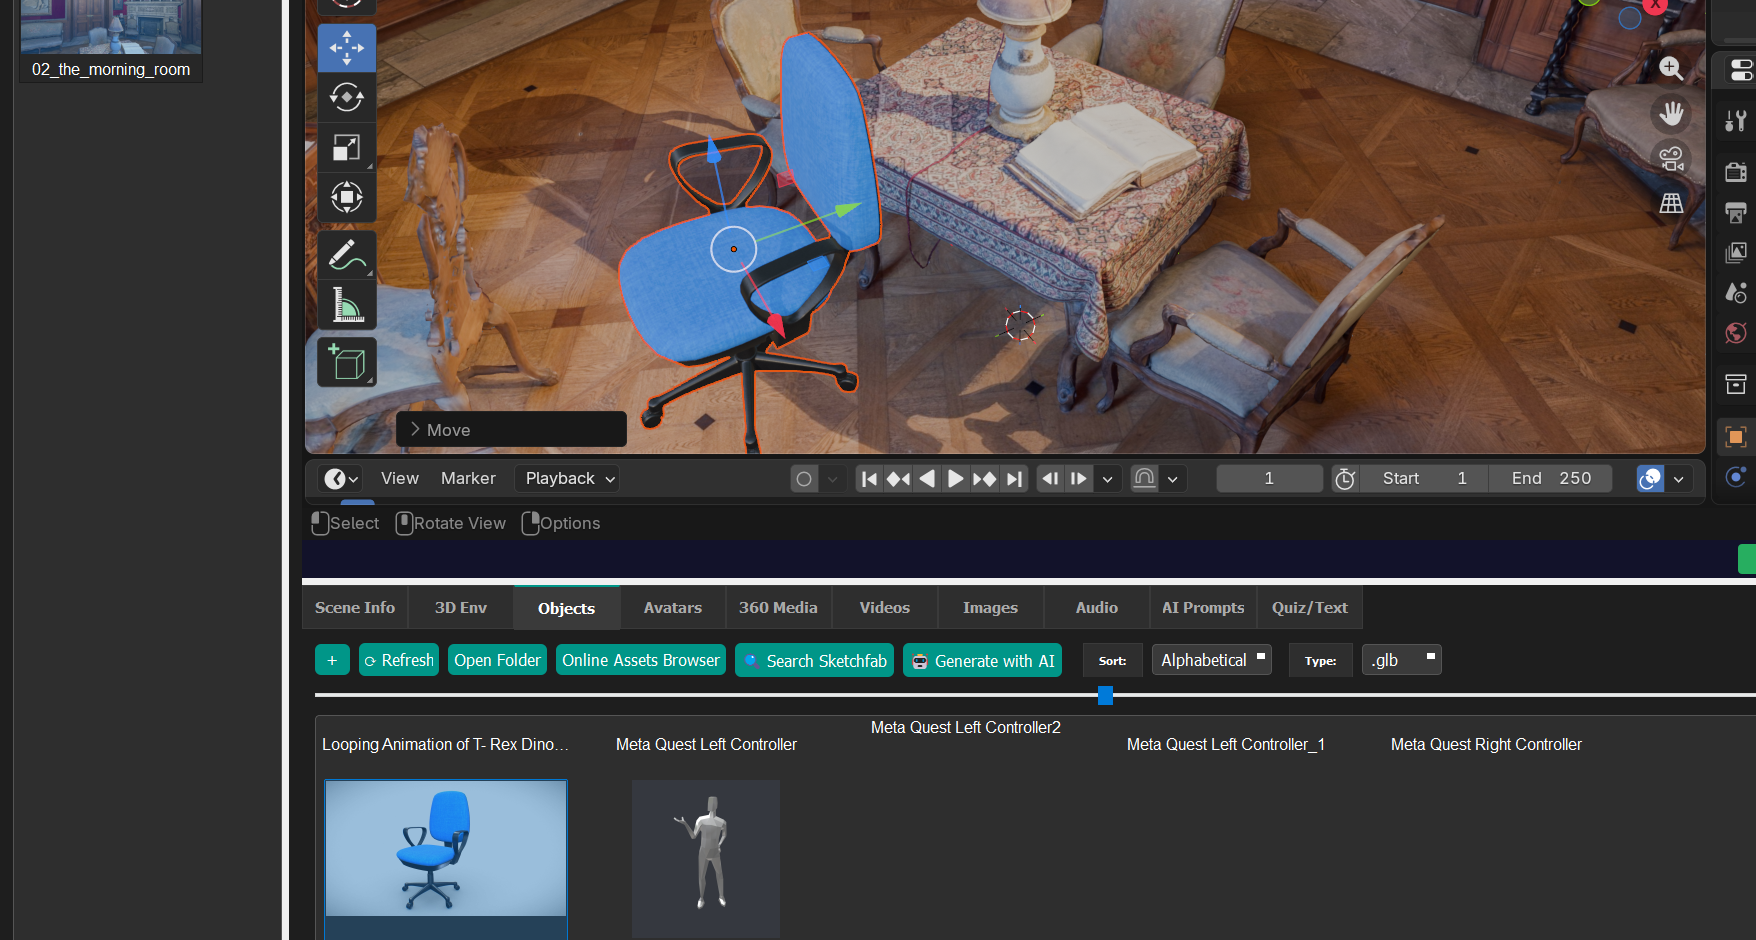
- Name any interactive objects with a
_tagsuffix (e.g.Door_tag,Button_tag).
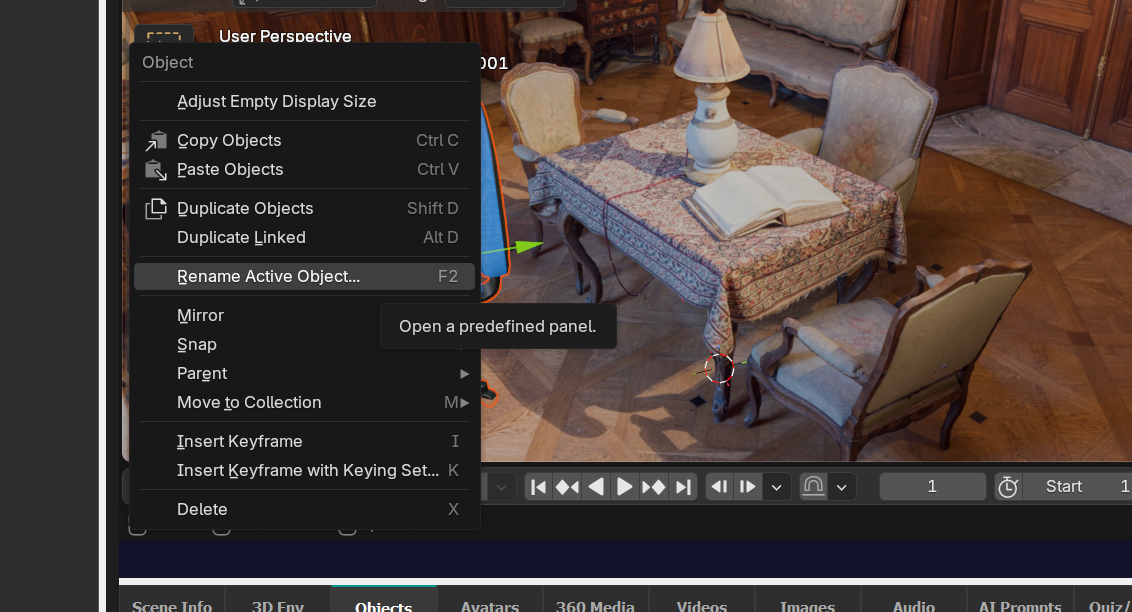
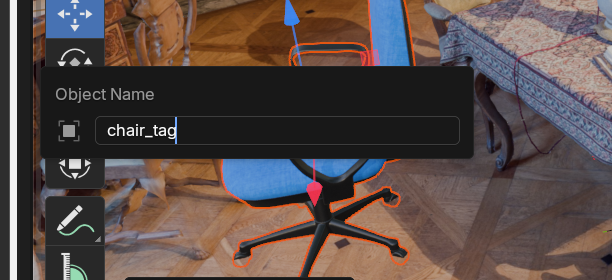
- To set a starting point, drag in the
START_POINT_SINGLE_start.glbobject from the objects bin and then use Blender's translate and rotate tools to place where you want the user to start.
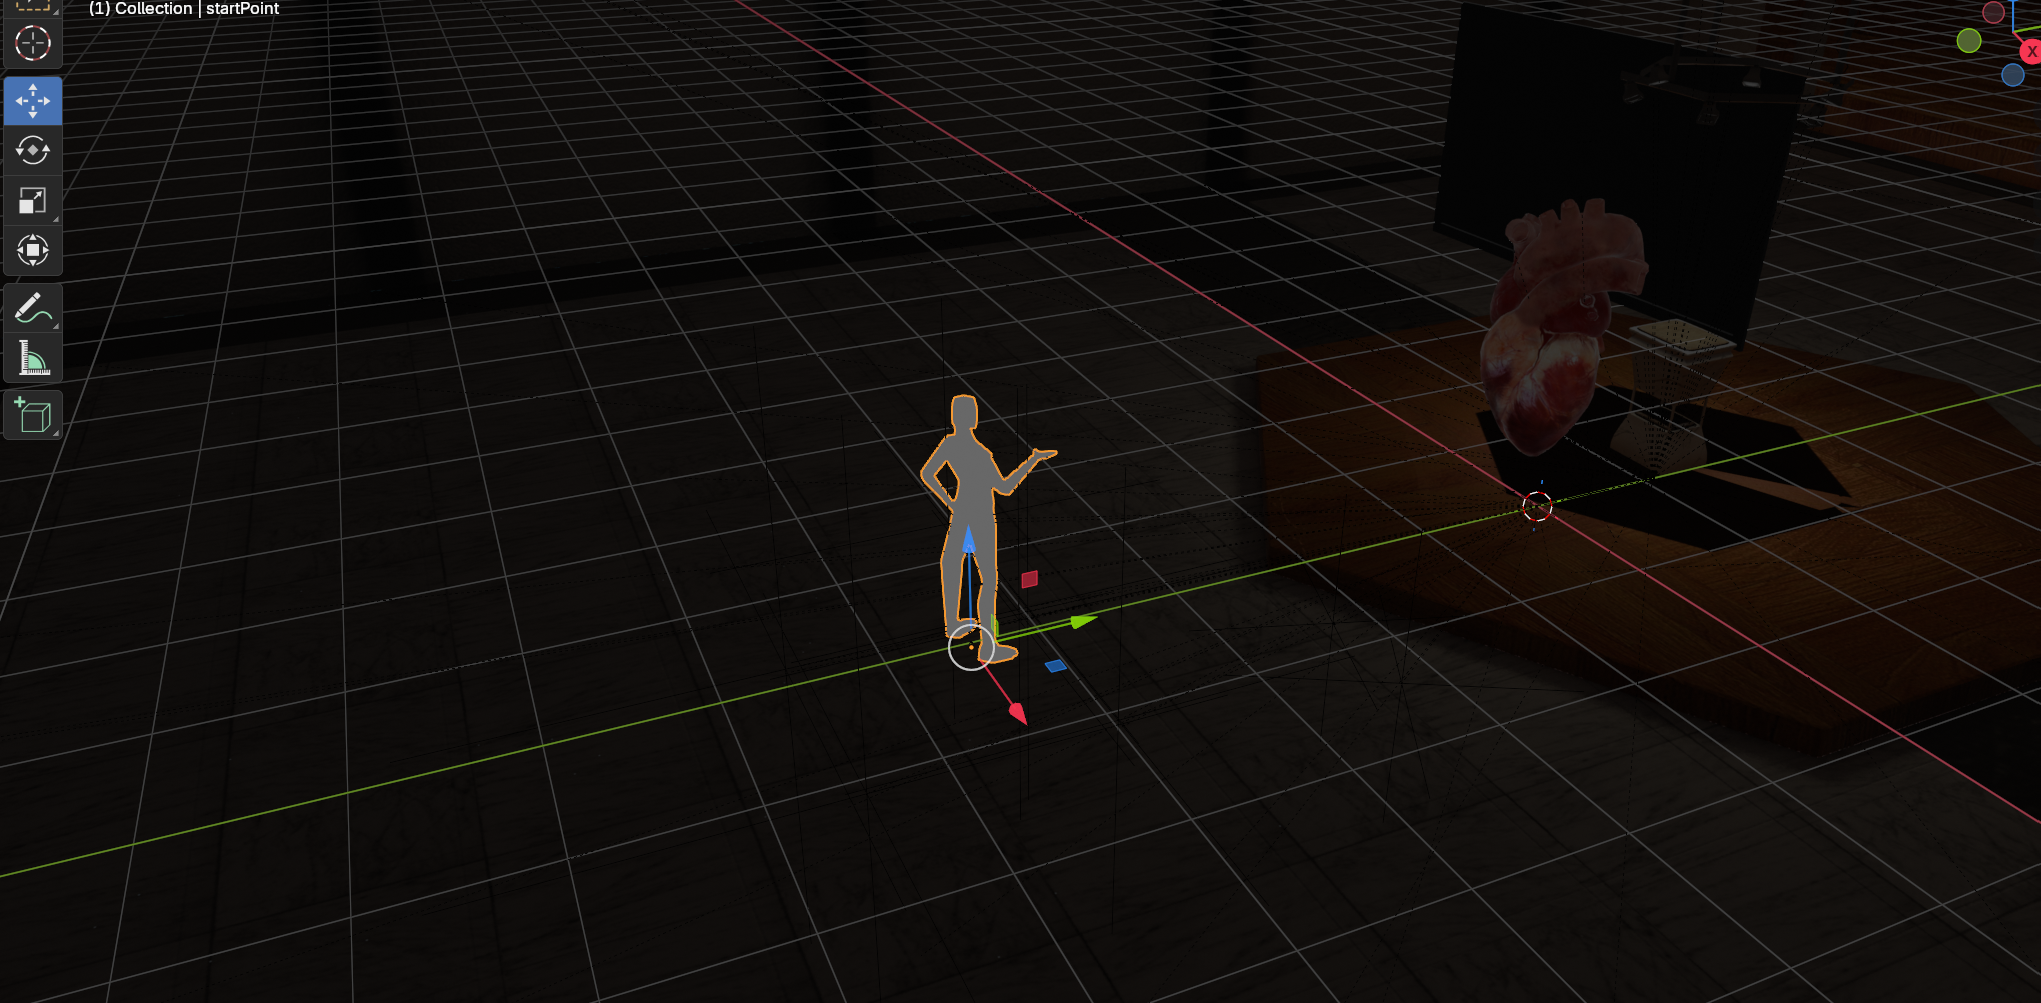
- Click "Save to Project" to save the Blender scene
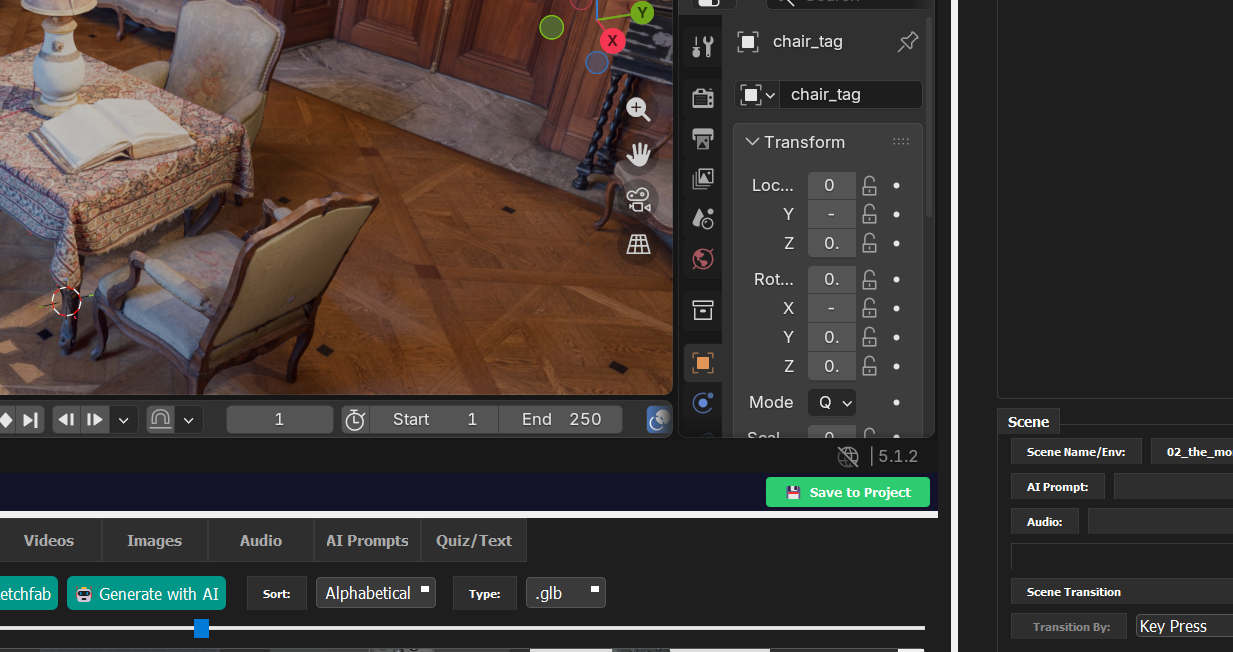
Step 4 — Build your sequence
Drag environments from the Environments panel, 360 Media, Videos, or Images, slideshows onto either:
- The Scenes list (left panel) — adds as a new slide, or replaces the currently-selected blank slide.
- The Preview image (center area) — same behavior.
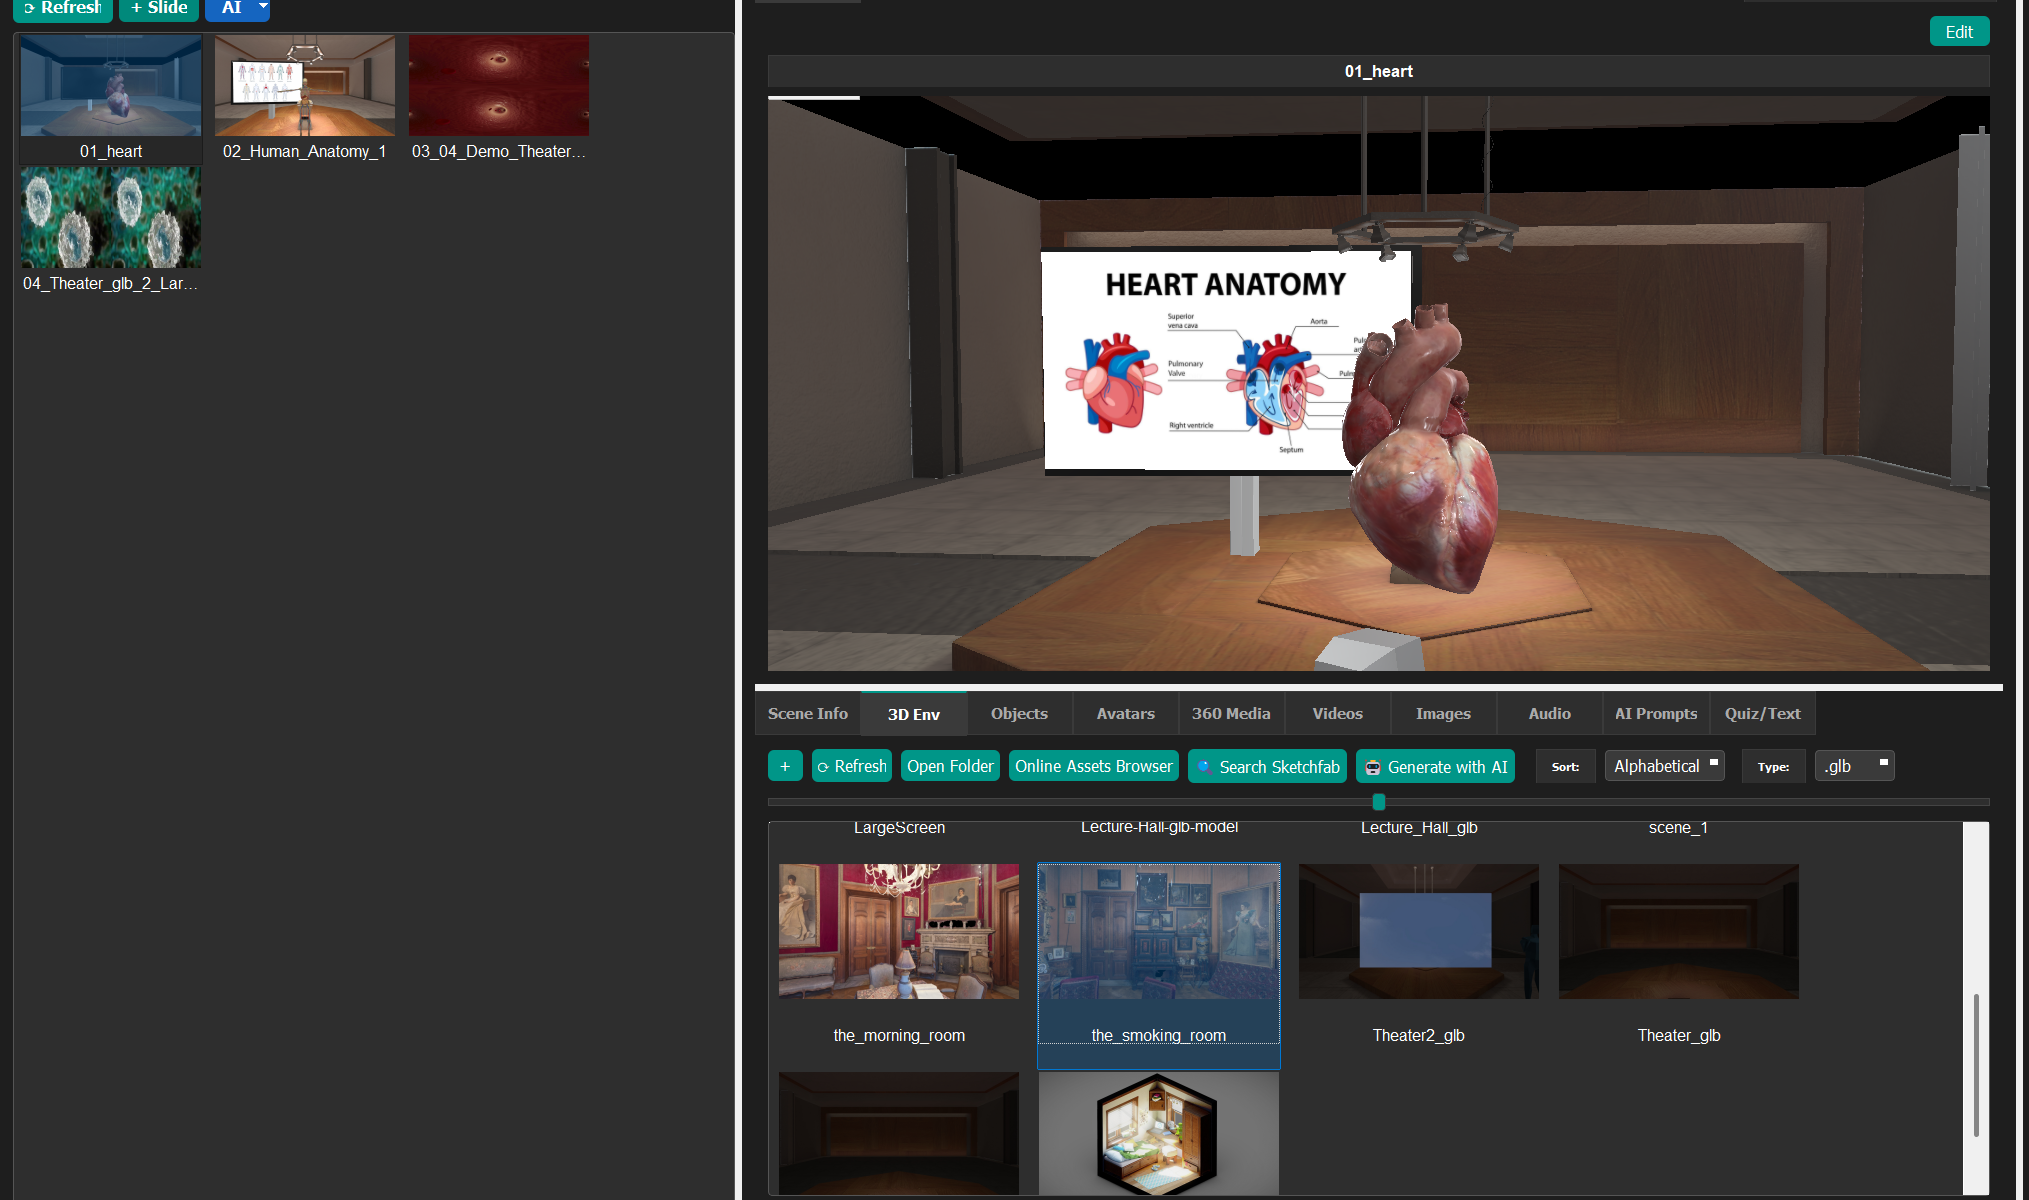
The scene appears in the list and loads in the Vizard preview window. You can then:
- Add Audio, Prompts, Images, Video, or 3d object files to the scene as normal.
- Right-click a scene → Edit in Blender to open the .glb for further editing.
- Use the Scene Objects panel to mark _tag nodes as Grabbable, Animate, or Visible.
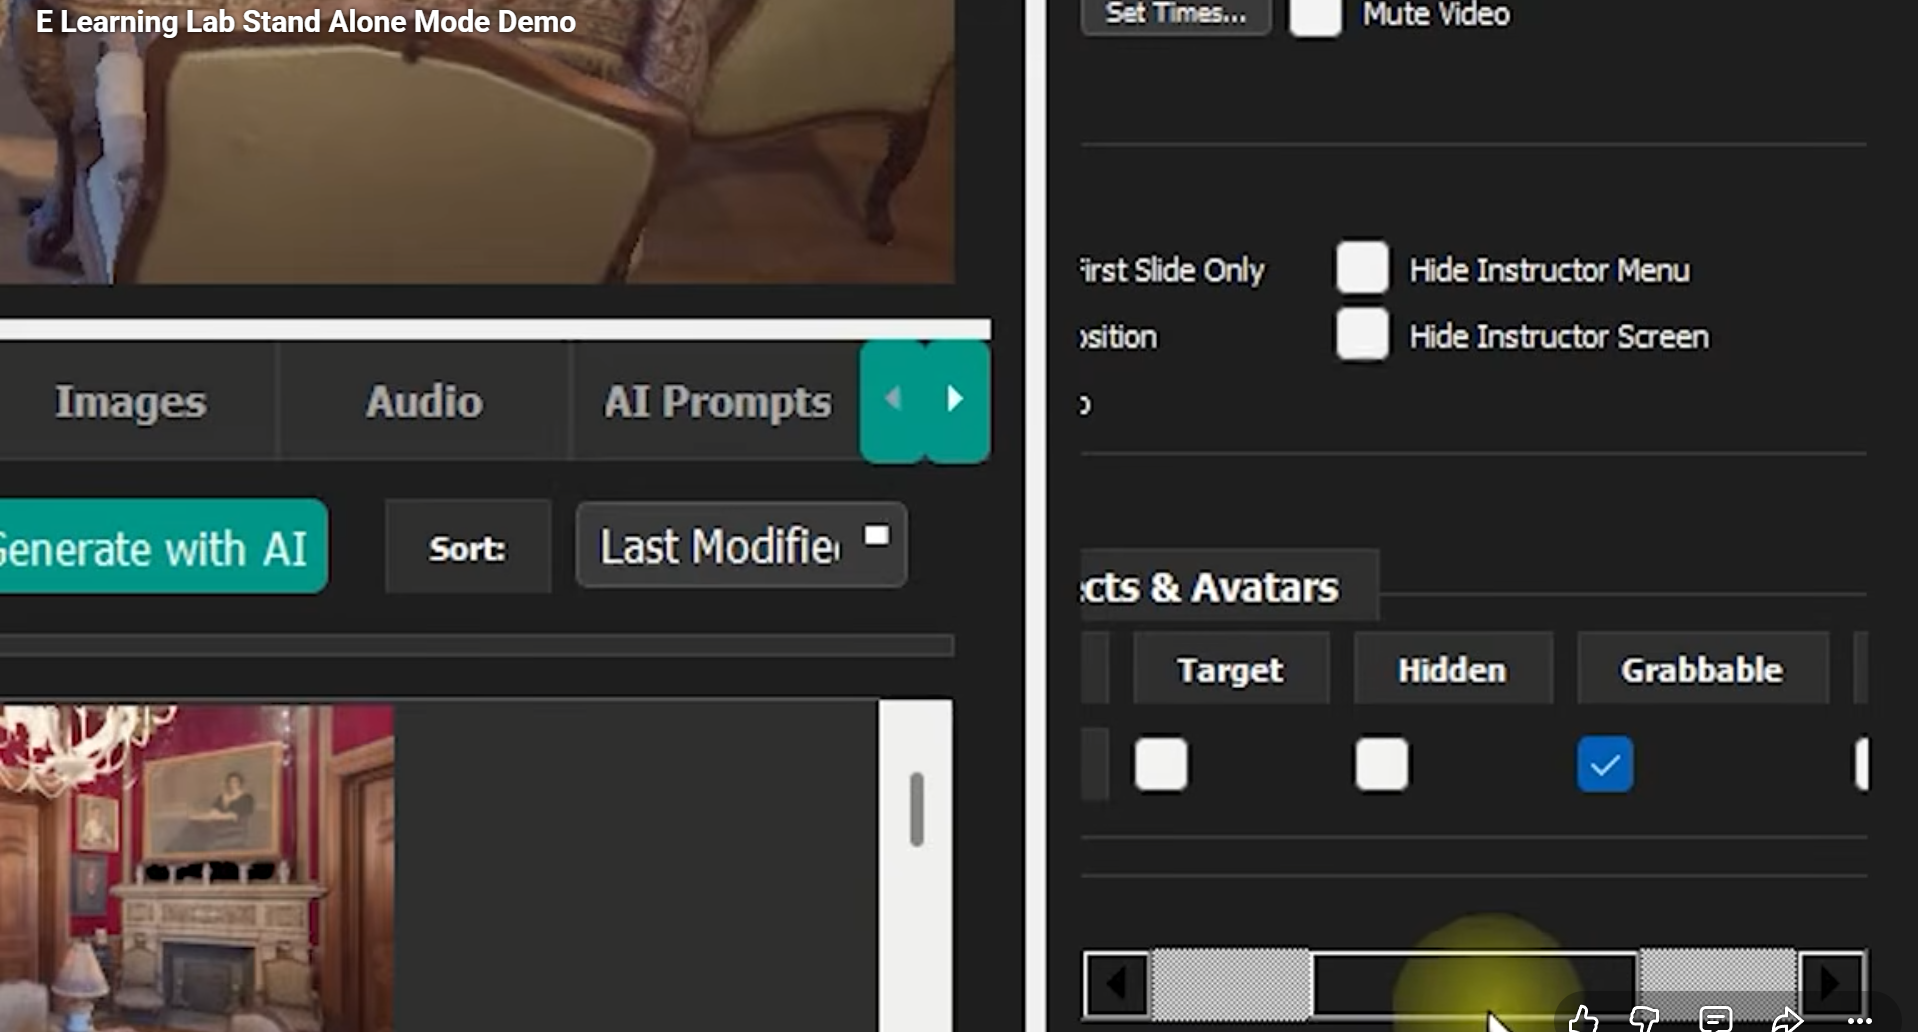
Step 5 — Run in WebXR
Click "Run Session" and Choose "WebXR"
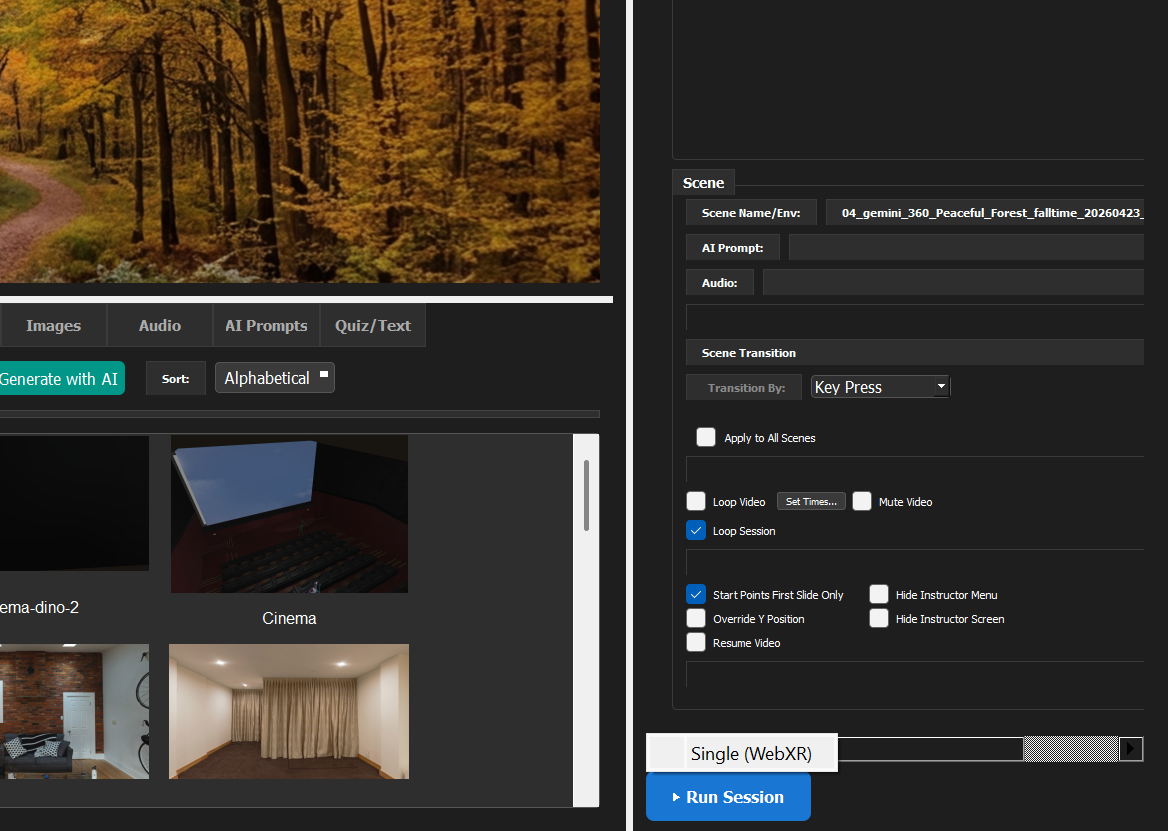
The server opens the PC browser automatically at https://localhost:8765. See Running in WebXR below for connecting headsets and other devices.
Running in WebXR
Prerequisites (on the PC running the server)
The WebXR server runs on the system Python (whatever is on PATH / the py
launcher) — not Vizard's bundled interpreter. On a fresh machine, double-click
Install_WebXR_Requirements.bat in this folder: it installs Python itself
(per-user, no admin rights needed) if one isn't found, then installs everything
below. It's safe to re-run at any time. See install_webxr_requirements.log in
this folder if it reports a failure.
| Requirement | Notes |
|---|---|
| Python 3.x | Whichever Python is first on PATH is what both the installer and E_Learning_Lab.py use — the installer targets that one, and only falls back to installing a separate pinned Python if that interpreter can't satisfy a package (e.g. piper-tts's onnxruntime dependency needs a wheel for that Python version) |
websockets package |
pip install websockets |
cryptography package |
pip install cryptography — needed for HTTPS/WSS |
piper-tts, edge-tts, pyttsx3 |
TTS engines for scene narration fallback (tried in that order) |
cloudflared (optional) |
Only for single-user internet access; not needed for LAN |
| Quest 3 on the same Wi-Fi | Both devices must be on the same local network |
Blender (or a 3D editor for .glb models) |
Blender has the best integrated support — download Blender |
All five Python packages are listed in requirements-webxr.txt; the installer
runs pip install -r requirements-webxr.txt under the hood, so you can also
do it manually with an existing Python:
python -m pip install -r requirements-webxr.txt
First run only: When the HTTPS certificate is generated, Windows will show a UAC
security dialog asking you to allowcertutilto add a trusted root certificate.
You must approve this for the PC browser to trust the connection without warnings.
This is a one-time step — the certificate is cached in%TEMP%\webxr_ssl\.
What the server prints at startup
[WebXR] Serving project 'MyProjectName'
  Local  : https://localhost:8765/
  Network: https://192.168.0.100:8765/  ← open on Quest 3 (accept the security warning once)
  WS sync: shares port 8765 (also on dedicated port 8766 for direct LAN clients)
           multi-user — add ?role=instructor to lead
  Tunnel : starting cloudflared… (HTTPS URL will appear below)

[WebXR] Tunnel (HTTPS): https://xxxxx-xxxxx-xxxxx-xxxxx.trycloudflare.com
The Network (LAN) URL is what a headset on the same Wi-Fi needs. The Tunnel URL (once it appears, a few seconds later) works for anyone on any network — share whichever one fits your situation. Both support multi-user.
Connecting devices
| Where you're accessing from | URL to use | VR works? | Multi-user sync? |
|---|---|---|---|
| Same PC | https://localhost:8765 |
Yes | Yes |
| Same Wi-Fi (headset, phone, tablet) | LAN URL, e.g. https://192.168.x.x:8765 |
Yes | Yes |
| Any network (Cloudflare tunnel) | https://xxxxx.trycloudflare.com |
Yes | Yes |
Same Wi-Fi (LAN) — supports multi-user
The headset must be on the same Wi-Fi network as the PC running the server.
- Put on the headset.
- Example for Meta Quest, open Meta Browser (the built-in browser, not a sideloaded one).
- Navigate to the LAN URL printed at server startup, e.g.:
https://192.168.0.100:8765
- Meta Browser will show a certificate warning:
"Your connection is not private" /
ERR_CERT_AUTHORITY_INVALID
This is expected — the certificate is self-signed. Tap Advanced and then
"Proceed to 192.168.0.100 (unsafe)" to bypass it. The bypass is remembered for
subsequent visits until the server IP changes.
- The E-Learning Lab page should load. Tap Enter VR (note: larger scenes can take a
few minutes to load in VR mode — around 1 1/2 minutes for a 1 GB scene on the test machine).
Note: The first time you connect, the page may not load immediately after tapping
"Proceed." If you see a blank page or it times out, do a full page reload (reload icon
in Meta Browser). Subsequent connections to the same server (same cert) should be faster.
Any network — Cloudflare tunnel (supports multi-user)
The server binds to all network interfaces and automatically launches a Cloudflare HTTPS tunnel if cloudflared is installed. The tunnel URL appears in the console a few seconds after startup — open it in the Meta Browser and tap Enter VR.
One-time install (Windows 11 — winget is built in):
winget install cloudflare.cloudflared --accept-package-agreements --accept-source-agreements
After that, just run the server as normal. No second terminal, no account, no sign-in. If cloudflared is not installed the server still works locally — it just prints the install hint instead.
Cloudflare's free quick tunnel only forwards a single port. The server automatically detects tunnel clients and multiplexes the WebSocket sync traffic (normally its own dedicated port, 8766) onto the same tunneled port over an HTTP Upgrade: websocket handshake — so any number of remote participants can join through one tunnel URL, the same as on the LAN.
The tunnel URL changes each session (free tier limitation) — share the freshly-printed URL with each participant every time you start the server.
Controls
In the headset
| Input | Action |
|---|---|
| Left controller Y button | Next scene |
| Left controller X button | Previous scene |
Trigger near a _tag object |
Grab / release object |
| Left thumbstick | Move forward / back / strafe (relative to head direction) |
| Right thumbstick left / right | Snap-turn 45° left / right (turns in place) |
| Right controller B button (held) + left thumbstick forward / back | Move up / down |
| Timer transition | Auto-advances after configured duration |
Desktop / phone / tablet (no headset required)
| Input | Action |
|---|---|
W / A / S / D |
Fly camera |
X |
Move up |
Z |
Move down |
| Mouse drag | Look around |
| Touch drag (one finger) | Look around (phones and tablets) |
V or Next ▶ button |
Next scene |
C or ◀ Prev button |
Previous scene |
What the WebXR runner reads from your project
- 3D environment for each scene
- 360 video for scenes named with a 360 suffix (see below)
- 360 image for scenes named with a 360 suffix
- Standard videos and images (mono or stereo)
- Powerpoint slideshows
- Scene order and transition type (Key Press / Timer / Release Object)
- Grabbable, animate, visible object lists per scene
- Per-scene audio (
.wav,.mp3,.ogg) - Whole-sequence background audio (set via right-click on an audio file in the Audio panel → Set as Whole Sequence Audio)
- Session audio loop setting
- Immersive-augmented reality
- Quiz questions (
Questions/<scene>.csvor.txt) — see Quiz below - Loop Session setting (project-level checkbox) — with it checked, reaching the last scene wraps back to the first instead of stopping, and going back from the first scene wraps to the last (applies to Prev/Next, Timer, On Media End, and Release Object transitions). Uncheck it to have the sequence simply stop at the last scene. Same setting and same behavior as the Vizard build.
360 media scenes
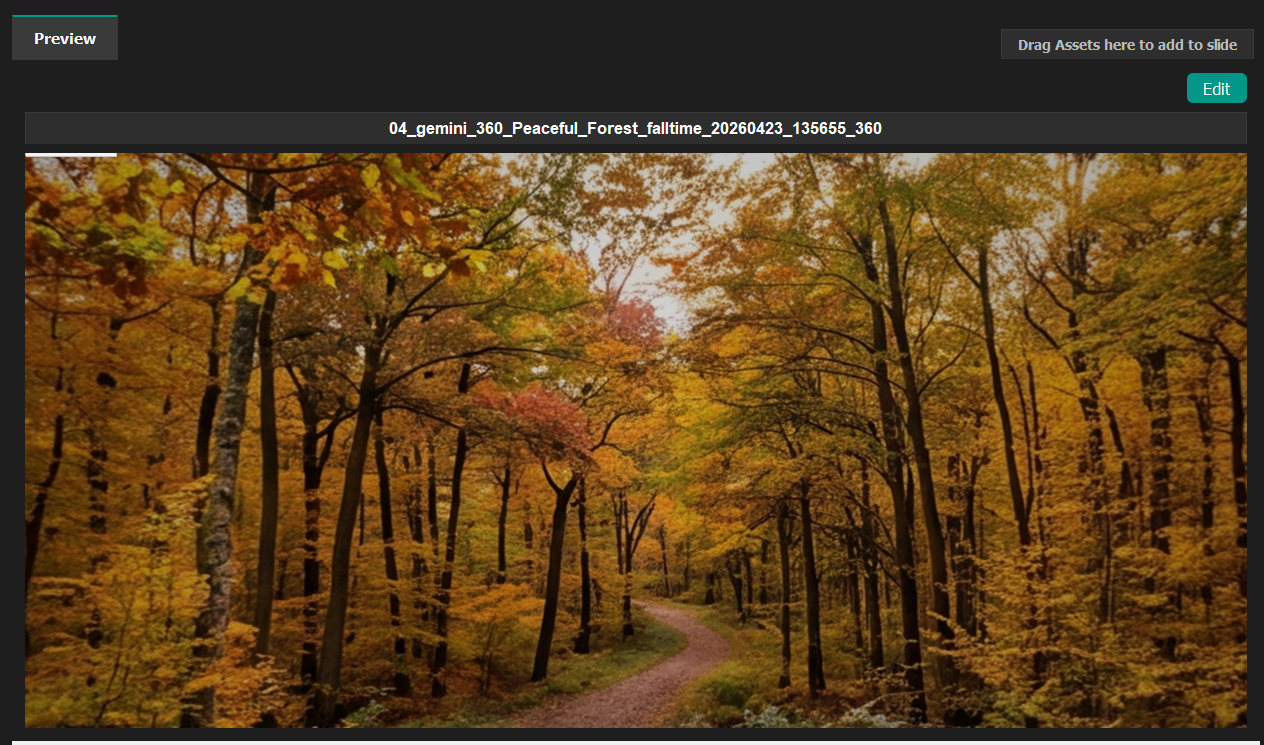
Scenes whose names end with a recognized suffix are rendered as immersive 360 spheres instead of (or alongside) a .glb model. The media file is looked up in the Videos/ subfolder first, then the project root as a fallback.
| Scene name suffix | Format | Description |
|---|---|---|
_360_stereo |
Top-Bottom stereo | Top half → left eye, bottom half → right eye |
_180_stereo |
Side-by-Side stereo | Left half → left eye, right half → right eye |
_360 |
Mono equirectangular | Single sphere, both eyes |
Supported file formats:
| Type | Extensions | Notes |
|---|---|---|
| Video | .mp4, .webm |
Browser-native only — .avi, .mkv, .mov are not supported and will be skipped |
| Image | .jpg, .jpeg, .png, .webp |
Always supported |
A 360 scene does not require a .glb file — the .osgb placeholder that Vizard creates is ignored by the WebXR runner. Scenes with no .glb and no recognised 360 media are skipped with a SKIP message in the console.
On desktop, stereo scenes show the left-eye view. In the headset, each eye receives the correct half of the image automatically via WebXR layer masking.
Augmented Reality/Passthrough mode
Right click on a scene to set in AR Mode
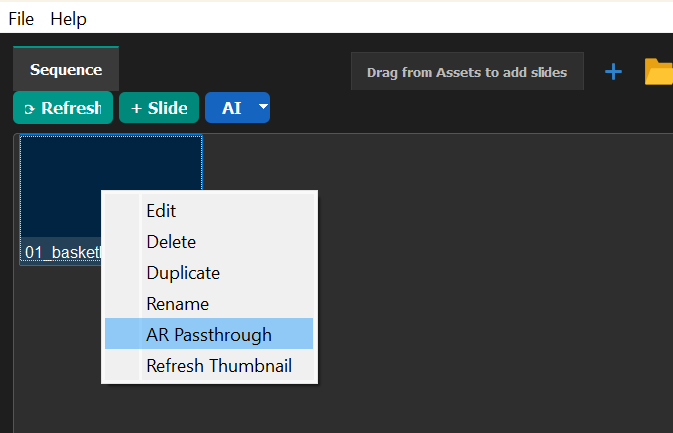
This will then use the passthrough camera on any stand alone headset, or a phone or tablet to use augmented reality
Quiz
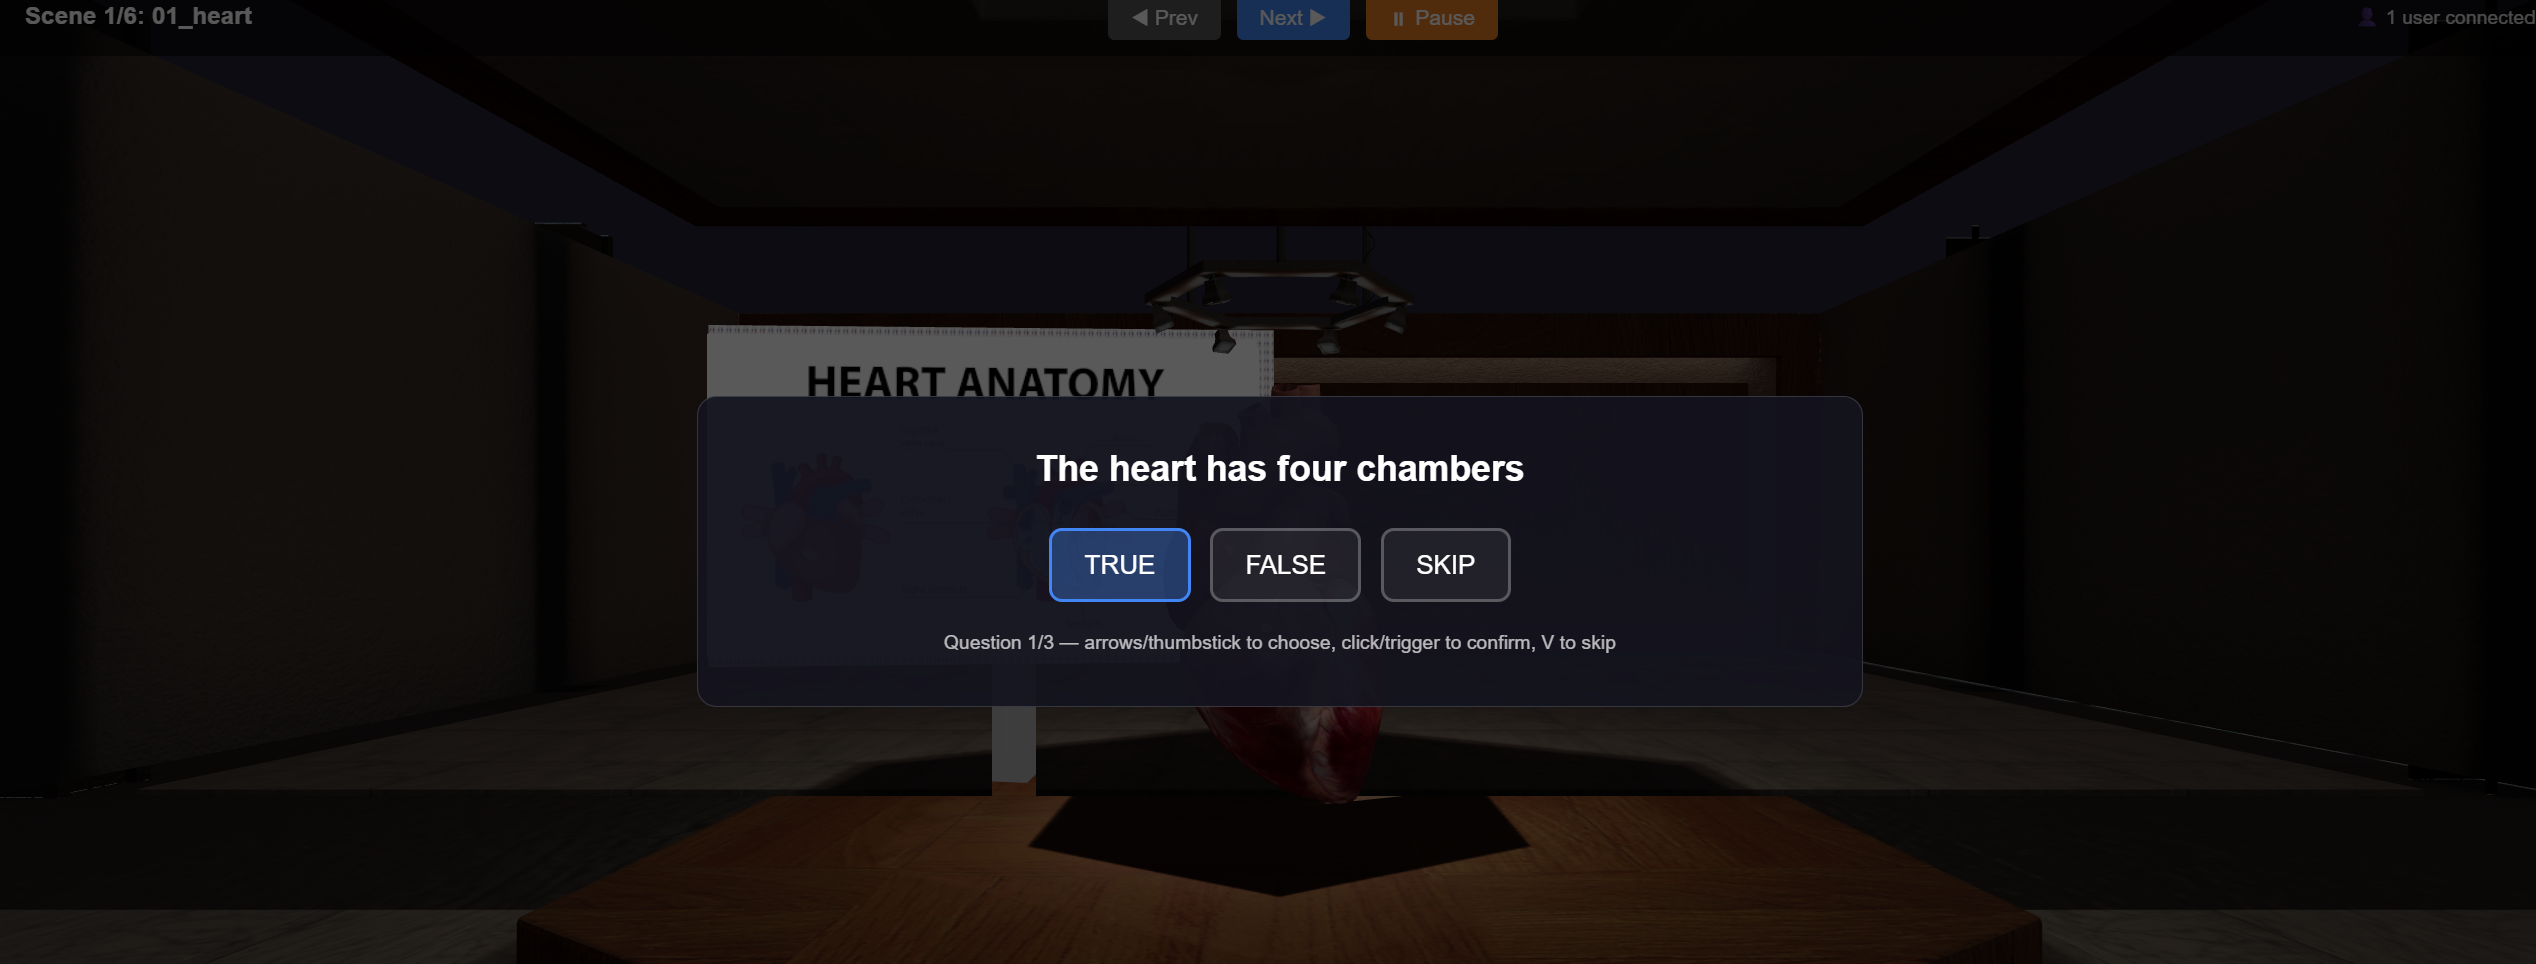
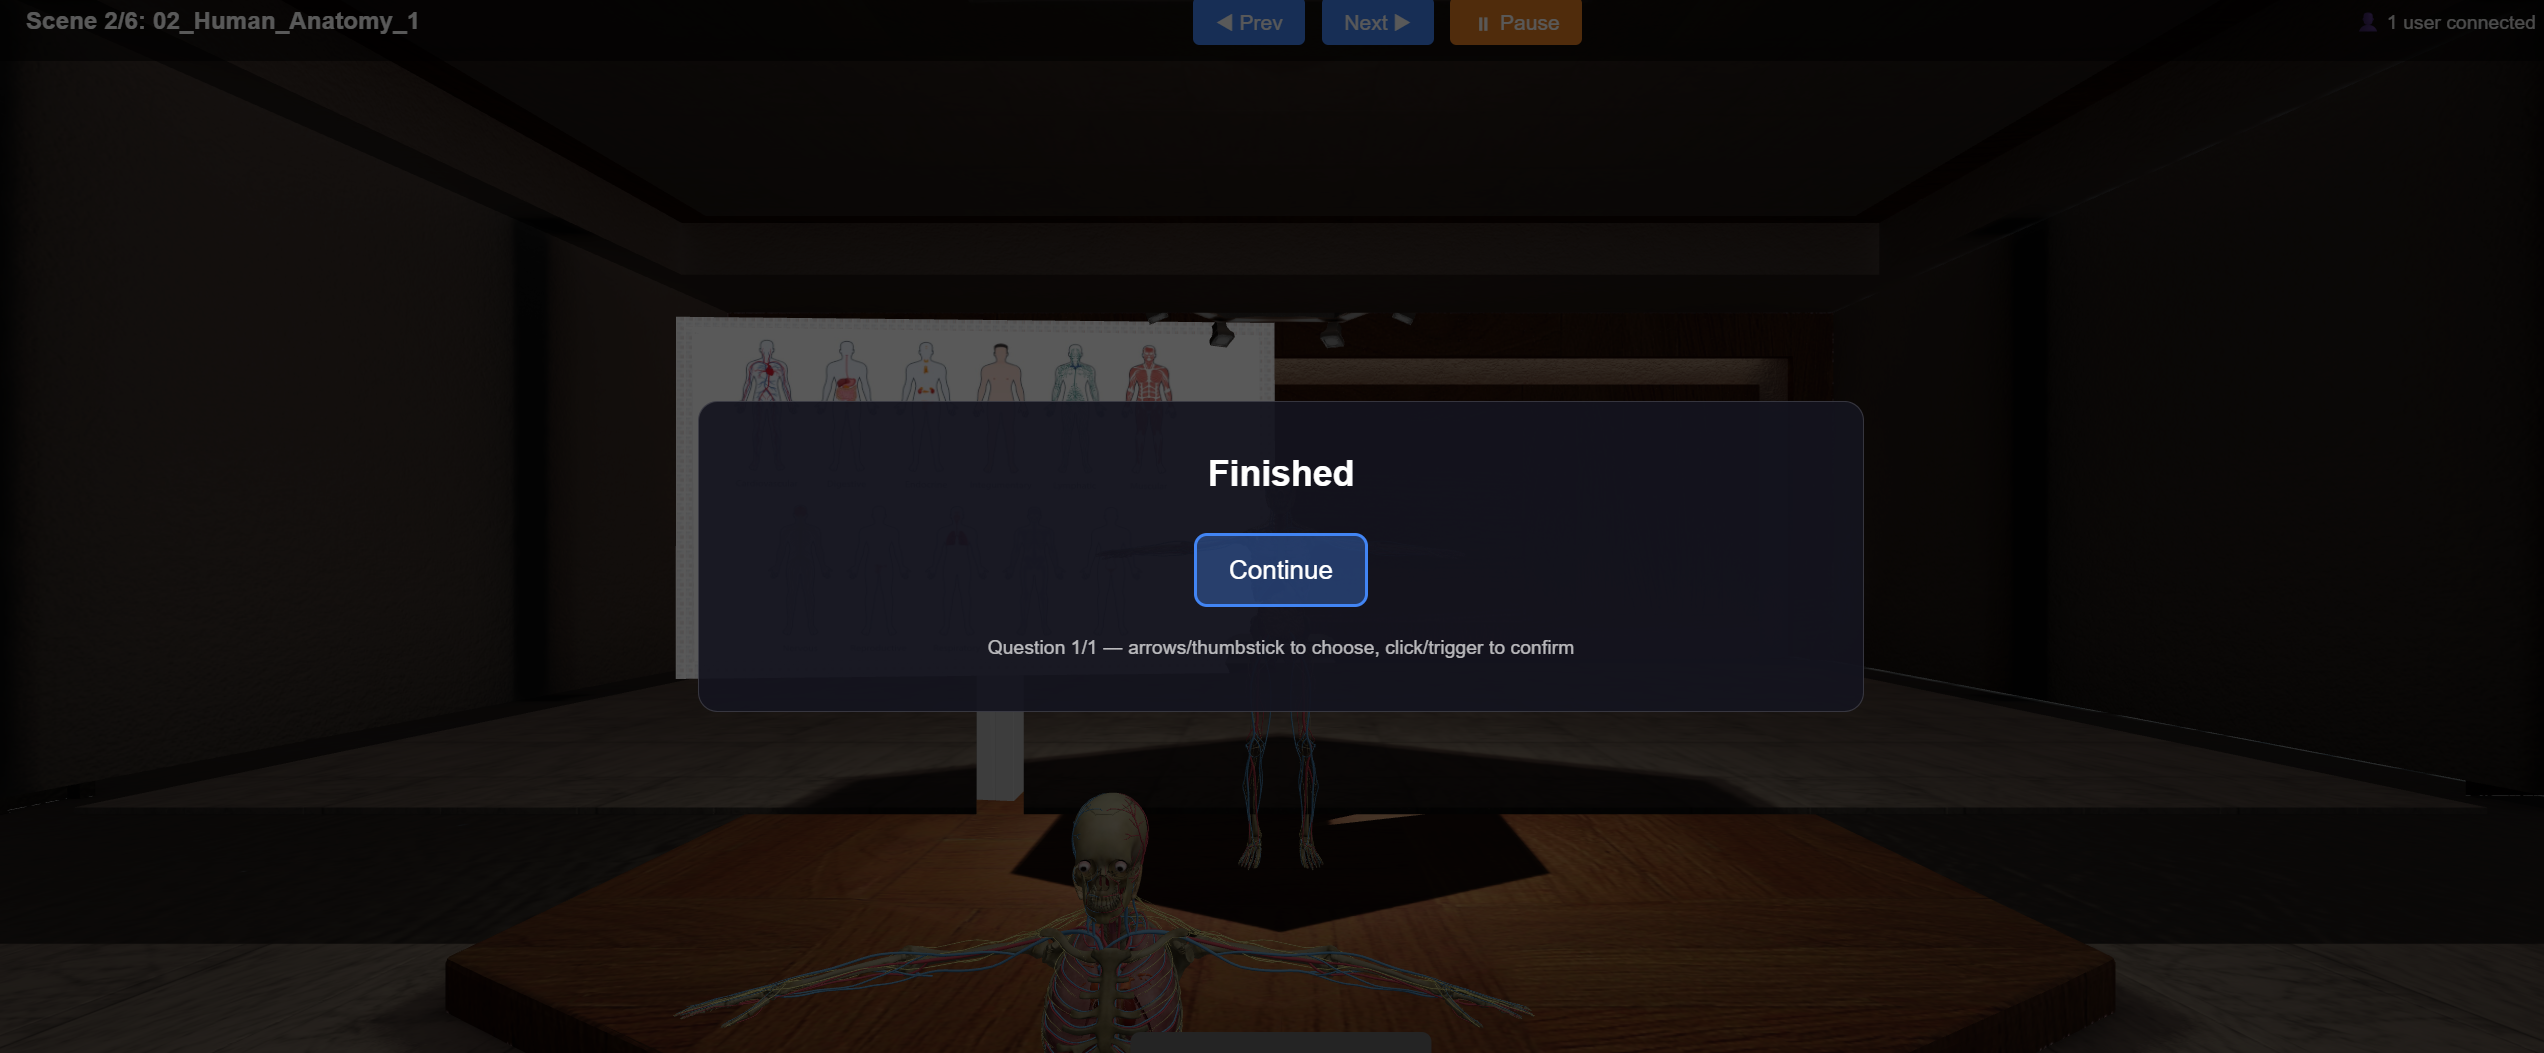
Add a multiple-choice or informational quiz to any scene. This uses the same file convention as the Vizard-only build's quiz screens (e_learning_common.py), so quiz files travel with a project regardless of which mode you run it in.
File format — Questions/<scene name>.csv or .txt:
| Type | Format | Behavior |
|---|---|---|
.csv with a Correct column |
Question, Choice1, Choice2, Choice3, Correct |
Feedback mode — a wrong answer flashes red and resets for a retry; a correct answer flashes green and advances. |
.csv without a Correct column |
Question, Choice1, Choice2, Choice3… |
Plain mode — any confirmed choice is accepted and immediately advances (no right/wrong feedback). |
.txt |
Free text, blank line between pages | Each page is shown as a single "Continue" prompt — use for instructions or informational text rather than a graded question. |
CSV columns are read by position, not by header name — every column between the question (column 1) and the Correct column (if present) is treated as a choice. In either file type, <br> inserts a line break within a question or page.
Adding a quiz to a project:
- Presentation Generator Wizard — checking Include Quiz auto-generates a quiz CSV from the lesson content and adds it as its own slide at the end of the sequence.
- Drag a quiz file onto empty space in the Scenes list (from the Quiz/Text tab) — creates a new, dedicated quiz slide (a blank scene whose only content is the quiz).
- Attach a quiz to an existing scene (Stand Alone Mode only) — drag a quiz file directly onto an existing scene's thumbnail, or right-click a scene → Attach Quiz… and pick a file. The quiz overlays on top of that scene instead of creating a separate slide, so a 3D model, 360 photo/video, or AR scene can have its own quiz layered on at the end. If the scene already has a quiz, you'll be asked to confirm before it's replaced.
Attach Quiz is Stand Alone Mode only for now — the Vizard-only quiz renders as a full-screen takeover rather than an overlay on the live scene, so "on top of an already-populated scene" doesn't apply there the same way.
Controls during a quiz:
| Input | Desktop / phone / tablet | VR headset |
|---|---|---|
| Change selected choice | ← / → arrow keys |
Right thumbstick left / right |
| Confirm selected choice | Left mouse click | Right controller trigger |
| Skip the current question | V or Next ▶ button |
Left controller Y button |
Skipping only advances the current question — it does not skip the whole scene. Normal scene navigation (Prev/Next, thumbstick movement, snap-turn) is disabled while a quiz is on screen and resumes automatically once the quiz finishes.
Notes:
- A quiz-only slide works even without a
.glb/.gltfmodel (e.g. one created before quiz slides were built as.glb) — it renders the quiz over a blank background rather than being skipped. See the.osgbscenes limitation below. - In a multi-user session, quiz progress is not synchronized — each participant answers independently on their own screen.
- Quiz answers are not yet saved/recorded by the WebXR runner (the Vizard-only build logs results to
data/*_quiz.csv); see Planned next steps below.
Quizzes can also be used as instruction slides (can take .txt or .csv formats)
Biopac
The E-Learning Lab can connect to a Biopac AcqKnowledge system to record physiological data (heart rate, GSR, EEG, etc.) in sync with WebXR sessions.
Check "Biopac" under the "Advanced Settings"
When a WebXR session is started with Biopac enabled, a companion script launches automatically in a separate window. See Session Synchronization below for how the companion controls session timing.
Note: Biopac recording works alongside Data Saving (see below). Both can be active at the same time.
Saving Data
The E-Learning Lab can save a timestamped CSV log for every WebXR session without requiring Biopac hardware.
Check "Data Saving" under the "Advanced Settings"
When a WebXR session starts with Data Saving, a companion script launches automatically. It creates a CSV file with the session date, start time, trial label, and any flag events recorded during the session. The CSV is saved to the project's data folder and can be opened in Excel or any data analysis tool.
There is also the option to set a label that will go into the data in the biopac_webxr_companion.py script on line 59
yield sightlab.startTrial(trialLabel="A")
See Session Synchronization below for how the companion controls session timing.
Session Synchronization
When Data Saving or Biopac is enabled, a companion script launches in a separate window on the instructor machine. It controls when the session starts and ends so that all participants and the data recording are synchronized.
Flow
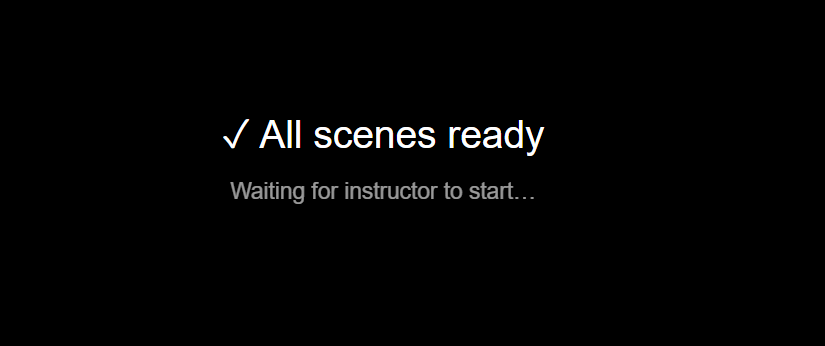
- Waiting screen — As soon as the companion launches, all connected browser clients (Quest headsets, phones, tablets) show a black "Loading session…" screen. Users should click Enter VR from this screen so the headset enters VR mode while scenes download in the background.
- Ready — Once scenes have finished downloading, the screen updates to "✓ All scenes ready — Waiting for instructor to start". The instructor can now press Space.
- Start — The instructor presses Spacebar in the companion window (that window must be in focus). All clients simultaneously clear the waiting screen, the recording trial begins, and AcqKnowledge starts capturing (if Biopac is enabled).
- End — The instructor presses Spacebar again. All clients fade to a black "Session ended" screen, the trial ends, and the data file is saved.
Important: The companion window must be in focus (clicked/active) on the instructor machine for spacebar keypresses to register. If the E-Learning Lab or another window is in front, the keypress will be ignored.
T key — Sync flag / custom event
While a session is running, pressing T in the companion window inserts a synchronization marker:
- Writes a
"T key pressed"event to the CSV data file - If Biopac is active, sends a Sync Event marker to AcqKnowledge at that exact moment
This is useful as a secondary synchronization method. For example, if a participant takes noticeably longer than others to load into a scene (VR scenes can take 1–2 minutes to become fully interactive after the session starts), the instructor can press T at the moment that participant is visibly ready — giving a precise timestamp to align against in post-processing.
Scene load times in VR
Even after the session starts and the waiting screen clears, VR users may experience a short delay (typically 1–2 minutes on large sessions) before scenes are fully interactive. This is normal — the 3D assets are large files and continue streaming in the background. The T key flag can be used to mark the exact moment a participant is ready if precise per-user alignment is needed.
Converting Projects to WebXR
An existing Vizard-based project can be converted for WebXR in one step. Right-click the project in the Projects panel and choose Convert to WebXR.
This will:
- Duplicate the project as
<name>_WebXR— the original is left completely untouched - Convert every
.osgbscene file to.glbin the copy - Convert any browser-incompatible videos (
.avi,.mkv,.mov) to.mp4if FFmpeg is available - Remove the original
.osgband old video files from the copy to save space
A progress bar shows each file as it converts. When done, the _WebXR project appears in the Projects panel and is ready to run with WebXR.
Note: Scenes that contain 3D text labels (
osgText::Text3D) cannot be converted automatically — remove the text labels in Vizard first, then re-export.
Converting Models and Videos
Convert to glb (individual assets)
Right-click any environment or object in the asset gallery and choose Convert to glb. This converts the asset to .glb using the built-in converter and saves it alongside the original as <name>_glb. The thumbnail is copied automatically. Supported source formats: .osgb, .fbx, .obj, .dae (and .glb/.gltf are simply copied).
This is useful when you want to make a single asset available in Stand Alone / WebXR mode without converting the whole project.
Video conversion
Browser playback requires .mp4 or .webm. If FFmpeg is installed (or placed in the utils/ folder), the Convert to WebXR project action converts incompatible videos automatically. For manual conversion:
ffmpeg -i input.avi -c:v libx264 -crf 23 -preset fast -movflags +faststart output.mp4
Filtering Assets
The Objects and Avatars galleries have a Type filter dropdown in the top bar. It automatically populates with the file extensions present in the gallery (e.g. .glb, .osgb, .fbx) and lets you show only one type at a time.
In Stand Alone mode this is particularly handy if you have both .osgb and .glb versions of assets in the gallery — select .glb from the filter to see only the WebXR-ready files.
Presentation Generator
The Presentation Generator Wizard builds a complete multi-scene lesson from a topic and a set of options — no manual scene creation needed.
When stand alone mode is active it will save the slides as .glb files instead of .osgb
Multi-User
One or more VR headsets (or browsers) can view the same E-Learning presentation simultaneously — with live scene sync, shared object grabbing, and (optionally) seeing each other as avatars in the space.
Works over the same Wi-Fi network using the LAN URL, or over any network through the Cloudflare tunnel — see Connecting devices above. Both now support any number of participants.
What syncs
- Scene index — every client jumps to the same scene in real time
- Release Object transitions — server-authoritative; whichever client releases the
object, all clients advance together (no double-advancing) - Session state — waiting / started / stopped overlay shown on all clients
- Video play/pause
- Audio state
- Grabbing — a grabbed
_tagobject is locked against being grabbed by anyone else; if Collaborative Avatars is enabled (below), everyone in VR sees it move with the holder's hand in real time - Avatars & VR controllers (optional — see Collaborative Avatars below) — each connected user's head position/orientation and VR controller positions, broadcast about 10 times per second
Connection flow
- Client opens the page → WebSocket connects (a dedicated port, 8766, for LAN/direct clients; automatically shared over port 8765 for clients connecting through a Cloudflare tunnel — see Any network — Cloudflare tunnel above)
- Server immediately sends a
state_snapshot— client jumps to the current scene, and (if enabled) learns its assigned avatar color and spawn position - From then on, any scene change from any client broadcasts to all others in ~50–100 ms
- If the WS drops, the client auto-reconnects within 3 seconds and re-syncs
- If running with INSTRUCTOR_LED then only the Instructor can initiate scene changes
Session control modes
Set in globalConfig.py:
INSTRUCTOR_LED— only the instructor tab can navigate; student headsets followALL_CLIENT_CONTROL— any headset can navigate (current behavior)
Collaborative Avatars
Set in globalConfig.py (requires STAND_ALONE_MODE = True):
COLLABORATIVE_SESSION = True # default
When enabled:
- The HUD shows a live "N users connected" count.
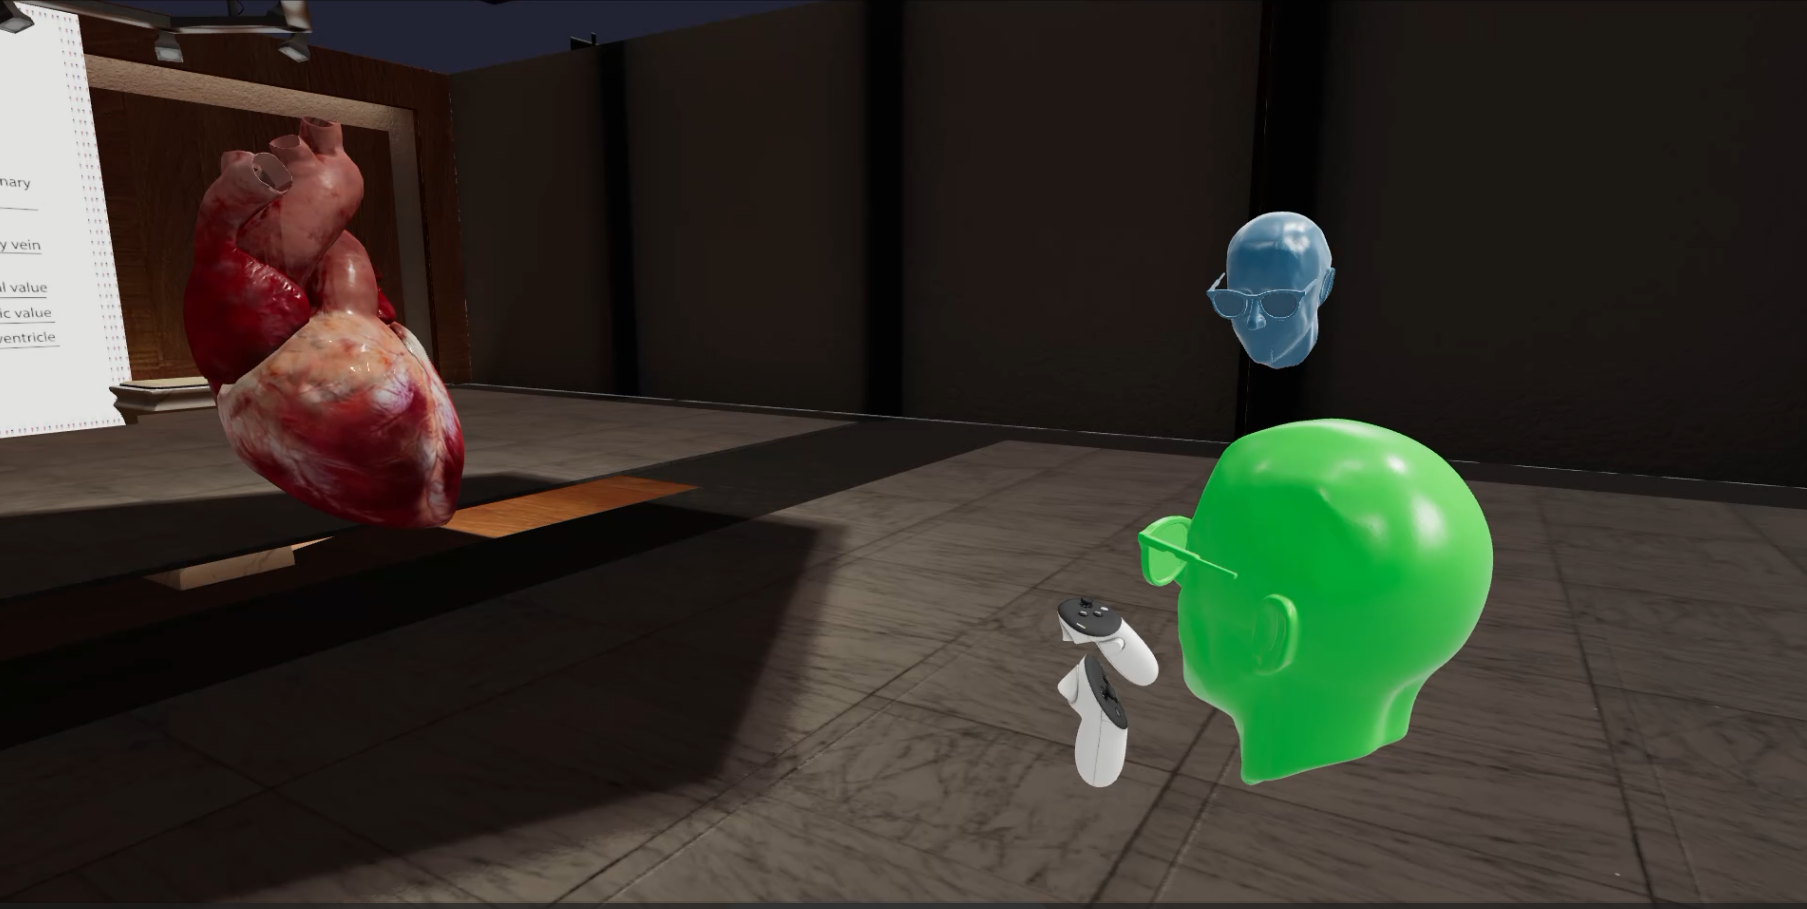
- Each connected client is rendered for everyone else as a simple stylized head avatar, tracking their real head position and orientation (yaw and look-up/down pitch).
- Each newly-connecting client is assigned a color from a fixed rotation — blue → green → red → yellow → blue… — so up to four simultaneous users are easy to tell apart at a glance. Colors are handed out in join order and aren't reused when someone leaves mid-session.
- If a user is in VR, their tracked left/right controllers are also shown to everyone else as placeholder controller models, moving in real time — so other participants (whether they're in VR or on desktop/phone) can see exactly what someone is pointing at or reaching for.
- Grabbing a
_tagobject attaches it, for every viewer, to the holder's tracked controller — it visibly moves with their hand for the whole room, not just for the person holding it.
Set COLLABORATIVE_SESSION = False to turn off avatar/controller rendering and the HUD count. Scene sync, grab exclusivity, and everything else above still works — it's just not visualized.
Spawn Offset
Set in globalConfig.py:
SPAWN_OFFSET_WEBXR = True # default
Without this, every connecting client starts at the exact same point in the scene (world origin, or the scene's _start node) — with several people joining together, everyone spawns stacked on top of each other. When enabled, each connecting client is placed a small distance apart on an expanding spiral around that same point, so any number of users land next to each other instead of overlapping. The first person to connect still spawns at the scene's exact original point, so a solo session looks unchanged.
Set SPAWN_OFFSET_WEBXR = False to restore the old behavior (everyone spawns at the identical point).
Add ?role=instructor to the network address to make a client the instructor.
Troubleshooting
| Symptom | Likely cause | Fix |
|---|---|---|
PC browser shows ERR_CONNECTION_RESET |
Server not running or still starting | Wait a moment (or a few minutes), refresh |
| PC browser shows cert warning | certutil step failed or was denied |
Run certutil -addstore -user Root <cert.pem> manually |
Quest 3 shows ERR_CERT_AUTHORITY_INVALID |
Expected on first connect | Tap Advanced → Proceed, then reload the page |
| Quest 3 shows "WebXR Unavailable" | HTTP (not HTTPS) URL used | Use the https:// LAN URL — plain HTTP can't use WebXR |
| Quest 3 controller changes slides locally but PC doesn't follow | WS connection dropped | Check WS port 8766 is open in Windows Firewall; wait for auto-reconnect |
ImportError: No module named 'websockets' |
Package not installed | pip install websockets |
ImportError: No module named 'cryptography' |
Package not installed | pip install cryptography |
| Firewall prompt appeared but rules weren't added | netsh needs admin rights |
Approve the UAC dialog for firewall rule creation |
| No avatars/controllers appear for other users | COLLABORATIVE_SESSION is False, or STAND_ALONE_MODE is False |
Set both to True in globalConfig.py and restart the server |
| Everyone spawns on top of each other | SPAWN_OFFSET_WEBXR is False |
Set it to True in globalConfig.py and restart the server |
Changed a globalConfig.py flag but nothing changed in the browser |
The server process is a long-running Python process — editing the file doesn't hot-reload it | Fully stop the server (close its terminal, or Ctrl+C) and relaunch it |
Limitations & Planned Next Steps
Current limitations
- Self-signed certificate on the headset — Meta Browser requires a manual bypass each time the server IP changes (different network or new DHCP address). Once bypassed, it is remembered for subsequent visits to the same address. The PC trusts the certificate automatically (via
certutil). - 360 video formats — Only
.mp4and.webmplay in browsers. Existing.aviand.mkvfiles (e.g. from older Vizard projects) must be converted to.mp4(e.g. with ffmpeg) for WebXR playback. The Vizard runtime is unaffected and continues to use the original formats. .osgbscenes — Standard (non-Stand Alone) scenes in.osgbformat are not loadable by Three.js and will be skipped by the WebXR runner. Only.glb/.gltfscenes and recognised 360 media are served — the one exception is a scene with an attached quiz (see Quiz above), which is still included and shown over a blank background even with no.glb.- Quiz answers aren't saved yet — the WebXR runner shows live quiz feedback (correct/incorrect, retry) but doesn't record results anywhere. The Vizard-only build writes results to
data/*_quiz.csv; WebXR result logging is planned but not implemented. - No "remove quiz" option in the GUI — detaching a quiz from a scene currently means deleting the file from that project's
Questions/folder by hand. - Avatar colors are fixed, not user-chosen — the blue/green/red/yellow rotation is assigned automatically in join order; there's no way for a participant to pick their own color or be labeled with a name.
- Avatar/controller models are simple placeholders — they're not matched to a participant's actual headset or controller hardware, and don't reflect a user's real appearance.
- AI Agents — Not yet implemented
- Screencasting — Not yet implemented
- Data Saving — Limited and currently can synchronize with biopac, add labels, time stamp and flags (no eye tracking or position data)
- Presentation Generation Scenes created in WebXR may have flipped texture images when viewed in non-stand alone
- Video modification settings don't yet work (videos loop by default). Mute, set start and end times and loop toggle don't yet work.
Planned next steps
- Auto-install missing packages — If
websocketsorcryptographyaren't installed, the server currently crashes with anImportError. A pip bootstrap on first run would self-install them. - AR mode multi-user — Passthrough works for single-user; multi-user AR hasn't been tested and may need additional anchor sync.
- mDNS/Bonjour discovery — Auto-discover the server on the LAN so users never have to type an IP address (removes the "note down the LAN URL" step).
- Custom/uploadable avatars — Let each participant pick a name or avatar appearance instead of the fixed color rotation.
- WebXR quiz result logging — Record quiz answers the same way the Vizard build does (
data/*_quiz.csv), likely via a new server endpoint the browser posts results to. - Remove/detach quiz from the GUI — A right-click action to clear a scene's attached quiz without deleting the file manually.