Blender + E-Learning Lab
From 3D Creation to Collaborative XR
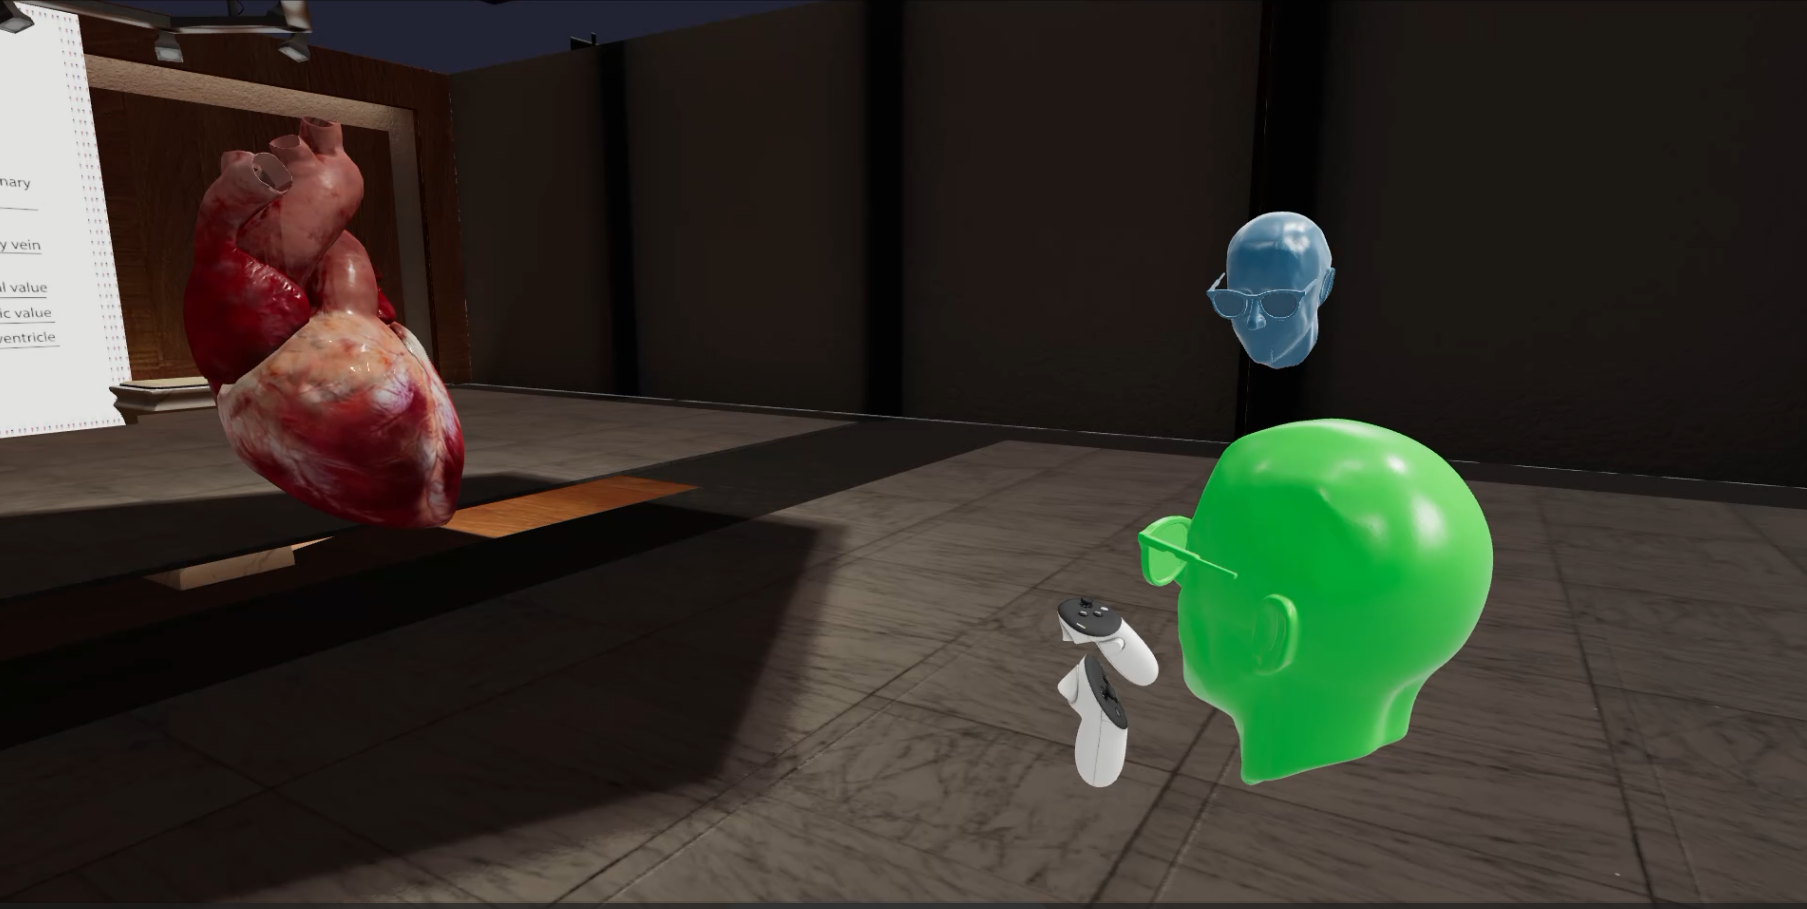
The E-Learning Lab extends Blender beyond 3D content creation by giving students and instructors a direct path from a Blender project to an interactive, collaborative VR or AR experience.
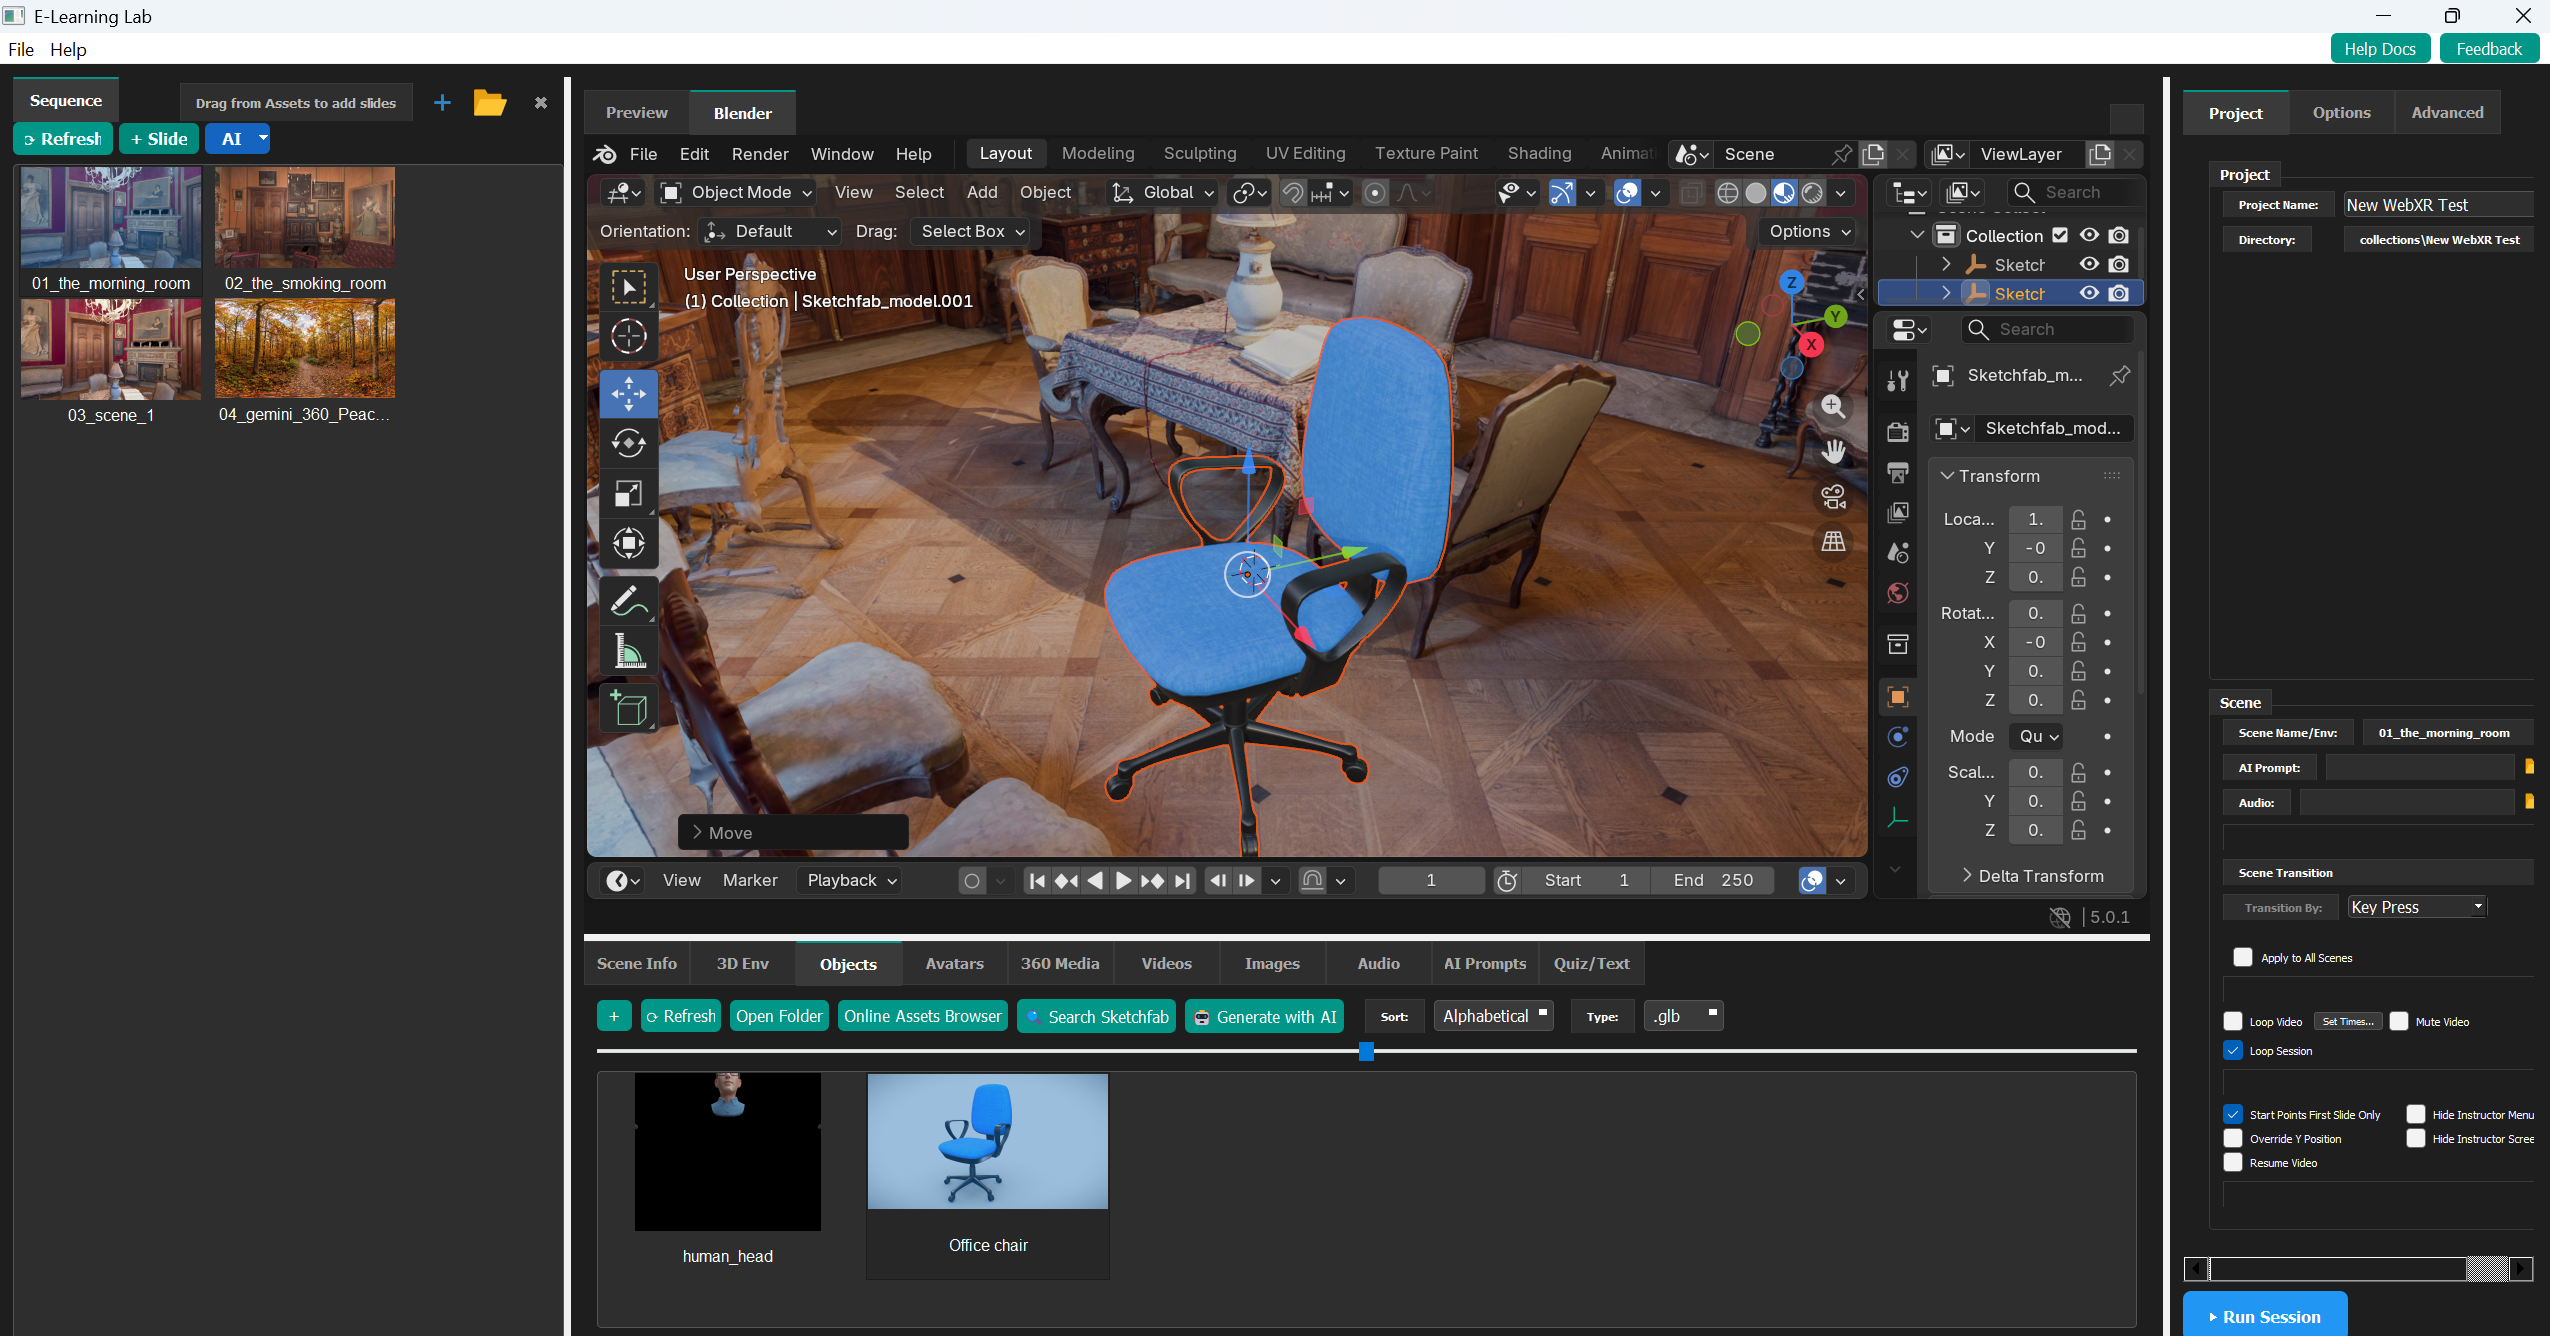
Instead of creating a model in Blender and then moving into a separate game engine or development workflow, users can work with Blender embedded directly within the E-Learning Lab. When they save their work, the scene is exported in a format that can be used immediately by the E-Learning Lab.
From there, the same Blender content can be enhanced with interaction, multimedia, presentation tools, and multi-user capabilities—without requiring students to become XR programmers.
Workflow
-
Create a new project.
-
Edit in Blender. Click Edit on your model and Blender opens embedded inside the E-Learning Lab. Use Blender to set up the scene, make material edits, mesh changes, custom rigging, and more.
- Drag additional objects from the Objects bin straight into the embedded Blender window, then use Blender's translate, rotate, and scale tools to place them. They'll show up in the Scene Objects panel.
- Start points work the same way: drag in
START_POINT_SINGLE_start.glband position it—this is where someone will start in the scene. -
Avatars dragged in are automatically converted to be scene-ready.
-
Save to Project. Click Save to Project to save the Blender scene.
-
Tag objects for interactions: grabbing, visibility, AI Agent targeting, data collection, animations, and more.
-
Build out the remaining slides. Switching slides switches which scene opens in Blender.
-
Run the session in WebXR on standalone headsets, tablets and phones, desktop browsers, Apple Vision Pro, or PC VR. Multiple users can join from anywhere.
Keep the Focus on Blender
A traditional Blender-to-XR workflow can require additional knowledge of game engines, XR development frameworks, networking, interaction programming, and device deployment.
With the E-Learning Lab, the workflow is much simpler:
Create in Blender → Save → Add Interactions → Launch in XR
Students can spend more time learning modeling, materials, animation, rigging, optimization, and spatial design rather than learning an entirely separate development environment in order to experience their creations collaboratively in VR or AR.
Experience Blender Work at Human Scale
Students are no longer limited to viewing their work on a monitor.
After saving a Blender scene, they can enter it in VR or place content into the real world using supported AR and passthrough devices.
This makes concepts such as these much easier to understand:
- Scale and proportion
- Spatial composition
- Architecture and interior layout
- Product ergonomics
- Object placement
- Animation in context
- Navigation and usability
- Real-time materials and performance
The result is an iterative workflow:
Model → Save → Experience → Evaluate → Revise → Save Again
Turn Blender Models Into Interactive Content
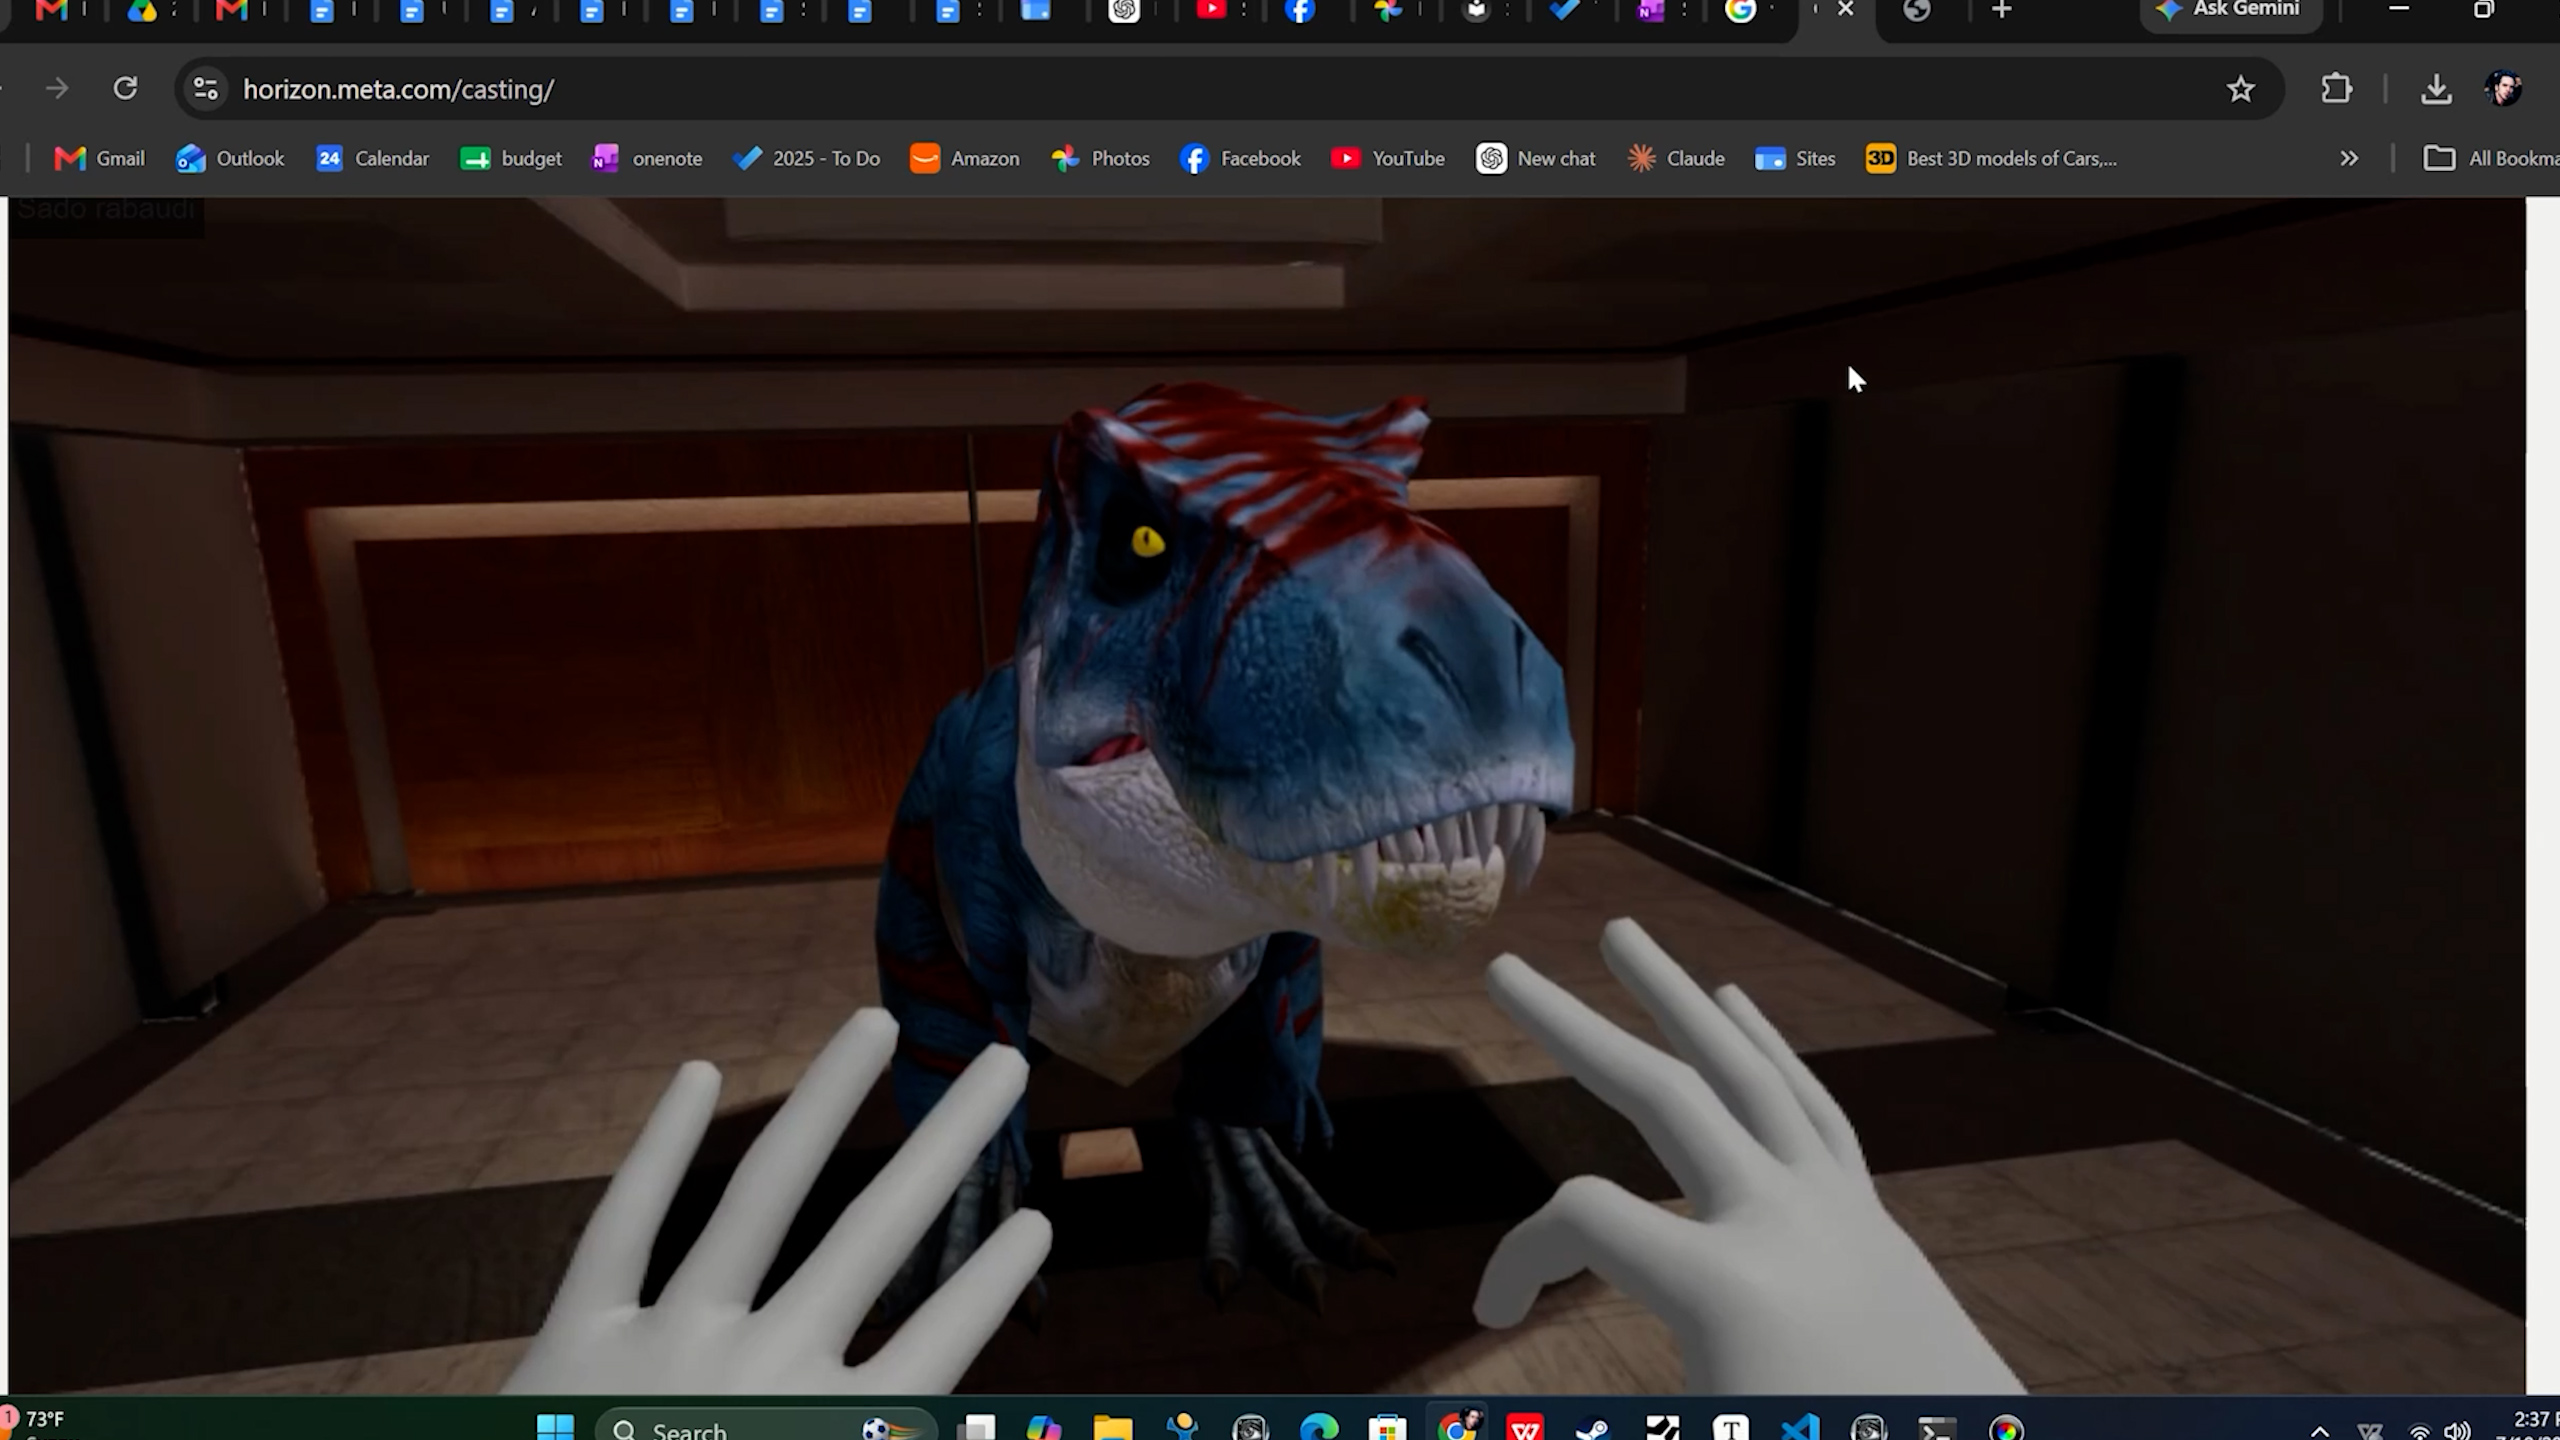
After a Blender scene is saved into the E-Learning Lab, users can add interactive behaviors without having to build a custom application.
For example, objects can be configured to:
- Be picked up and grabbed
- Appear or disappear during a presentation
- Play animations
- Spin or perform additional animations
- Be examined collaboratively by multiple users
- Run in VR or AR
The Blender scene can also be combined with other forms of content, including:
- Audio
- Video
- Images
- 360° environments
- Avatars
- Slides and presentation content
This means a Blender project can become more than a model—it can become an interactive simulation, demonstration, virtual exhibition, or presentation.
A Simple Workflow
1. Create or Edit in Blender
Blender opens directly within the E-Learning Lab workflow.
Students can use normal Blender tools for:
- Modeling
- Mesh editing
- Materials
- Rigging
- Animation
- Scene assembly
- Object placement
Additional 3D models can also be dragged directly into the Blender scene.
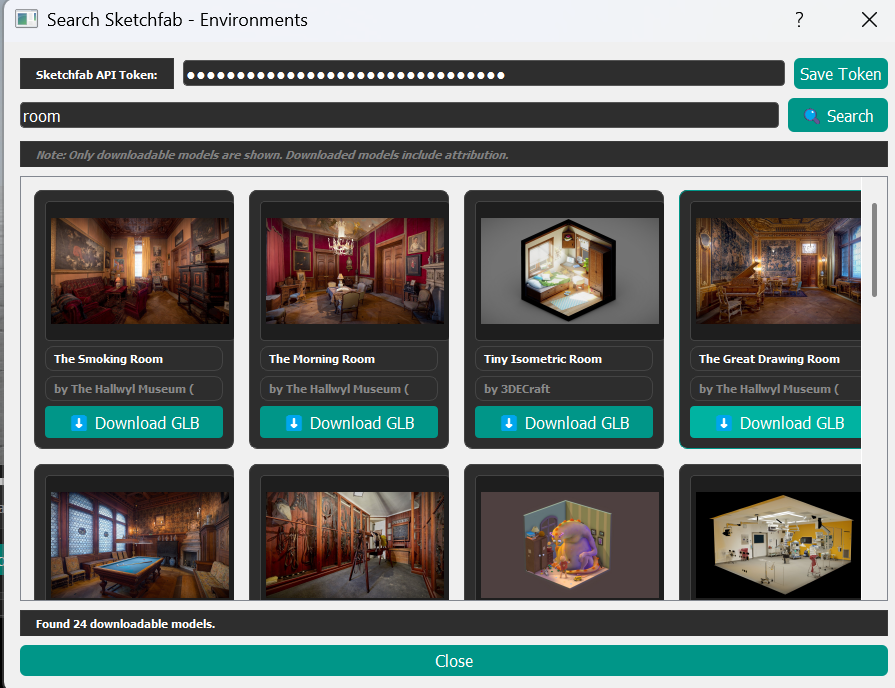
The E-Learning Lab provides direct hooks into content libraries such as Sketchfab and more, so users can search for and add additional models without leaving the workflow.
2. Save the Scene
When the user clicks Save, the Blender content is exported as a .glb that the E-Learning Lab can use.
There is no need to manually rebuild the scene in another XR development environment.
3. Add Interactivity
Within the E-Learning Lab, the instructor or student can configure how the scene behaves.
Objects can be made grabbable, animations can be played, visibility can be controlled, and other media or presentation elements can be added.
4. Build a Lesson or Presentation
A Blender scene can be one part of a larger sequence.
For example:
Introduction → 360° Context → Blender Scene → Animation → Interactive Objects → Quiz → AR Demonstration
This allows Blender content to become part of a structured educational experience rather than simply being viewed as a standalone model.
5. Launch the Experience
The project can then be launched as an immersive session.
Depending on the deployment, participants can join using WebXR-compatible devices such as:
- Standalone VR headsets
- PCVR headsets
- Desktop or laptop browsers
- Tablets
- Phones
Supported devices can also use augmented-reality or passthrough experiences.
Sharing Projects with Other Users
The E-Learning Lab includes a shared folder, making it easy for students and instructors to share Blender projects with one another. A project saved to the shared folder can be opened, reviewed, or built upon by other users without manually copying or transferring files.
This makes it simple to distribute a starting scene to a class, hand off a project between collaborators, or let an instructor review student work directly.
Working Outside the Embedded Blender
Using Blender embedded directly within the E-Learning Lab is the most direct workflow, since saving automatically exports the scene in a format the E-Learning Lab can use immediately.
However, this isn't a requirement. Users who prefer to work in their own standalone installation of Blender can do so, and then export the finished scene as a .glb file for import into the E-Learning Lab. This can be useful for users who want access to plugins, hardware, or workflows not available in the embedded editor.
Collaborative Multi-User Learning
One of the biggest advantages of the integration is that Blender content can become a shared space.
Multiple users can enter the same session and interact together using synchronized head-and-hand representations.
Depending on the device and session configuration, users can:
- Walk or teleport through scenes
- Use continuous navigation
- Interact using tracked hands and fingers
- Grab and manipulate objects
- Collaboratively handle the same content
- Move between scenes and presentation slides
- Participate remotely or in the same classroom
This creates new possibilities for teaching and critique.
Instead of showing a Blender project on a projector, an instructor and students can enter the project together.
For example, a class could stand inside an architectural design, walk through a museum exhibit, inspect an animated character, examine a scientific model, or collaboratively discuss the proportions of a product.
Extending Into the Broader E-Learning Lab
Because the Blender workflow is integrated with the E-Learning Lab, the same content can also connect with a larger immersive-learning ecosystem.
The broader platform includes capabilities such as:
- Drag-and-drop lesson creation
- Multi-user presentations
- Custom avatars
- 360° and standard media
- PowerPoint and PDF presentations
- Quizzes
- Instructor controls
- Augmented reality
- Eye tracking and learning analytics
- BIOPAC integration
- AI-assisted content creation and teaching tools
This creates a pathway from 3D content creation to immersive teaching, collaborative presentation, training, and research.
WebXR note: AI Agents are part of the broader E-Learning Lab environment but are not currently available in the WebXR version.
The Blender + E-Learning Lab integration allows students to create in Blender, click Save, add interaction and instructional content without programming, and turn their work into a collaborative VR or AR experience that can be shared across a wide range of devices.