Proximity Sensors
Overview
A proximity sensor makes something happen when a learner reaches a spot in the scene. For example:
- "Walk to the station" plays a chime.
- "Reach into the box" shows a label.
- "Bring the beaker to the tray" moves on to the next slide.
You set sensors up in the Scene Editor; no code is needed. A sensor can be a zone you place in the scene, or any object already on the slide.
Adding a Sensor
Drop a Zone
- Select a scene.
- Open the Objects tab and drag PROXIMITY_ZONE onto the Preview window.
- Move, rotate and scale the zone with the gizmo, like any other object.
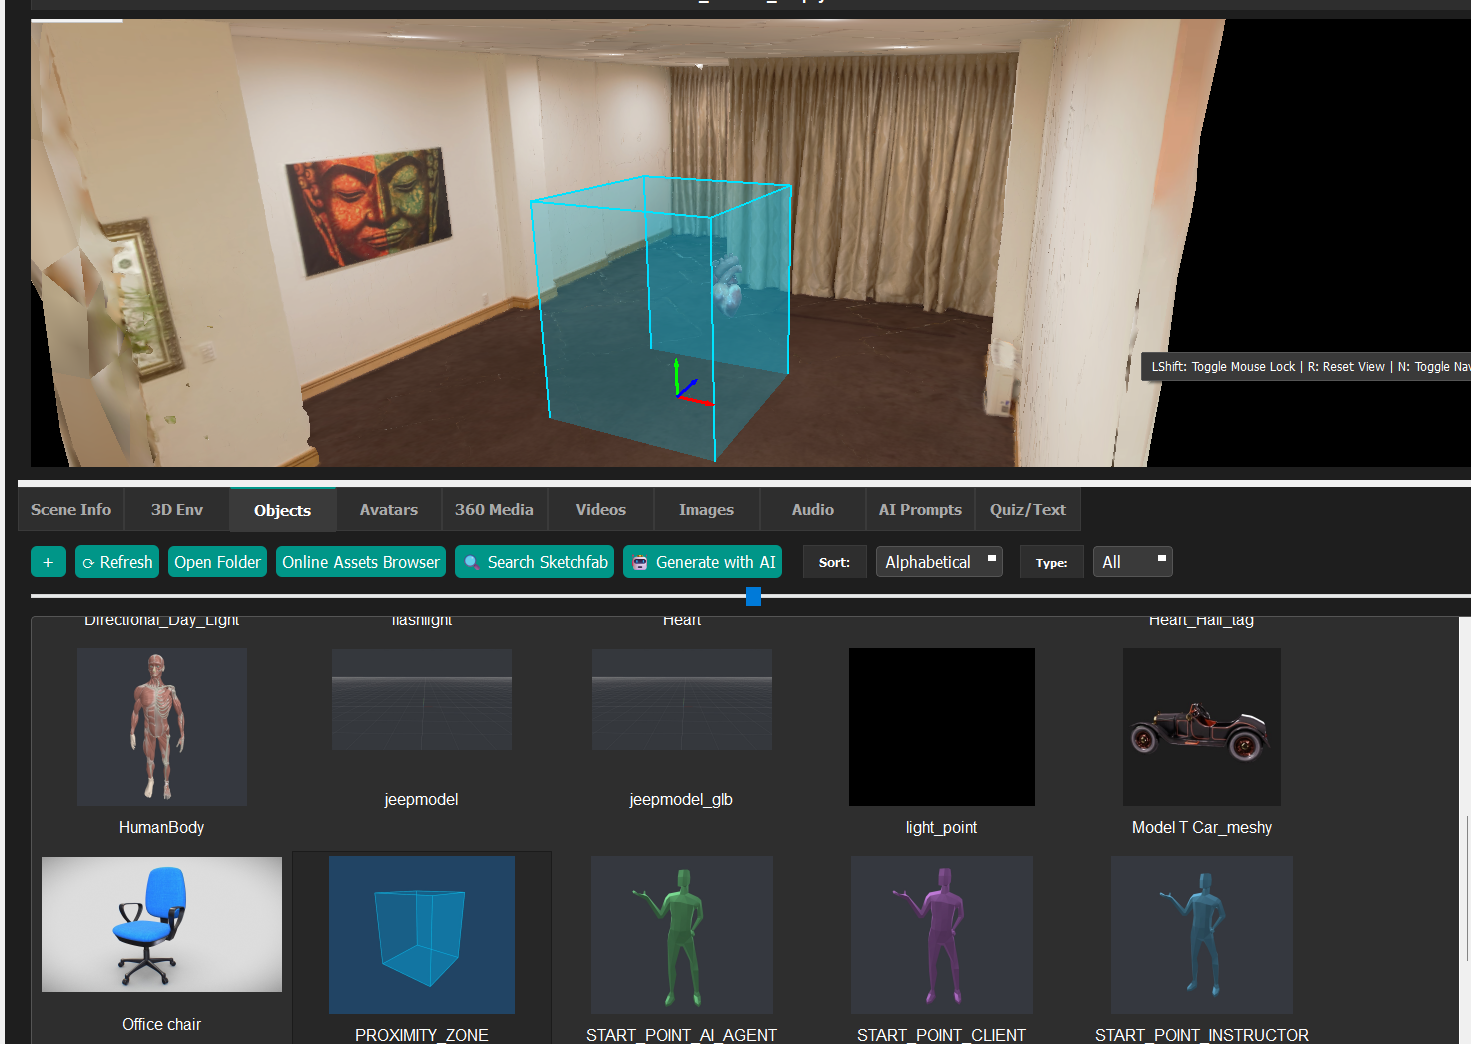
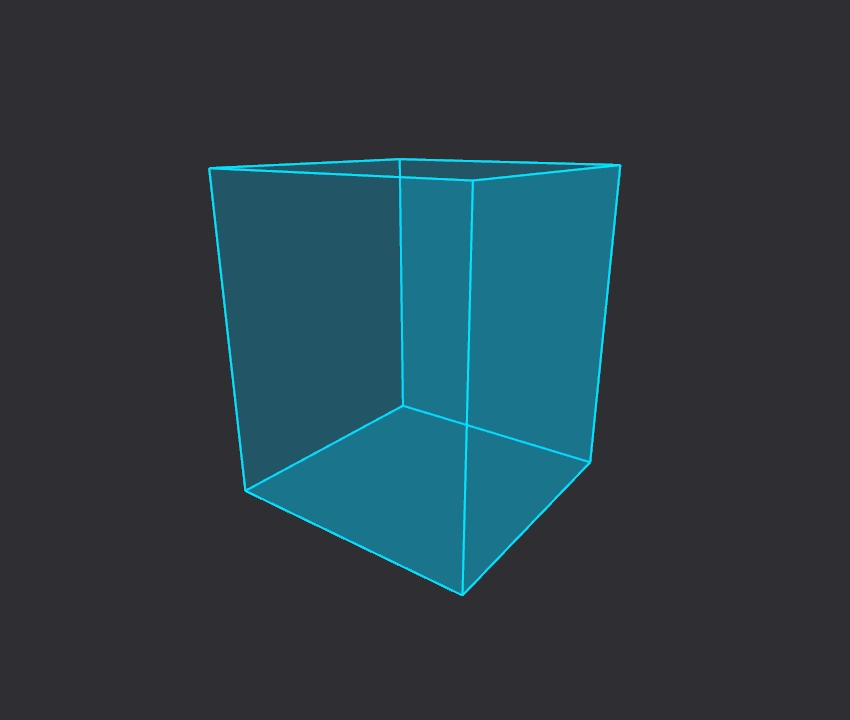
The zone is a translucent blue box, 2 m wide and 2.4 m tall, that stands on the floor, so a learner walking into it is inside it. Each drop adds a new zone (PROXIMITY_ZONE_1, PROXIMITY_ZONE_2, and so on), and the Proximity Sensor dialog opens straight away.
Zones are visible while you edit but hidden when the lesson runs. In the Scene Objects & Avatars panel they show a 📡 icon, and their Target, Hidden, Grabbable and Animate checkboxes are turned off.
Use Any Object
Right-click any row in the Scene Objects & Avatars panel and choose Proximity Sensor.... This works for objects that are part of the environment, objects you dropped in, and avatars. Approaching an avatar is a common use.
The Proximity Sensor Dialog
| Setting | What it does |
|---|---|
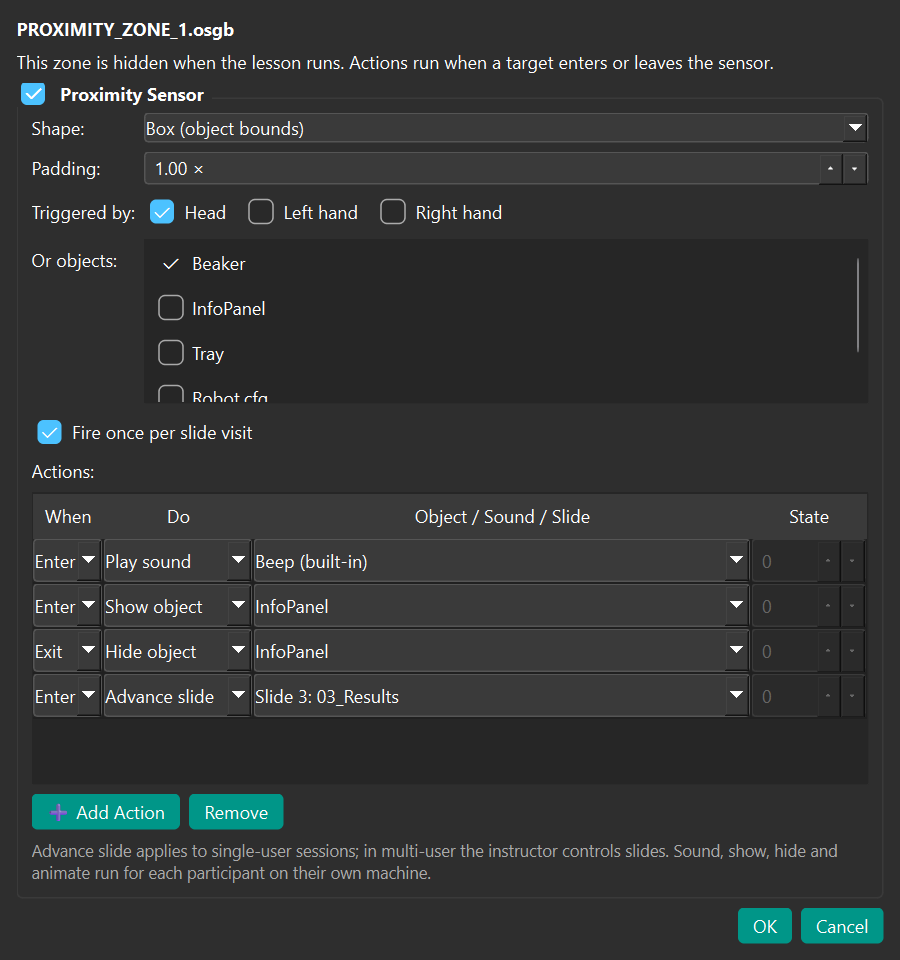
| Shape | Box uses the object's own bounds and follows it as it moves, rotates and scales, including an object that is grabbed or moving on a MoveTo path. Sphere does the same with a sphere around the object. Distance means "within this many metres of the object on the floor", ignoring height, which suits avatars. |
| Padding / Distance | Padding enlarges a Box or Sphere (1.0 = the object's exact size). Distance is the radius in metres for the Distance shape. |
| Triggered by | Head (the learner's viewpoint), Left hand or Right hand. |
| Or objects | Any other object on the slide, such as a grabbable ball. The sensor triggers when the object's center point is inside it, so you can build "put this in the zone" tasks. |
| Fire once per slide visit | On by default. The enter actions and the exit actions each run at most once until the slide is shown again. |
| Actions | What happens. Each action runs on Enter or Exit. |
Click Add Action to add a row, and Remove to delete the selected row. The available actions are:
- Advance slide — moves to the Next slide, or jumps to a slide you choose, such as Slide 3: 03_Lab. The choice is remembered by slide, not by number, so it still points at the same slide after you reorder or rename slides.
- Play sound — choose Beep (built-in), or Browse... for your own
.wav,.mp3or.oggfile. The file is copied into the project'sSoundsfolder so it travels with the project. - Show object / Hide object — shows or hides an object on the slide.
- Animate object — plays an animation, using the State number (for avatars, their animation state).
While the dialog is open, the sensor's shape is drawn in the Preview window. It turns green while the preview camera is inside it. Click OK to save.
Note
On the hand targets: on Desktop, the right hand follows the view and the left hand isn't used. Use Head for sensors that should work on both Desktop and VR.
How Sensors Behave in a Session
- Several targets count as one. If the head and a hand reach a zone at the same moment, the enter actions run once. The exit actions run when the last target leaves.
- A short settle time. Sensors ignore the first half second of each slide, so the learner has time to land on the start point. If the start point is inside a zone, the learner has to step out and back in before it fires.
- Each visit starts fresh. Objects shown or hidden by a sensor return to how you set them up the next time the slide is shown.
- Advance slide never fires on a quiz slide, and advances at most once per slide visit. With Loop Prompt on, going to the Next slide from the last slide shows the Repeat prompt as usual. Jumping to a chosen slide works from any slide and skips the prompt.
- Deleted target slide. If the slide an Advance action jumps to has been deleted, the dialog shows it as "(missing)" and the action does nothing.
- Deleted objects are skipped. If an object a sensor uses has been deleted or renamed, that part is skipped and the rest of the slide works normally.
Multi-User Sessions
Each participant has their own sensors. Sounds, and objects shown, hidden or animated, happen only for the participant who triggered them, on their own machine.
Advance slide only works in Single User sessions. In multi-user sessions the instructor stays in control of slide changes, so the action is ignored there.
Note
Proximity sensors run in Vizard sessions only. In Stand Alone Mode (WebXR), zones are left out and sensors don't run.
Checking Sensors in a Session
To see every sensor while a lesson runs, click Open globalConfig.py on the Advanced tab and set PROXIMITY_DEBUG = True. Each sensor is drawn as a magenta wireframe that turns green while a target is inside. Set it back to False before running real sessions.
Using Proximity Sensors in Your Own Scripts
To build proximity sensors in code with SightLab and Vizard's vizproximity library, see Proximity Sensors in the SightLab documentation.