External Data Recorder - Postprocessing Guide
This guide details postprocessing and its configurations. Postprocessing settings are in Postprocess_Config.py in the External Data Recorder folder. For an overview of the detection models, see AI Object Detection.
The Postprocessor.py can be run standalone (i.e. not automatically triggered by the External Data Recorder) to enable post processing of old experiments, experimenting with different thresholds of object detection confidence and dwell time, and visual features.
To run standalone, first set the EXPERIMENT_ID and CALIBRATION_ID config variables to a valid Sightlab experiment ID (see Config Variable Table below for more information). After setting these, run Sightlab2/ExampleScripts/External_Data_Recorder/Postprocessor.py.
You can copy the EXPERIMENT_ID from your session in the data folder and calibration from the calibration_data folder (copy the ID up to the word experiment_data)
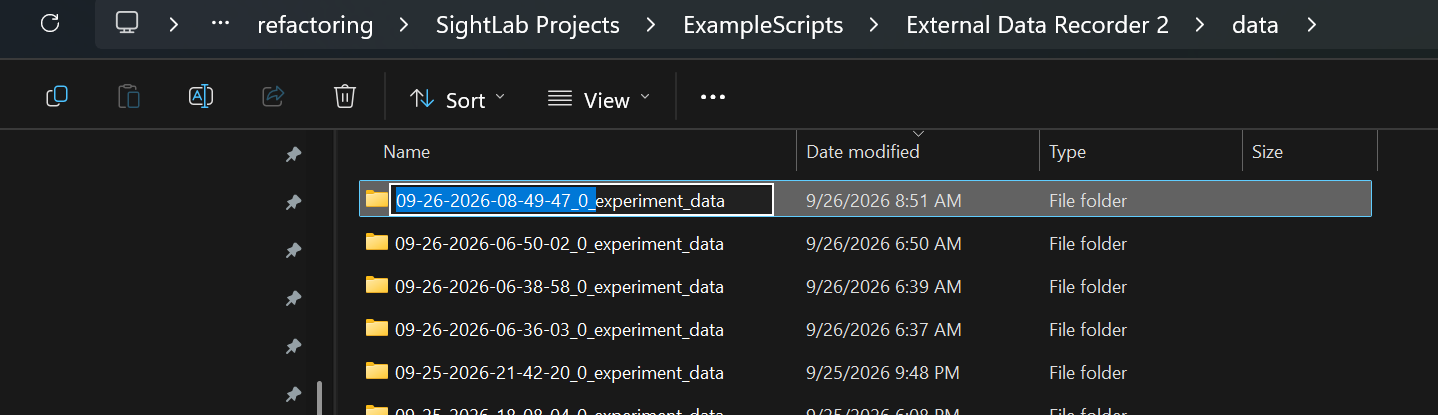
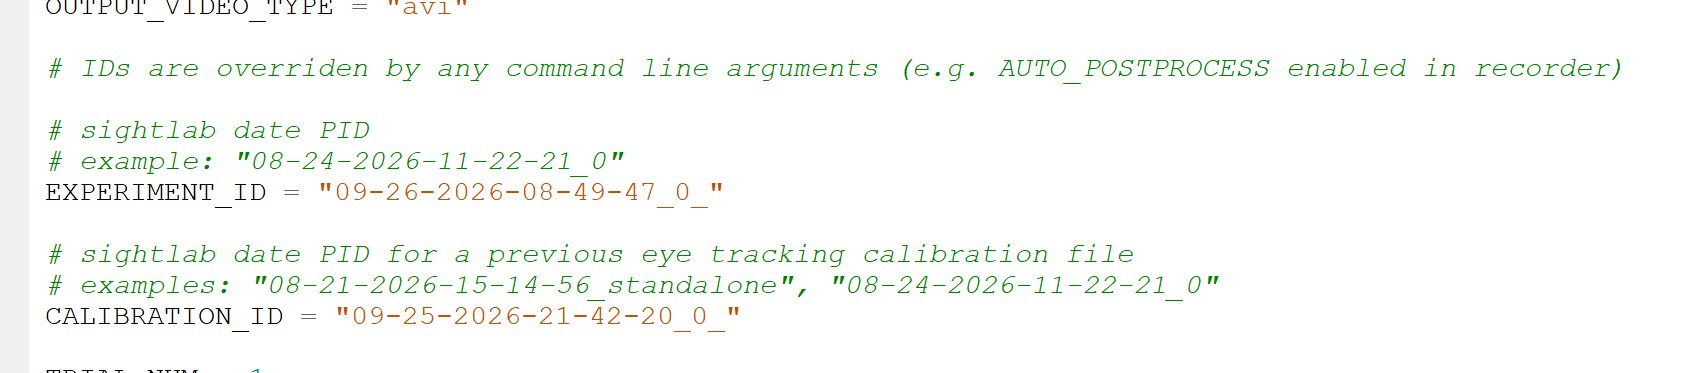
Output files will overwrite existing old files from the same EXPERIMENT_ID in the External Data Recorder output folders (data/, recordings/) unless you rename the old ones first.
To speed up postprocessing speed, close RAM/VRAM heavy processes, or enable USE_FP16 (Note: setting USE_FP16 = True may degrade the quality of inference by nature of less precision, but in our testing it was not noticeable.).
There are two AI-object detection models that are available:
-
RT-DETR V2, which only detects COCO classes
-
OmDet-Turbo, an open-vocab detection model that can be prompted
In order to use either, USE_OBJECT_DETECTION must be on. Ensure that Vizard's Python environment has torch and torchvision packages enabled with cuda and compatible with your system.
Being a smaller Our tests have shown RT-DETR V2 to run 2-3x faster than OmDet-Turbo. This is due to architectural differences between the two models, in addition to model size. If you need greater speed and you want to label COCO class objects in your scene, use RT-DETR V2. If your scene contains objects that aren't in the COCO classes, use OmDet-Turbo.
To use RT-DETR V2, enable USE_OBJECT_DETECTION but leave USE_OVD as False.
To use OmDet-Turbo, enable USE_OBJECT_DETECTION and enable USE_OVD.
Interactive Mode
Currently, only hardware that has centerpoint gaze support Interactive Mode (Desktop First Person Game, Meta Quest 3). Interactive mode allows you to translate the centerpoint gaze manually in case the center isn't where the gaze should be, and crop regions of the recording to cut out unneeded regions like browser tabs.
This is useful when the area you care about in the recording doesn't take up the entire window. For example, a browser based game has the top browser bar that doesn't have any important content:
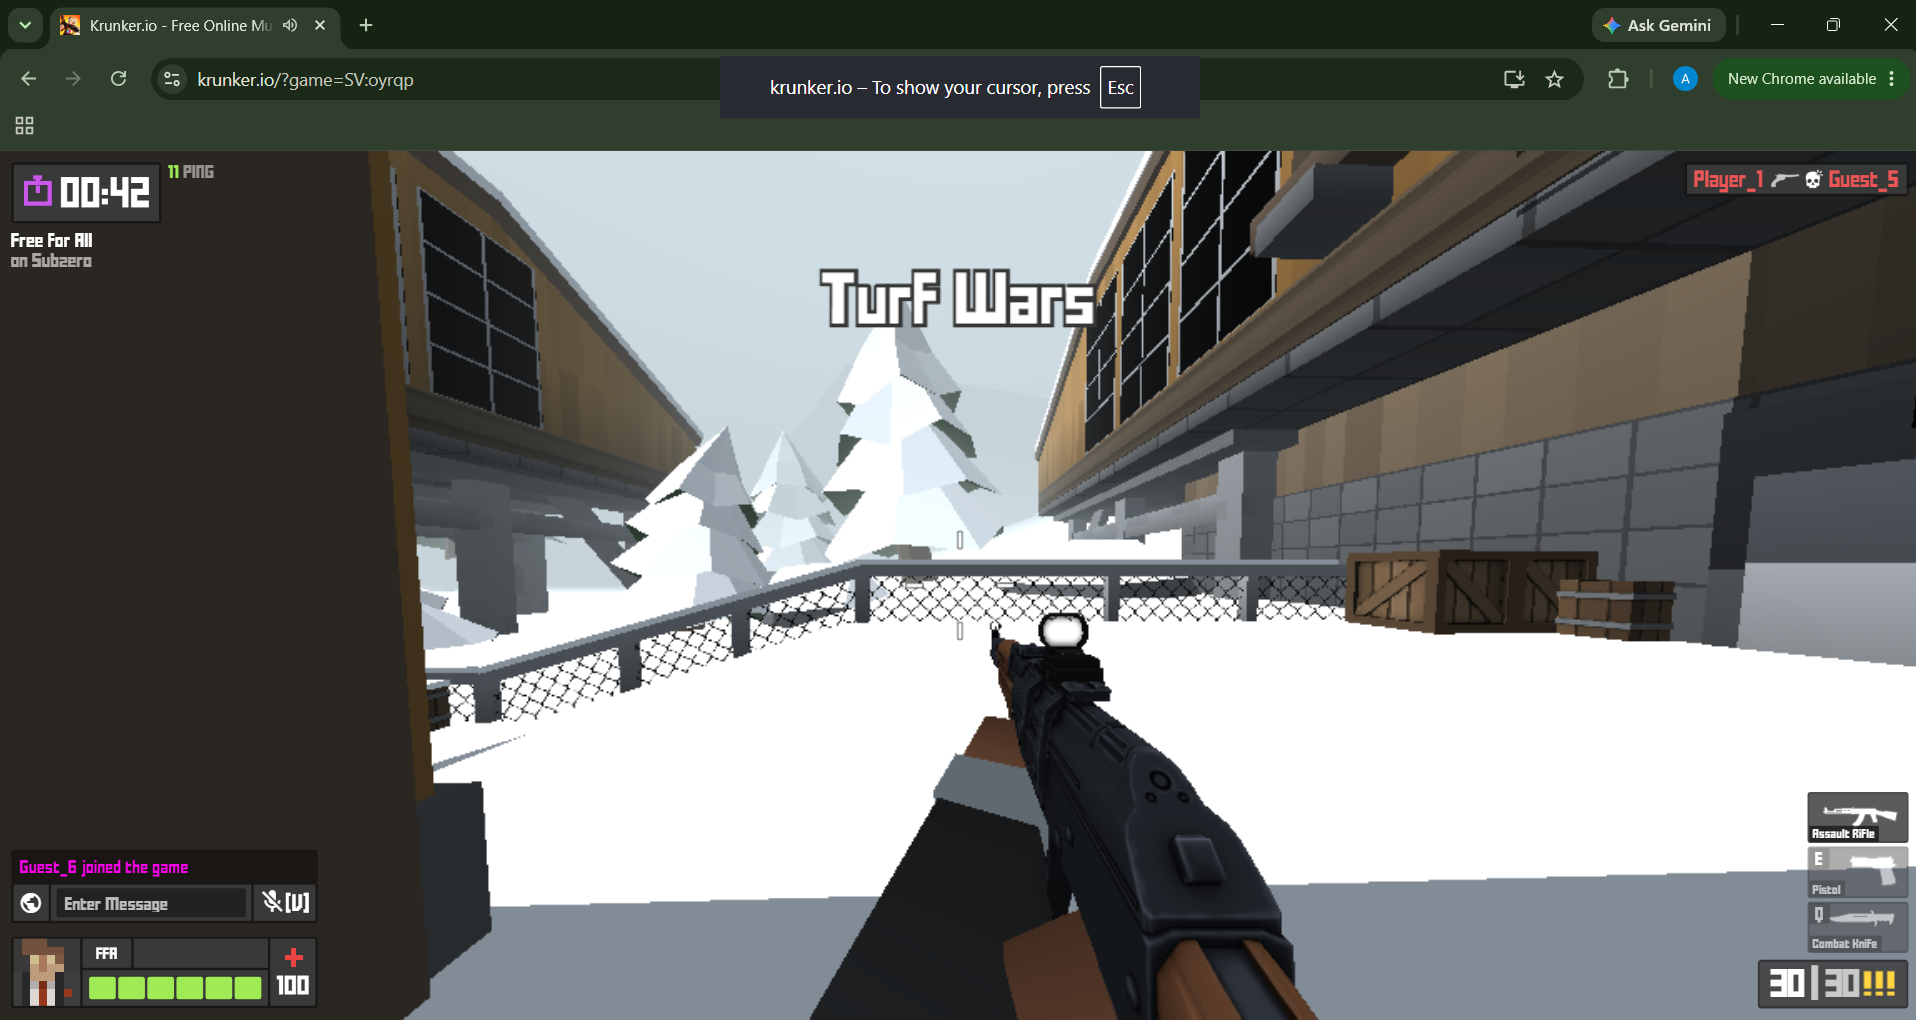
When Interactive windows appear, the console window will print instructions on how to translate the centerpoint and crop the recording.
It will first ask you to crop the window recording:
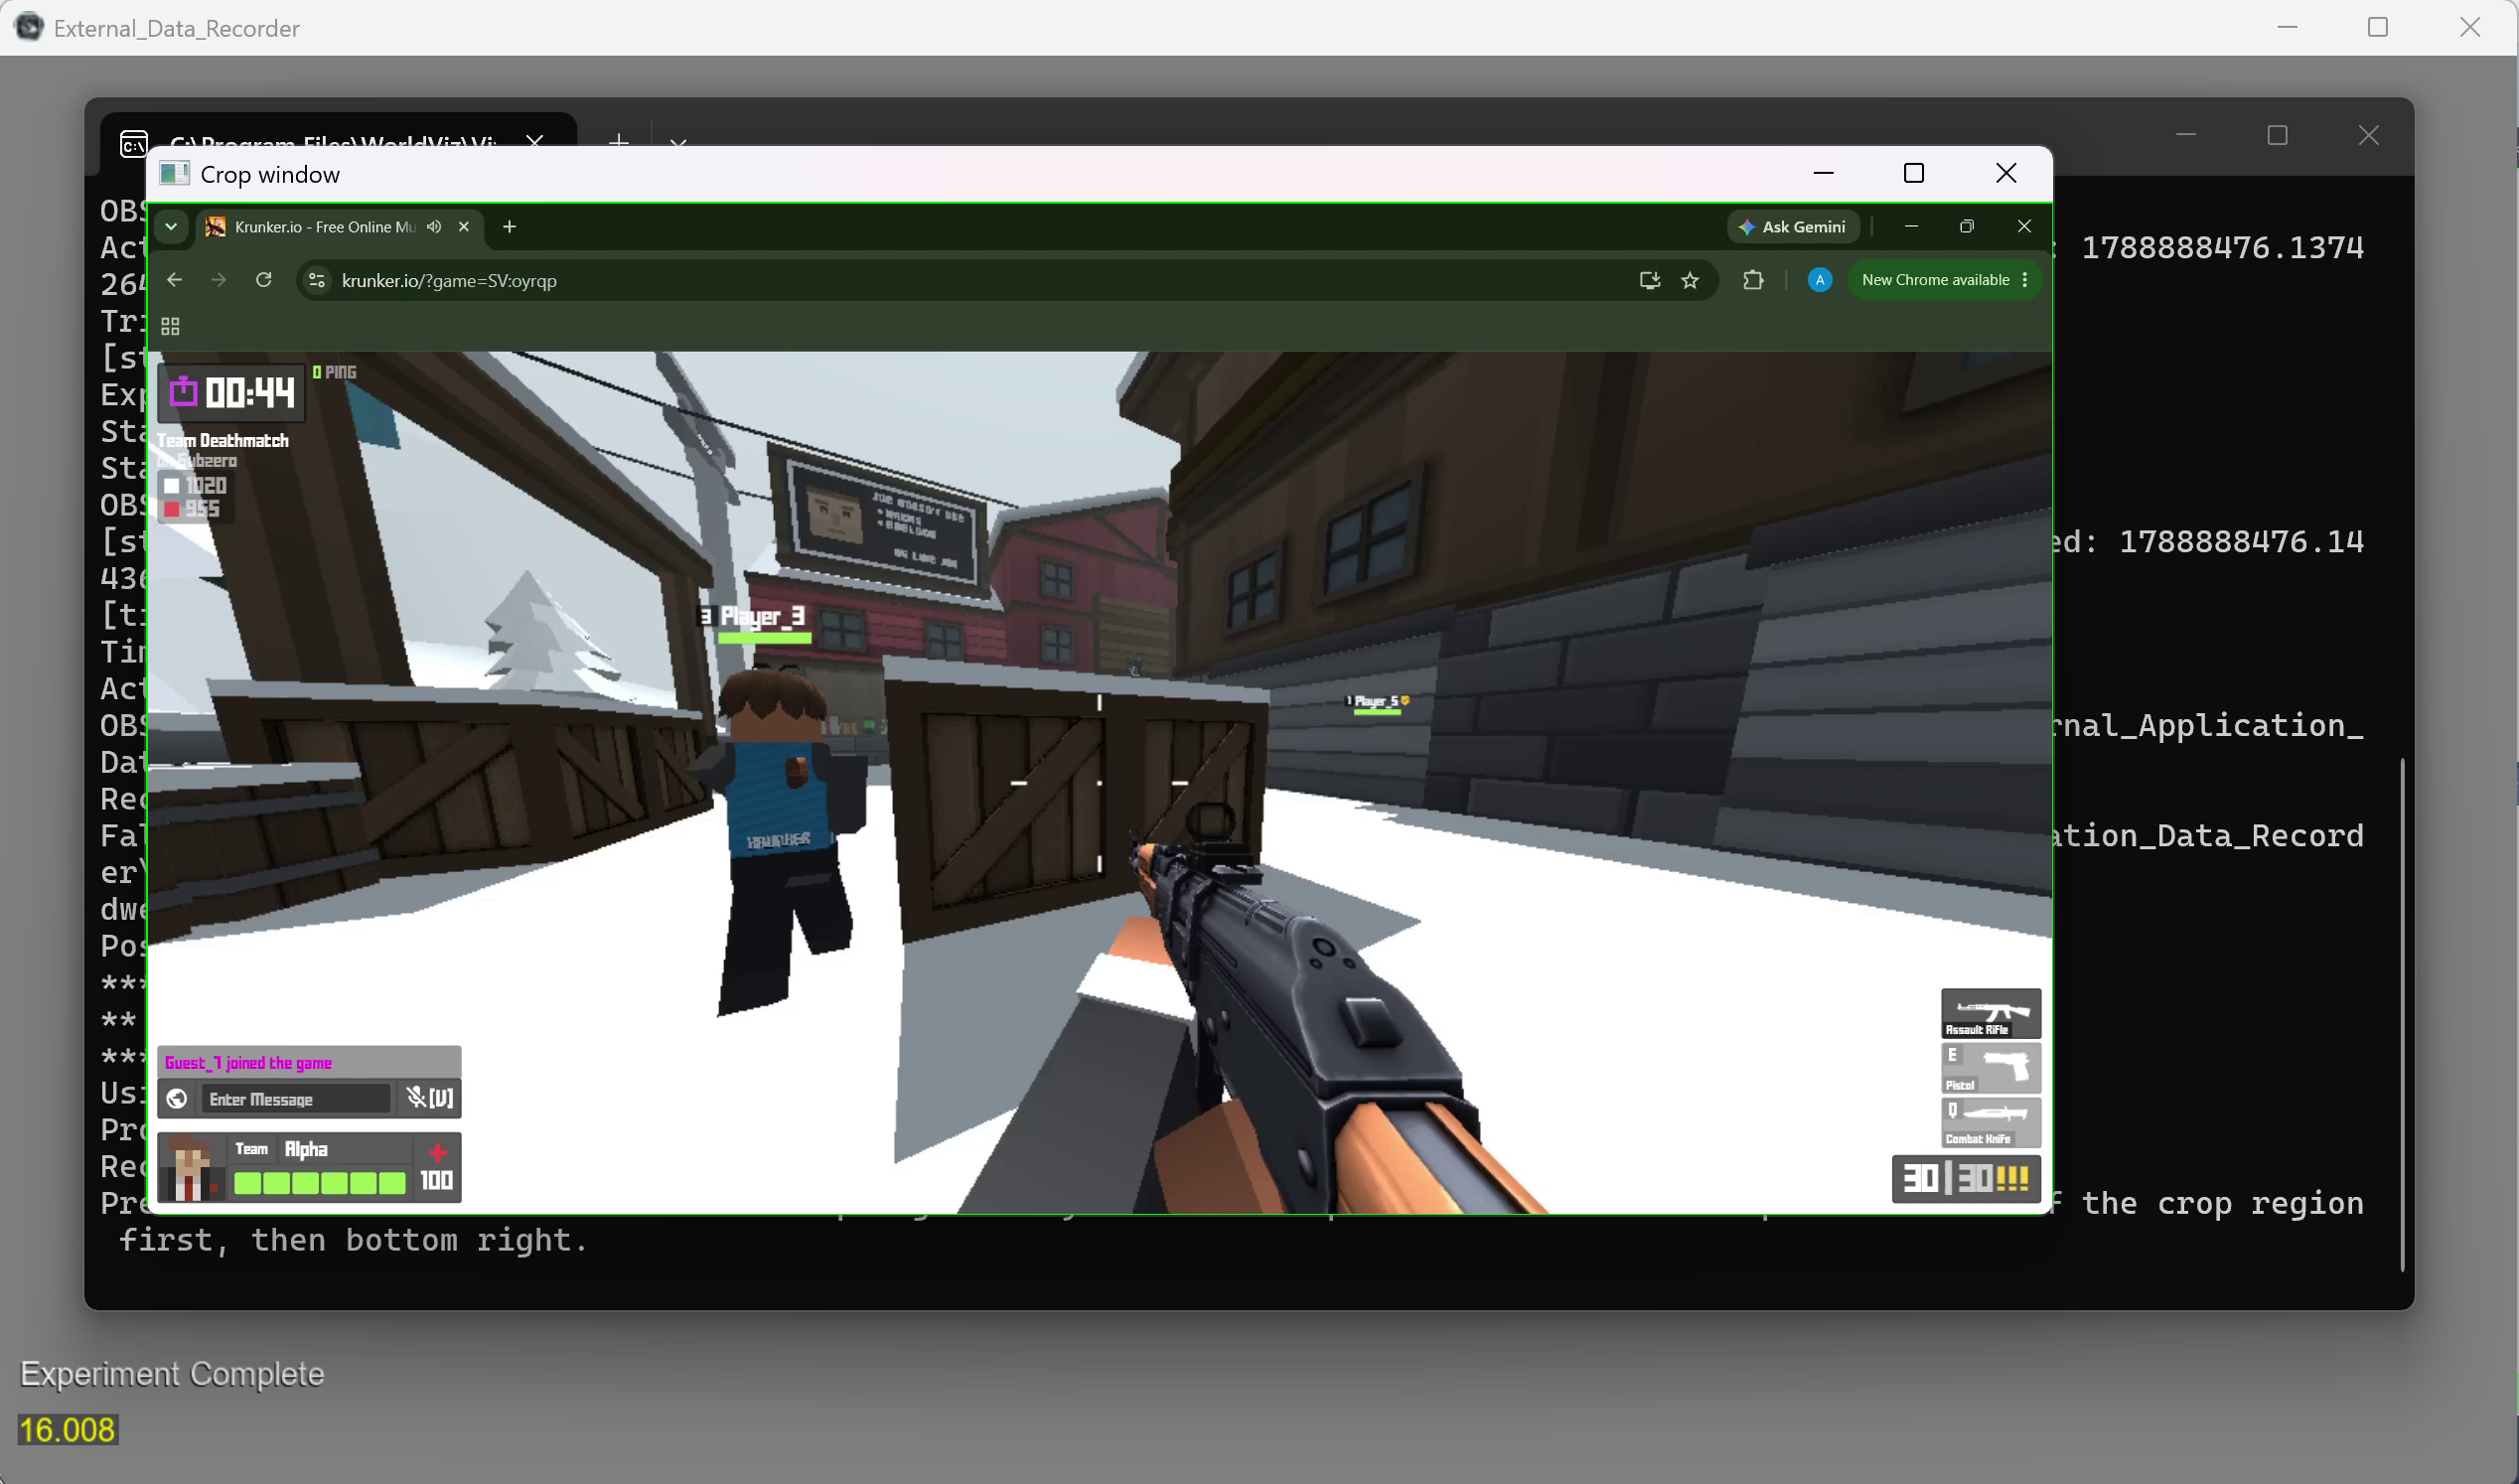
The console window will print instructions:

Per the instructions, move your cursor to the desired top left corner of the crop region, press 'c', then do the same for the bottom right. If you're okay with the current region shown, then you can accept by pressing 'a' without marking any corners.
If you're postprocessing an older session that you cropped and you want to reset the crop region to the full window, press 't'. This also resets the centerpoint to the center of the original window dimensions.
As you select corners, the console window will confirm your selections:

Once you determine your crop region, a confirmation window will appear showing your desired crop:
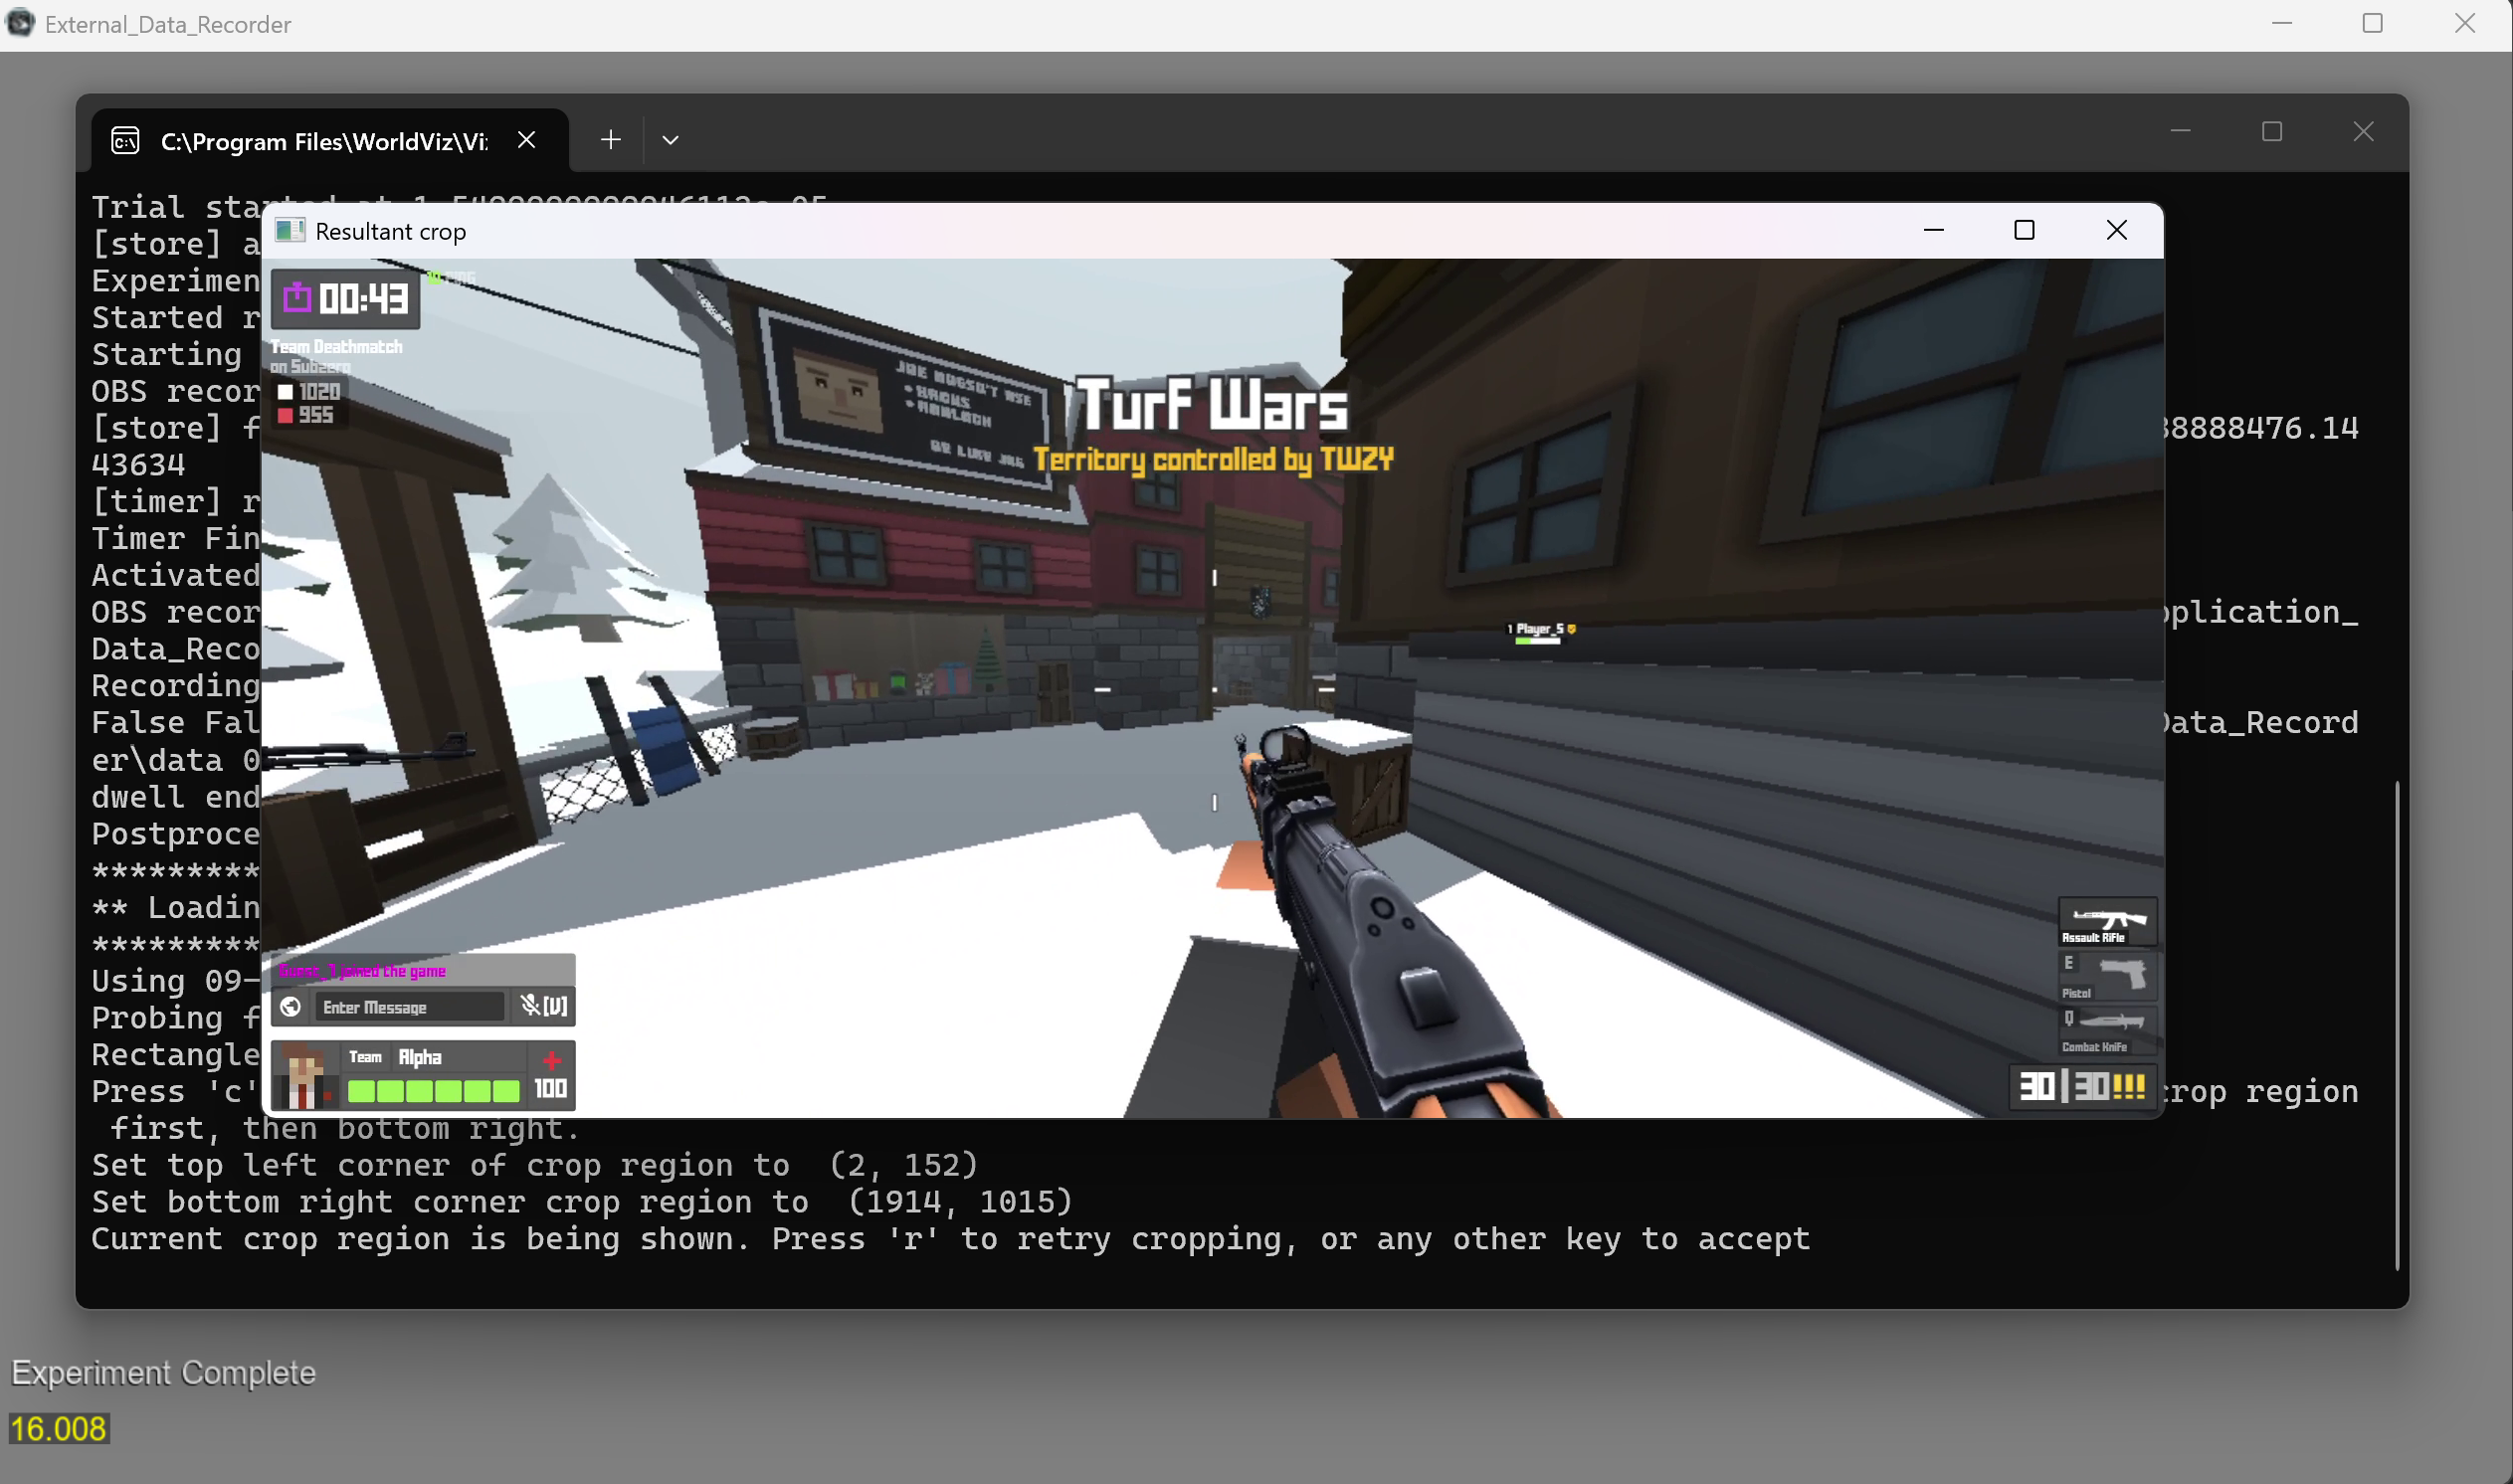
If you want to redo the crop region, press 'r' to go back to the crop region selection. Otherwise, any other key will accept the crop shown in the Resultant crop window. This crop will be used to produce the overlay and transcoded videos.
After accepting, you will be asked to adjust the centerpoint:
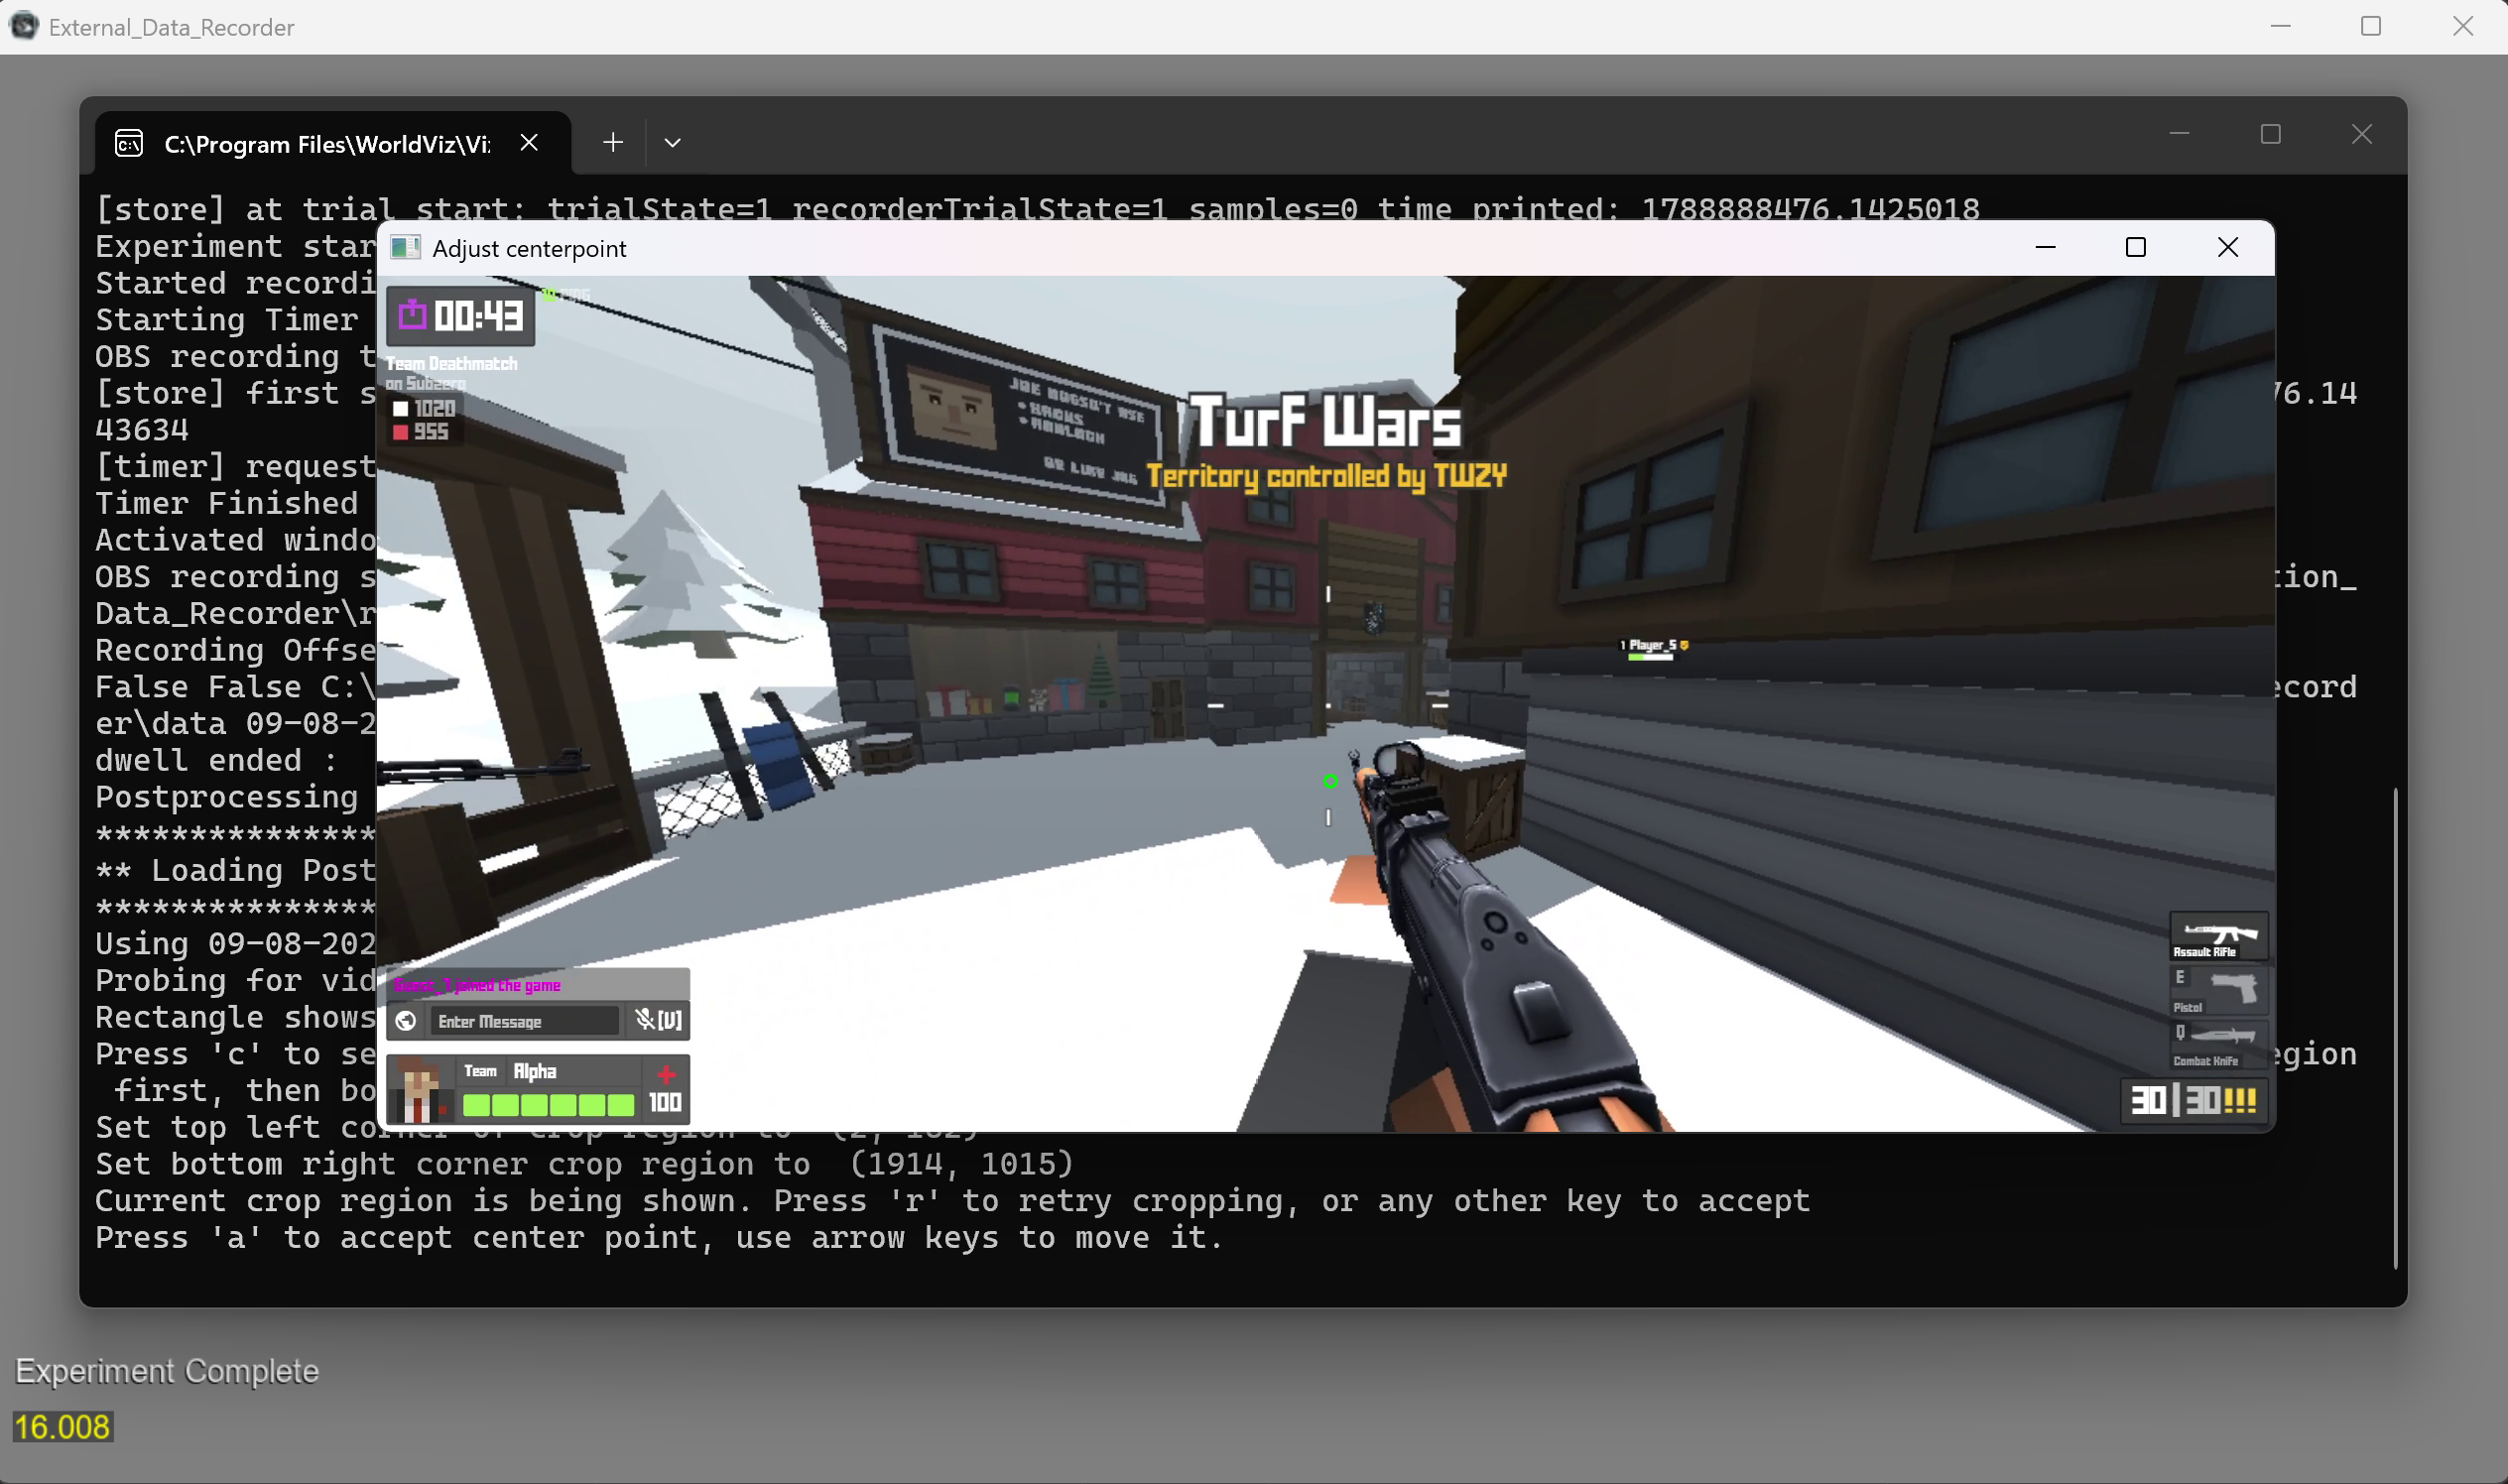
The centerpoint appears as a circle following the GAZE_COLOR, GAZE_RADIUS, AND GAZE_THICKNESS config variables. The console window prints instructions on how to move the center point:

Move the centerpoint using the arrow keys or by moving your mouse to the desired position and pressing 'c' in the same way you selected the crop region corners.
Once you adjust the centerpoint, press 'a' to accept its placement.
Values for centerpoint gaze and crop regions are saved and automatically applied if you postprocess the same video again.
Config Variable Table
| Config Variable | Default Value | Description |
|---|---|---|
| INTERACTIVE | True | If True, enables interactive use (e.g. asking the user to adjust a center point for non-calibrated hardware configs) |
| CENTERPOINT_POSITION | [0,0] |
[tx, ty], auto applies this translation to hardware configs with centerpoint gaze if INTERACTIVE = False |
| CROP_REGION | None | ([x,y], [x,y]) in pixels, auto applies this to centerpoint hardwares when INTERACTIVE = False as the capture region, cropping everything outside it |
| STEP | 1 | Pixels to translate per arrow press in manual centerpoint adjustment |
| USE_OBJECT_DETECTION | True | If True, generates object detection overlays in the output overlay video and .csv files with gazed object data, with either RT-DETRV2 or OmDet-Turbo |
| USE_OVD | False | Only applies if USE_OBJECT_DETECTION is True. If USE_OVD is True, uses an open-vocab detection model (OmDet-Turbo) to detect only classes listed in OVD_CLASSES according to the OVD_TASK prompt |
| USE_FP16 | False | Use floating-point 16 precision, which speeds up inference at the cost of slightly less accurate regressed outputs (e.g. bounding box locations) |
| OVD_CLASSES | [] |
Only applies when USE_OVD is True. List of classes to detect, in order. These become the label set, and anything not listed will not be detected |
| OVD_TASK | None |
Only applies when USE_OVD is True. Natural-language prompt giving OmDet-Turbo detection instructions (e.g. "Detect anything that looks like a boat.", OVD_CLASSES = ["boat"]) |
| NMS_THRESHOLD | 0.3 | Only applies when USE_OVD is True. IoU threshold for OmDet-Turbo's non-maximum suppression. |
| CONFIDENCE_THRESHOLD | 0.5 | Confidence threshold that a detected object must clear to be accepted. Increase if OVD is overlapping multiple classes on a single object |
| BATCH_SIZE | 16 | Model and frame preprocessing batch processing size |
| FRAME_QUEUE_SIZE | 32 | Max full-res frames buffered for the gaze worker thread. Decrease if system RAM is tight |
| MIN_TQDM_INTERVAL | 0.5 | Minimum progress bar update interval in seconds, in case the output console doesn't support in-place line changes. |
| MAX_TQDM_INTERVAL | 10 | Maximum progress bar update interval in seconds, in case the output console doesn't support in-place line changes. |
| USE_ANGULAR_THRESHOLD | True | If True, Gaze-bbox intersection area is slightly padded proportionate to the eye tracker validation rms_deg error calculated during calibration. If False, 0 padding (gaze must interesect bounding box limits) |
| CLOSEST_EDGE | True | If gaze interesects no bounding boxes, the near misses (bounding boxes where the gaze fell within validation rms_deg error angular threshold) are searched to find the best match. If True, choose the near miss that was closest to the gaze point in angular distance, if False then use the smallest area bbox that is a near miss |
| BANNED_CLASSES | {} | A set of COCO class names known not to exist in the scene (e.g. {"train", "boat", "cow"}). The object detection will ignore these classes |
| DWELL_THRESHOLD | 0.5 | How long gaze must stay on an object to be considered dwell, in seconds |
| DWELL_GRACE_S | 0.1 | Seconds the gaze can miss any detected object and still hold dwell. Accounts for detection flickers and gaze flickers from a detection to no detection |
| MAX_GAP_S | 0.1 | Max gap in seconds between frame timestamp and replay offset before considering old data stale and drawing no gaze overlay |
| RECORDING_TYPE | "avi" | Input video type from the External Data Recorder |
| OUTPUT_VIDEO_TYPE | "avi" | Output video type from postprocessing |
| EXPERIMENT_ID | "" | Sightlab date and participant ID used to identify experiment data (e.g. "08-24-2026-11-22-21_0") |
| CALIBRATION_ID | "" | Sightlab date and participant ID used to identify calibration data (e.g. "08-21-2026-15-14-56_standalone", "08-24-2026-11-22-21_0") |
| HOMOGRAPHY_FIT_TEST | False | Whether or not to run and display a test evaluating the fit of the calibrated homography on its calibration points. Does not test validation points |
| GAZE_RADIUS | 6 | Radius of the cv2-drawn gaze circle in pixels |
| GAZE_COLOR | (0,255,0) | Color of the cv2-drawn gaze circle in BGR |
| GAZE_THICKNESS | 2 | Thickness of the cv2-drawn gaze circle in pixels |